
DSPORT Issue #199
Text by Michael Ferrara // Photos by Joe Singleton and Michael Ferrara
Product provided by Eastwood
DIY (do it yourself) or PSE (pay someone else) is a decision that everyone has to make with regard to vehicle repairs and upgrades. Taking the DIY path is nearly always a money saving and more rewarding path. While it takes more skill, time and planning, a properly-completed DIY project delivers a great sense of pride and accomplishment. However, all DIY projects pose an element of risk. If the skill required is beyond the level of the DIYer or the planning for the DIY project wasn’t done properly, that fun, money-saving experience can turn into a nightmare. The improperly executed timing belt replacement that ends up bending all the engine’s valves, the polish and wax job that leaves swirls in the paint, or the electronics install that now has your car regularly popping fuses are just a few of the possibilities when DIY goes bad. In those cases, you will probably wish you didn’t even try and simply paid someone else. While we can do 95-percent of the types of work required for the maintenance and build of a project vehicle at our facility, there are still many items that we send out and pay someone else. To expand our skill set and give us a better understanding of the process involved, we’ve decided to explore some DIY projects that we never tried before. By sharing our first-hand experience, we hope to let you know if you should go DIY or don’t even try.
Powder, Powder Everywhere
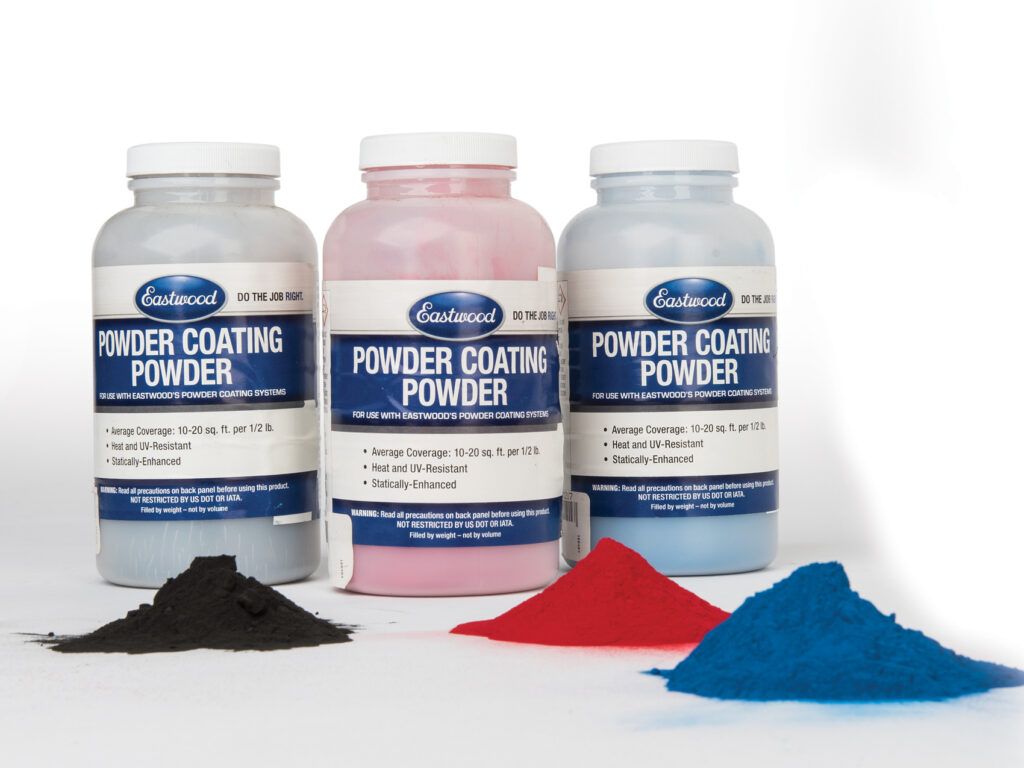
Whether it is a bracket, intercooler piping, a valve cover or even a set of wheels, chances are that you have components that are powder coated on your vehicle. If you are in the process of restoring, upgrading or modifying your vehicle, there are probably many items that could look better and hold-up better with a properly-applied powder coat. Anything that can conduct electricity and survive 30-minutes at 400 degrees in an oven can be powder-coated. Even if it doesn’t conduct electricity, there are methods to apply the coating that can sometimes allow powder coating. However, if being in an oven for 30 minutes at 400 degrees changes the physical properties or dimensions of an object, do not try to powder coat it. Instead, paint it.
WHAT IS THE POWDER?
The powder itself is usually an epoxy, polyester or urethane material that will form a “plastic” coating a er being baked onto the part. Normally this powder wouldn’t want to stick to most surfaces but by using a low-current, high-voltage charge to the part, the powder forms a static cling to the part. The powder then melts out around 350-400 degrees to bond to itself and the prepped surface of the part.
Paint vs. Powder Coat
Both powder coating and painting apply a layer of coating to an object. Paint is applied as a liquid. All paints use some type of solvent (even water in some cases) that will evaporate as the paint dries. When done properly, the cured paint should adhere to the part and to itself (cross-linking) so that no flaking, cracking or li ing occurs. The objective of a powder coating is the same, but how powder coatings are applied is much different. Instead of being applied in a liquid form, powder coatings are applied in a solid, powdered form. To get this powder to adhere to the part, metallic parts are electrostatically charged. This causes the powder to cling to the part before its put into the oven for curing. In some applications, the composition of the part (or multiple layers of coating) may mean that an electrical current cannot be used. In these applications, the part may also be heated near the curing temperature and then the powder is applied and melts to the object. Once an object is coated with powder, it is then placed into the oven to allow the powder to flow out, melt and cure.
Every DIYer is familiar with the pros and cons of a rattle-can spray paint. The process is simple: prep the part’s surface, spray the part, let the paint dry on the part. Depending on the quality of the surface preparation, the compatibility and quality of the paint, the weather conditions and the capabilities of the person that sprayed the paint, you either get a desirable result or, more o en than not, a result that is plagued with dry spots, paint drips, sags, fish eyes or worse. One reason that poor results o en occur is that the conditions are not optimal. If it’s too hot out, too humid or too cold, the solvent does not evaporate at the optimal rate so the solids in the paint don’t properly flow out. The outside temperature, humidity as well as the temperature and shape of the part all affect the end result. With spray paint, it’s always a hit or miss experience.
With powder coating, you gain some big advantages over the rattle can. One big advantage of powder coating is that you control the environment during the curing process. It doesn’t matter if it’s 20 or 120 degrees outside, the oven can be at the temperature that you set. Another advantage is that since the powder is applied in a dry state, it’s much harder to have a drip or sag in the coating.

The Chemistry of Powder
While all of the powders used in powder coating are applied in the same basic way, there are a number of different chemistries used in the formulation to achieve the desired results. Powders may incorporate epoxy, polyester and/or polyurethane formulations. Epoxies have the advantage of excellent corrosion protection and exceptional adhesion. However, they are susceptible to overbaking and they do not have good UV protection (will weather quickly). As a result, powders that are primarily epoxy based are usually just primers that will be top coated. The majority of powders are polyester or polyester-blends. These are less susceptible to overbaking while providing superior UV protection compared to epoxies. Polyurethane and polyurethane blends are o en used for translucent colors. Polyurethanes are generally higher priced than polyesters but o er some advantages in chemical resistance and quality of finish. However, they are a bit more susceptible to cracking. While the off-the-shelf formulations that are available from a company like Eastwood are going to deliver excellent results in over 95-percent of applications, there may be an application that requires a different formulation to achieve the desired results. Just remember that the product is just one part of the equation. Using a different undercoat, clear coat or curing process can also effect the end results.
ADVANTAGES OF POWDER OVER PAINT
• Outside Temp Not a Factor
• Less Likely to Get Runs or Sags in Finish
• Coating Can be Much Thicker
• Higher Chemical Resistance in Many Cases
• Improved Durability and Scratch Resistance
• Easier for 2-, 3- or 4-stage Finish Effects
The Costs
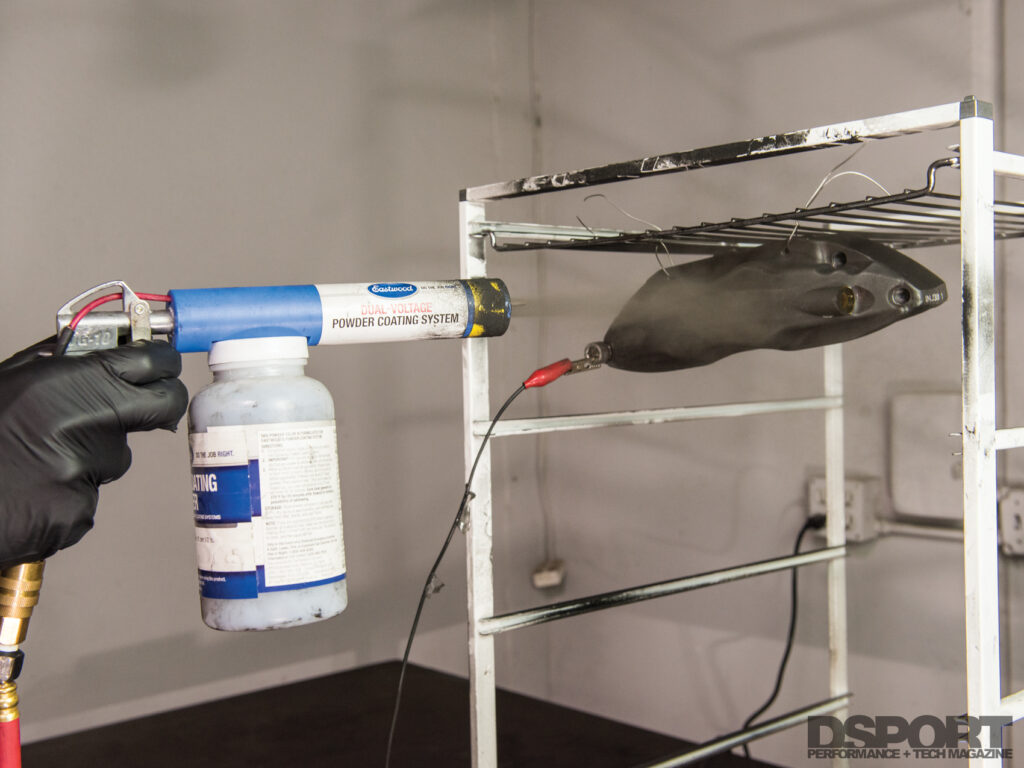
You can get a no-frill powder coating gun from Harbor Freight for about $75. If you plan to use it more than once or you are going to be doing multiple stage coating, save up another $55 and get the Eastwood dual-voltage gun like the one we used. For the enthusiast, it’s built well enough for occasional use and its dual-voltage design is helpful for getting the powder to coat the part, especially on multi-stage coating projects. A pound of solid color powder is about $10 and it will give you the same coverage as four to six cans of spray paint. Metallic and specialty clear colors can go over $30 per pound. Unlike rattle-can spray paint, unused powder keeps extremely well and can be stored on the shelf until the next project. The bottom line is that there will be more upfront investment, but over time, you can actually save a few bucks using powder coating over quality rattle can paint.
Prepare to Mess Up and Learn
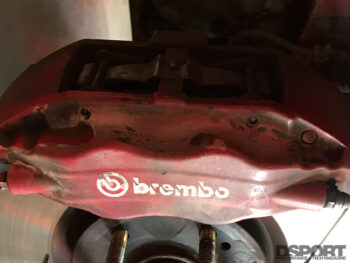
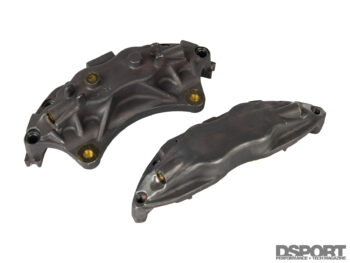
We researched just about everything we could about powder coating before we pulled the trigger. Unfortunately, a good deal of the information was contradictory or simply wrong. We picked one of the more difficult items to powder coat: brake calipers. On paper, the process seems simple. Prep-it, apply-it and cure-it. For the prepping part, we started with some pretty rough-looking calipers that had been painted over at one time. They were a mess. To prep them, we used aircraft paint stripper to remove the paint. This took forever! We probably applied it over a half dozen times and made a slight amount of progress each time. While this process is usually a great non-abrasive way to remove original coatings, it simply had a hard time with the coatings that were embedded into this caliper. In retrospect, glass beading the surface of the calipers (which we later ended up doing when we weren’t happy with the finish from our firstattempt) would be our recommendation. Of course, the piston bores must be masked off before this process can be executed.
TOOL LIST FOR POWDER COATING
• Metal Prep Tools & Materials
• Electric Oven Large Enough for the Parts
• Timer
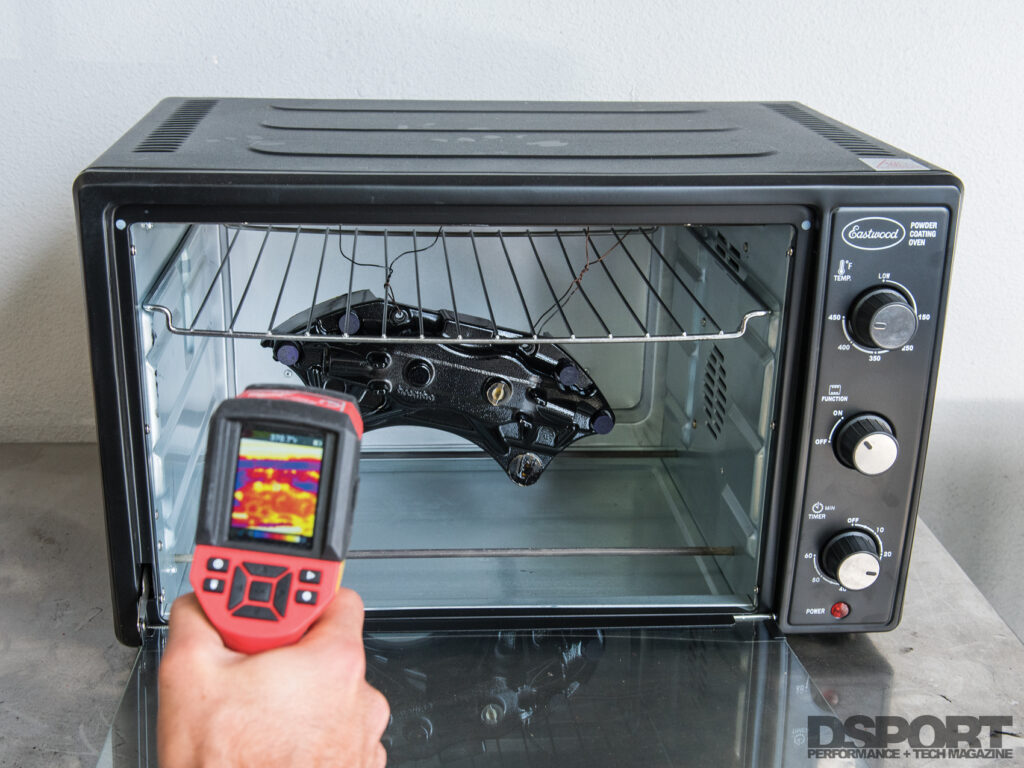
• Infrared Temperature Gun
• Material: Powder that will be Applied
• Powder-Coating Gun
• Moisture Filter and Pressure Regulator
• Air Compressor
• Bare Uncoated Solid Wire to Hang Parts
• Gloves and Mask
• High-Temp Silicone Plugs (Optional)
• High-Temp Masking Tape (Optional)
Get it Hot, Cool it Down, Ready for Powder
After a chemical or mechanical means is used to strip the surface of the part to be powder coated, we used acetone to remove any chemicals that might be present on the caliper. From there, it was into the oven for a 400-degree pre-bake. The substances that are trapped in the pores of the material would vaporize during the curing process, causing surface defects. By getting the part up to the temperatures it’s going to see during the curing process, we pre-vaporize to eliminate that before the coating is applied. Once the parts are baked for about 30 minutes after they reach the 400-degree temp, we allowed them to cool and again wiped them down with acetone. Be sure to handle the parts with powder-free nitrile gloves as to not leave any oils or finger prints on the part. Those oils may prevent the powder from being attracted to the part during the application process. As for the prep process, there really isn’t much to it. Get the part stripped and clean and heat cycle it once to allow the surface to outgas. After that, simply let the part cool down and get it ready for the application stage.
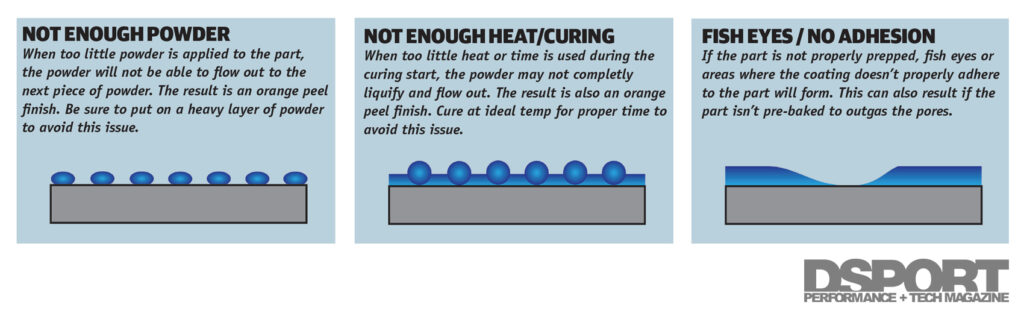
The Trick: Go Thick!
We’ve rattle-canned thousands of parts over the past 40 years. With spray painting, a thick coat of paint leads to sags and runs. Wanting to avoid runs and sags (which are much harder to produce with powder coating), we went with what we thought was a medium coat of powder on our first attempt. In reality, we went way too light on the amount of powder that needed to be on the part. Failure to put enough powder on the part can result in two issues. First, you may see dry spots on the part where the powder never really glossed up. Second, you end up with a high amount of “orange peel” in the finish. As there isn’t enough powder present, the powder that does melt and bond to the part doesn’t have enough powder around it to flow out and cross link properly. If there isn’t enough material applied to the part, no amount of curing time or temperature can fix the issue. You end up back at square one. In most cases, the quickest fix is to strip off the new coating and try again. Bottom line, go thick here. With the Eastwood powder coating gun, it has two voltage settings. Start with the lower voltage setting first and if there isn’t enough build, try the highest voltage setting and see if the powder build thickness can be increased.
Primer Coat
Improves the corrosion resistance of the part and improves the bonding of the base coat to the part. Primer coats are most often epoxy based which provides superior adhesion of the powder to the part while providing an excellent surface for top coats.
Single-st age
Simplest of all finish types. Good corrosion resistance, good adhesion, good UV resistance. Overall performance of this finish highly dependent on the quality of the powder.
Two-st age: Base Coat-plus-Clear
After applying the base coat layer, a clear coat is added on top. The additional clear coat layer adds additional gloss and UV protection to the part. Performance of this finish varies dependent upon the quality of the clear coat that is exposed to the elements. There are also some clears that contain a metal flake for effect.
Three-Stage: Base Coat, Translucent Effect Coat, Clear Coat
Creates “candy,” metallic or other specialty effects. Since the effect can be affected by the thickness of the translucent coat, it’s always best to coat all of the parts that need the same finish at the same time. Performance of this finish varies dependent upon the quality of the clear coat that is exposed to the elements. Always test this process on a similar part to ensure that the system will coat three or four layers (if primer used) to the part.
Some Like it Hot, But Let’s be Clear…
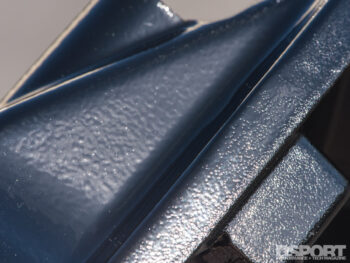
Once a proper prep is done to the part and the proper amount of powder has been built up on the part, it’s time to cure the powder in the oven. Each and every powder should have a temperature specified for the curing process. This is where an infrared temperature gun comes into play. Use the gun to keep checking the part to see its surface temperature after it’s placed into the oven. The powder will initially have a matte finish to it and then it will begin to sweat giving a hint of sheen as the temperatures rise. The powder will then begin to flow out and get glossy. The orange peel factor will start out high and start to reduce as the powder flows. The temperature window for some powders is very narrow for optimal results, so you have to be diligent with the temp gun checking the surface of the part. Once the part is up to temp, reduce the oven temp to keep the surface at the curing temperature for the required time. If you are under the proper temperature or you cut the time short, the surface finish will have a high-degree of orange peel. If you exceed the proper temperature or you bake for too long, the surface finish may bubble. If it is a clear powder, it will likely turn yellow when too much temp is used.
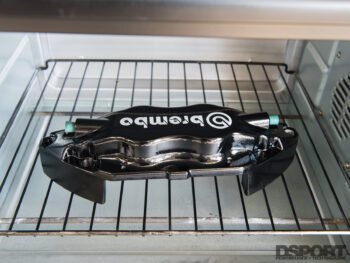
We were able to gain a lot of experience at the curing stage, too. In short, we messed up here, too. When we underbaked the part, there was a high degree of orange peel. We thought that maybe this was as good as it gets, but with a proper curing, the smoothness of finish achievable is pretty impressive. In fact, it was better than the OEM finish on the calipers as delivered by Brembo. We also got to see what happens when an item is overbaked. We needed to reach a surface temp of 400 degrees for the gloss black so we had our oven set to 450 degrees to get the part up to 400 degrees. The plan was to turn it down to 400 once the part reached temp. A distraction kept the part at 450 degrees for about 30 minutes and we returned to see a blistered gloss black coat. The lesson here, don’t get distracted. Having a timer on the oven that switches it off is a big convenience once you get the part to temperature and just need it to stay at 375 or 400 degrees for 20 minutes. We also ran into an overbaked issue at one point with the clear coat. We were trying to use more heat to improve the surface finish (thinking it needed it, when in fact we just didn’t apply enough clear powder). The end result was a yellowing of the clear coat.

Single, Two- or Threewith or without Primer
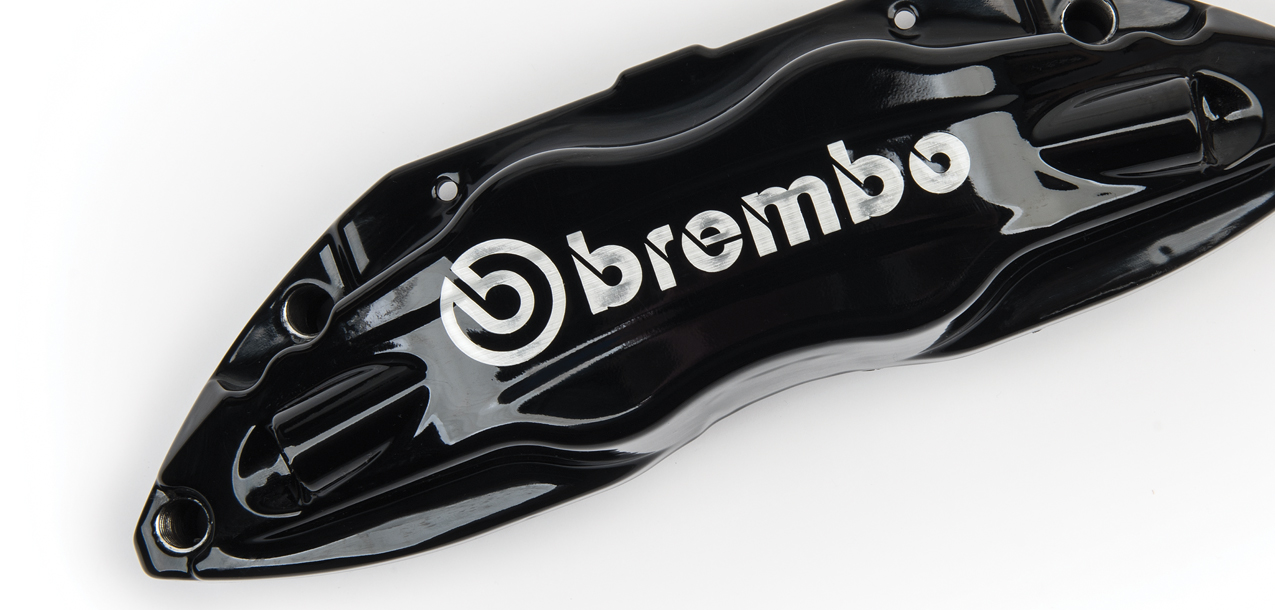
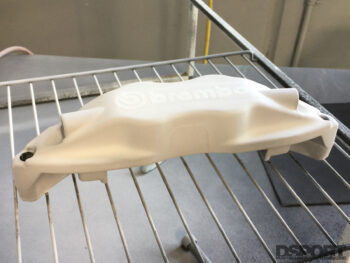
Just like a paint finish on a vehicle, powder coats can be applied in multiple stages. The first coat is going to be either no coat or a primer. Primer coats are recommended for parts subject to a corrosive environment. In many cases, the ability for a powder coat to form excellent adhesion to a part negates the need for a primer coat. Once the primer coat is in place, the base color coat is applied. These are your typical solid (opaque) colors. In many cases, you may simply decide that no primer and a single-stage color are all that is needed for your application. In other cases, you may want to put a clear coat over the base coat for increased gloss and durability. We powder coated our calipers gloss black and then applied a brushed-aluminum vinyl decal (Brembo logo) on the caliper before clear coating the caliper to protect the decal and base coat. Clear coats generally have a higher degree of UV protection than the base coats so it can keep the part looking glossy for longer. There are also specialty finishes that use a base metallic silver color and then a translucent color over it before a clear coat is applied. When used in an application where a primer is applied, you may have up to four layers of powder coating on a part. If there are difficulties in getting a new layer of powder to be applied over the previously cured layers, you may have to experiment with applying the powder to a hot part. While an electrostatic build of the powder to the part is optimal, sometimes your equipment or the part just won’t let it happen. We tried this method on occasion with the clear coats and it worked quite well.
DON’T BE STUPID
• Always wear a proper mask when you spray on the powder.
• Don’t use your kitchen oven, you’ll get sick from the food you cook in it later.
• Watch the oven! Don’t get distracted.
• Don’t Grab Hot Parts!
The Bottom Line
Nothing is idiot-proof. We started the powder coating process as idiots, but we graduated in the end as accomplished powder coaters. Should we have started with more forgiving parts? Maybe, but in the end you can learn to ride a bike with or without training wheels (and scars are cool). While it is a bit of an undertaking to get set up to do powder coating, getting everything from one source made it easy. All of the Eastwood product performed very well, but we will be trying to locate a FREE electric oven on LetGo or Craigslist so that we can cure larger parts. If you have about $200, get a starter kit and spend another $50 on the powders that you think you will use most o en. Just be warned, it’s really easy to get addicted to this and want to powder coat anything that isn’t nailed down and can fit in an over.
What can go wrong…
Prep issues: Improper prep doesn’t allow the powder coat to adhere to the part.
Application Issues: More often than not, not enough powder applied to the part. This may be localized or throughout the entire part. Localized will mean a small portion has too little coating where an inadequate amount of powder will result in poor surface finish (orange peel).
Curing Issues: Not curing the part enough leads to orange peel, over-curing the part can lead to blistering or yellowing of clear coats.
Post-Cured Issues: Be sure the part is fully cooled before handling. The coating may still be soft at higher temperatures and your fingerprints could become a permanent tattoo on the part. Use powder-coat safe cleaners on the surface.
