
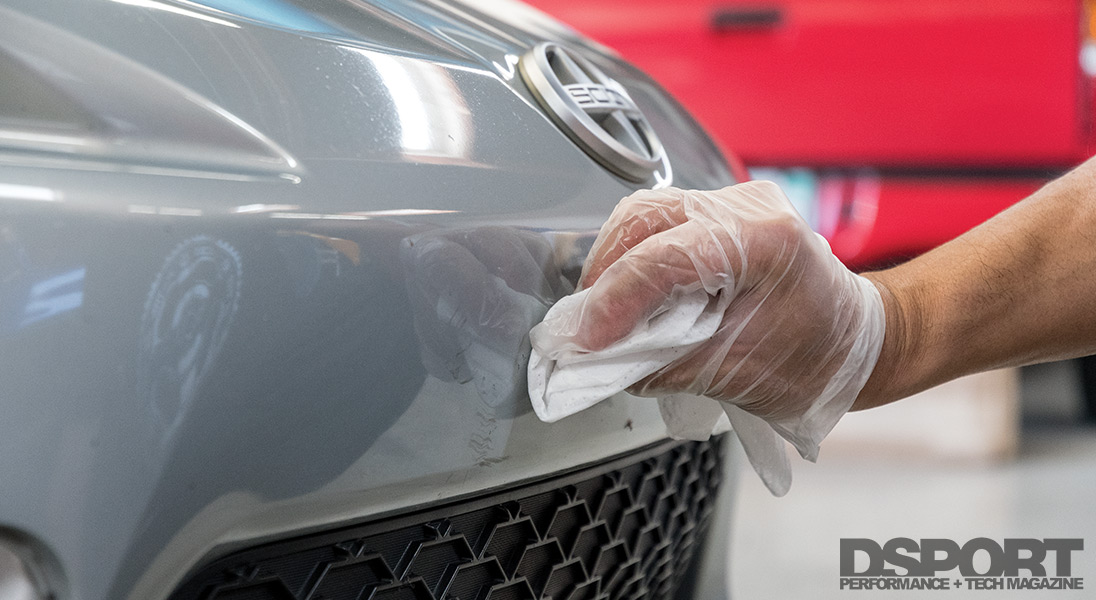
The cars in the D’Garage don’t spend their days sleeping under the covers, they are daily driven, dyno-tested, and tracked on a regular basis. However, with heavy use comes heavy wear, so the flawless new car shine never lasts long. Sometimes there are factors that you can’t do much about, such as rock chips and small debris flung at you on the freeway, or door and bumper scuffs earned in the grocery store parking lot. Either way, flaws in your paint can stand out like a sore thumb and kill your car’s overall aesthetic. You may even end up having to pay extra for it if the lease on your car is expiring and it’s time to return it to the dealer. This was actually the exact situation our Sales Director Al Rhee was put up against with his Scion FR-S, so his car served as the platform for us to show the basics of touching up your car.
Text and Photos by Cameron Parsons
DSPORT Issue #185
In for Analysis
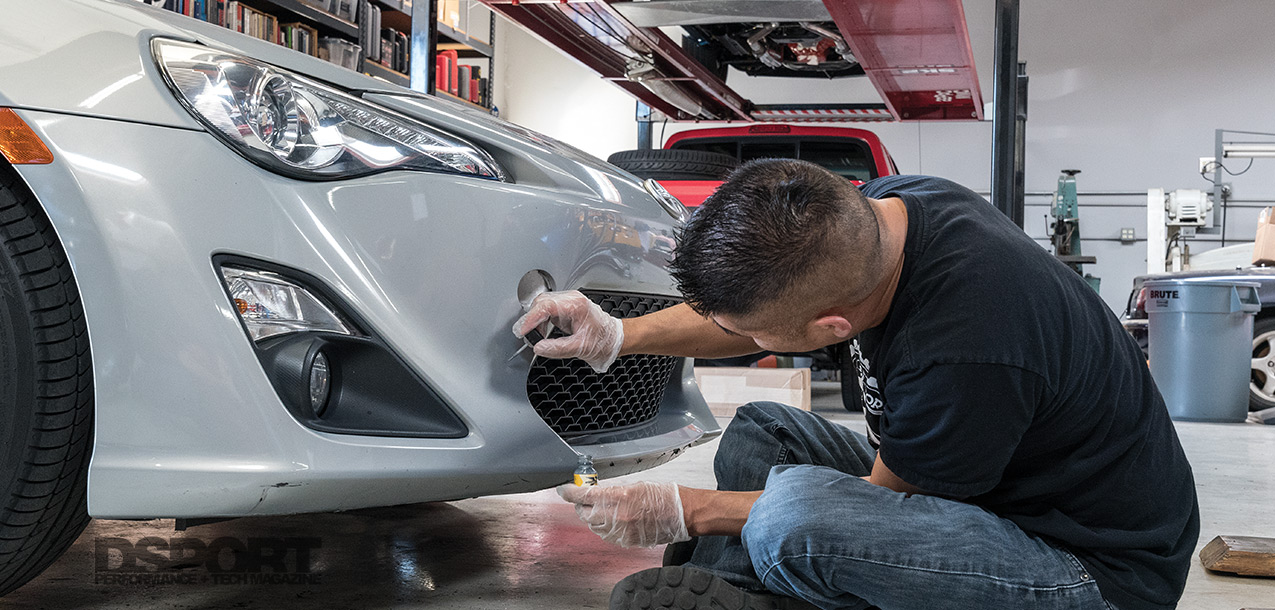
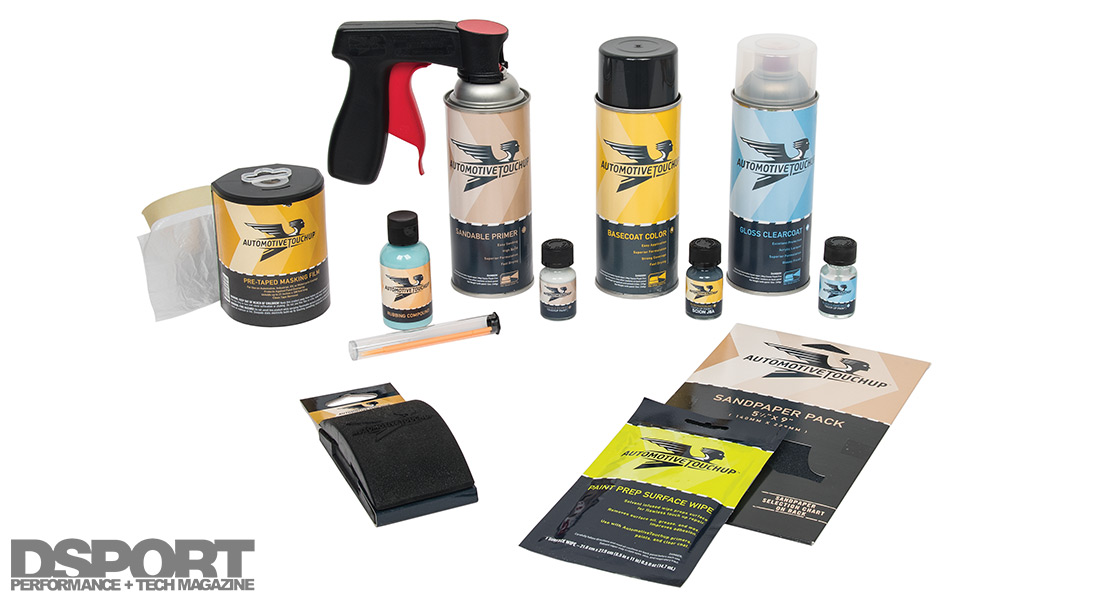
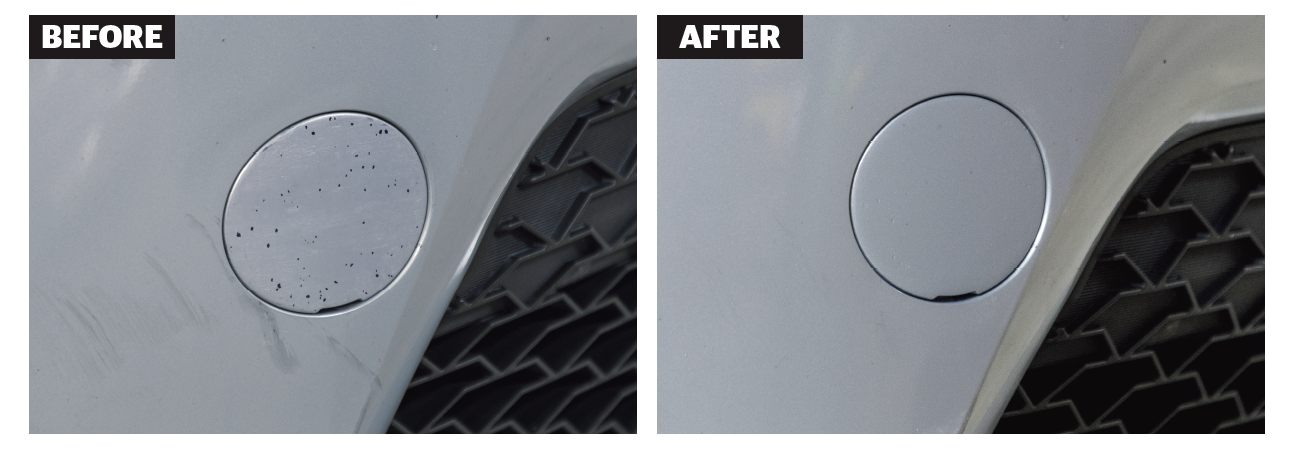
The FR-S had its share of rock chips and light scratches, but the biggest standout was the color-mismatched front tow hook cover. A past incident broke the original cover, so Al had to source a replacement and he then simply rattle-canned it with the closest color match he could find off the shelf. This resulted in an off-color tow hook cover that regularly developed new paint chips to look like it was covered in black confetti. With a variety of different types of paint damage in need of a cure, we sourced the repair products from AutomotiveTouchup. This company offers a wide range of paint repair products, each one color-matched to any factory paint color.
Different types of paint damage call for different repair solutions, so the first step is analysis. On our FR-S, nearly every trouble spot showed damage through the clear coat and into the base coat, revealing the primer underneath. This included a long scratch on the rear bumper, rock chips on the front bumper, and a few curb scrapes on the bottom leading edge of the front bumper. Although these marks dug down through the base coat, they were small in width and diameter. AutomotiveTouchup’s Paint Pen and Touch Up Paint bottles and brushes best handle these types of areas. The overall size and depth of repair needed for the tow hook cover calls for aerosol spray primer, base, and clear coats. Simple touchups with a small brush and/or paint pen are generally quick and straightforward, you can find our How-To article on this process on dsportmag.com. For this article, we’ll focus on the tow hook cover and the aerosol method which calls for a little more prep work and attention to detail.
Be sure to thoroughly clean the area to be painted. Proper surface preparation is vital to a quality finish. Even small traces of wax, dirt, oil or other contaminants can have an effect on the completed paint job.
Order of Operations
When it comes to paint and bodywork, there’s no such thing as a do-over. Beyond that, trying to find a shortcut in any step of the process will surely leave you with sub-par results. AutomotiveTouchup makes the process easier by offering a wealth of information on its website that explains its products, repair instructions, and useful how-to videos. In our case, the tow hook cover required some specific preparation procedures before applying any paint.
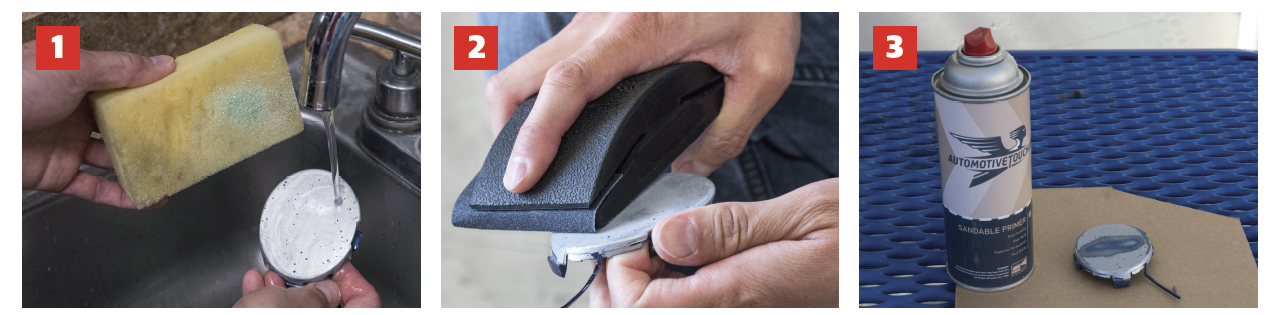
AutomotiveTouchup offers masking tape as well as a very useful pre-taped masking film in a rolling dispenser, used to block off areas for painting. This is mandatory for most cases, however, the tow hook cover is removable so we pulled it off the car to make the process easier. (1) First, clean off the surface with regular dish soap and water, followed by AutomotiveTouchup’s prep solvent to remove any wax, oil, or other potential contaminants. (2) If the surface is in especially rough shape with rust or deep scratches, use 180- to 320-grit sandpaper to sand out the scratches and surface damage before applying the primer. (3) Then spray three coats of primer with 10-minute breaks of dry time in between each coat to ready the surface for some color. After the final primer coat sits to dry for 30 minutes, it’s time to move on to prepare for the basecoat.
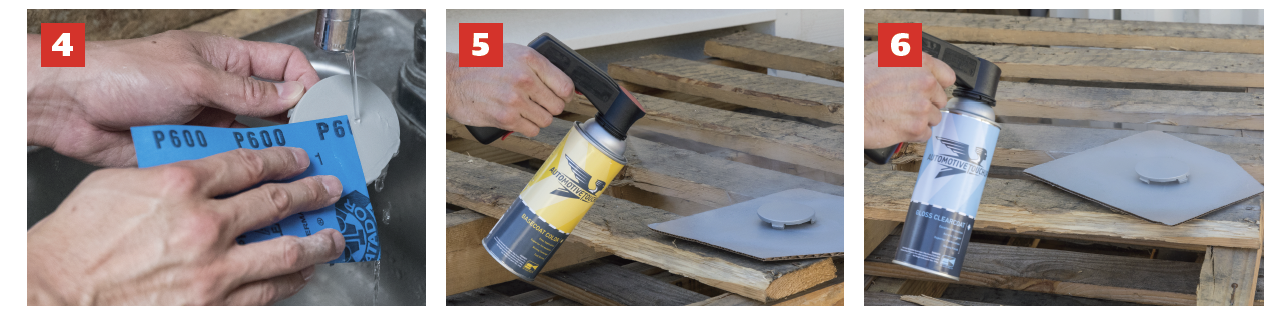
(4) Wet-sand the surface with the finer 600-grit sandpaper and then wash it off to ready the surface for the base coat paint. If you are working with areas that will need to blend into the repair, wet-sand the blend areas with 1,000- 1,500-grit sandpaper to prepare it for the base coat and clear coat. Since we were working with a removable panel, this step wasn’t necessary for our project. (5) With the components sanded and cleaned, it’s time for the base coat color spray. AutomotiveTouchup recommends spraying as many medium coats necessary, waiting about 10 minutes in between each coat. Our panel required four coats to produce a smooth, even-looking finish. After 30 minutes of dry time, you can move onto the final step.
Clear It Up
(6) After the last of the base coat color has dried, there’s no need to do any more sanding before applying the clear coat. Spray four or five coats with 10 minutes of dry time in between, and make sure not to overdo any coat to the point of it dripping. Each coat should be dry to the touch before layering on the next one (touch the tapeline to test this, not the actual surface being repaired). If you apply the clear coat without enough dry time in between coats, you can produce a color mismatch, orange peel texture, or less glossy finish. If you do find yourself in such a position, you can wet sand the texture flaws in the clear coat layout with 1,500-grit wet sandpaper and then use rubbing compound to bring the gloss back. But we highly recommend getting it right the first time. According to AutomotiveTouchup, you should wait to wax the surface for at least 30 days.
Finishing Touches
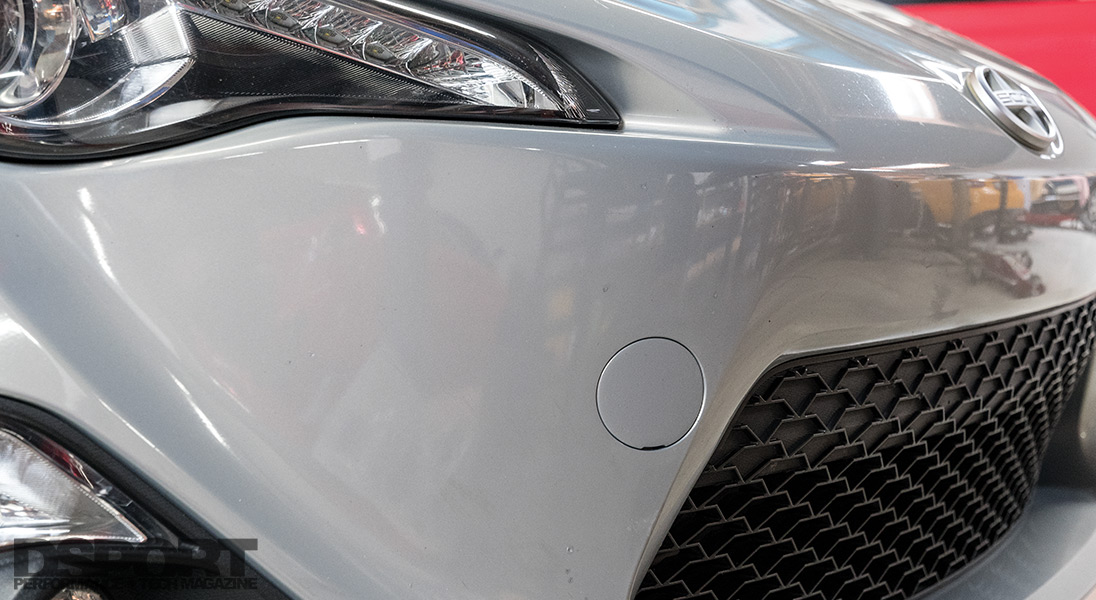
When compared to the rest of the FR-S’s paint finish, the tow hook cover appeared flawless in both color matching and surface quality. With the panel reinstalled, no one could tell that it had been repainted or that it even used to be a completely different color. Paint chips and scratches can come out of any environment, from driving on the freeway to lapping the race track, but you can rest assured that you’re not stuck with these imperfections forever. Whether you’re touching up minor chips or respraying larger scrapes, you’ll find that many of these items can be repaired at home with the right hardware. Plus, it’s easier and more affordable than having entire panels replaced or repainted at the body shop.
