
DSPORT Issue #265
Text by Michael Ferrara // Photos by Joe Singleton
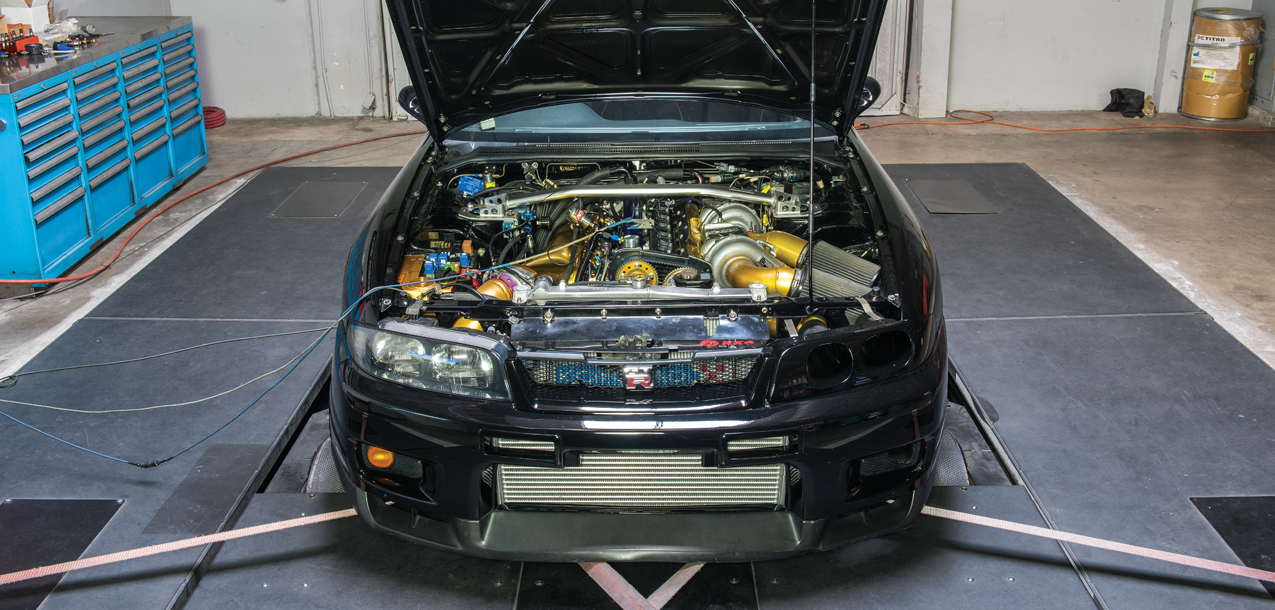
It’s been said that “By failing to prepare, you are preparing to fail.” While making an appointment to get your car on a dyno is one of the smartest moves you can make, failing to have your car properly prepared for a dyno session can result in a waste of time, a waste of money or even worse. DSPORT has decided to share its experience of the past 20 years with what we’ve seen on the dyno. If you want to be sure you get the best bang for your tuning dollar, be sure to follow the advice.
The Ultimate Tune
Maximum performance, lightning response, optimized efficiency, and uncompromised reliability. These are the areas that can be addressed through proper calibration of the engine’s ECU. Proper calibration of the engine’s ECU can be accomplished by several methods. The method that works best for you will often result in a trip to the dyno. However, a trip to the racetrack or even some cruising on the street may be required to fully complete a calibration.
Methods of Tuning
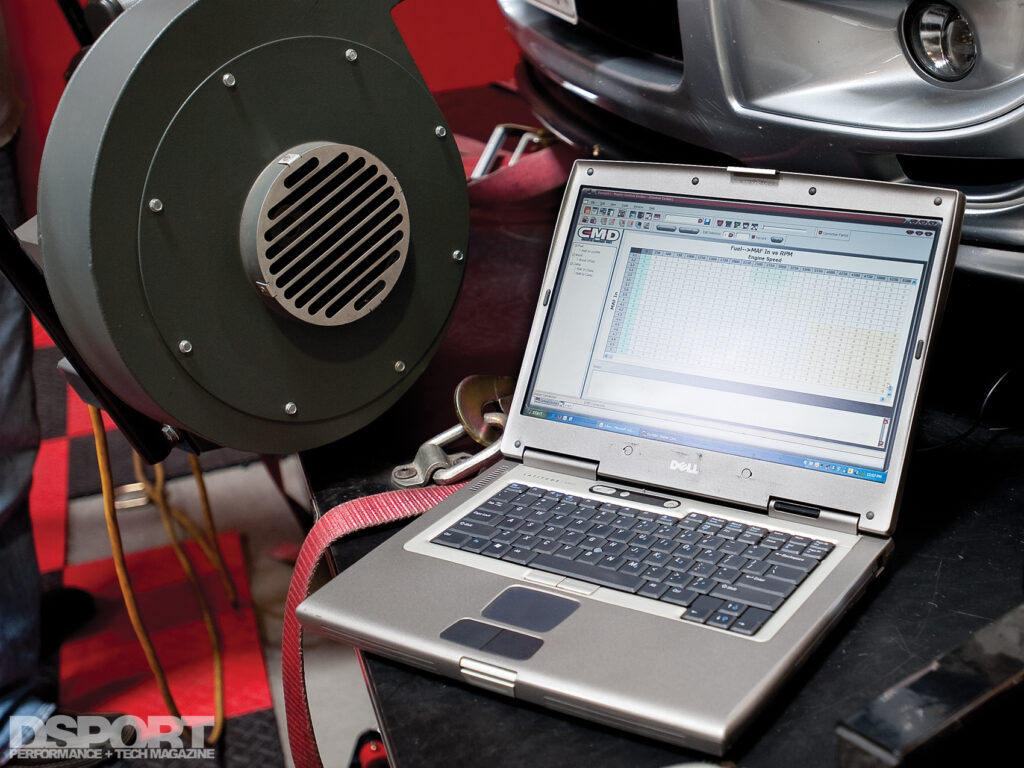
The “tune” is everything. Air/fuel ratios, timing tables, boost targets and various safety parameters are just a few of the items that need to be addressed during a proper tuning session. Years ago, a proper tuning session consisted of strapping your vehicle down to a chassis dyno while a tuner set in the passenger seat and a dyno operator in the driver’s seat. The dyno operator would take cues from the tuner to vary throttle, vehicle speed and engine speed while controlling the start and stop of loading or sampling. The tuner would modify tables and log runs to calibrate the engine controls to do what he wanted them to do. Sometimes, the tuner would also be the dyno operator. Regardless, with these arrangements, the tuner could hear and feel the engine during a pull while also looking at live data. Best of all, a great amount of tuning could be completed in a relatively short amount of time compared to “street” tuning.
If you took the ideal tuning situation and then removed the dyno, you would be left with the street tuning alternative. In the early days of tuning when chassis dynos were few and far between, many took to street tuning. While street tuning could deliver true loads to the engine, it couldn’t do it in a safe environment. Driving on the streets to tune risked the safety of the driver, tuner and vehicle. Fortunately, there is a better way.
Get on the Dyno
Nothing is better than having a qualified tuner calibrate your engine in person on a dyno. Second best from this is having a remote tune done with a qualified dyno operator at your local dyno. While there are different types of chassis dynos with different levels of accuracy, repeatable and loading strategies, the most important consideration is picking a dyno that gives repeatable results while safely loading your vehicle. From a tuning standpoint, the tuner needs to be able to depend on the repeatability of the results form the dyno. If the tuner hasn’t used a particular dyno in the past, it’s always a good idea to make three passes a set amount of time apart with similar engine conditions (air temp, oil temp, coolant temp) and see if the results are repeatable and to what extent. It’s not important to get into what the numbers from the dyno say, it’s more important to make sure that the tuner is making the numbers go in the right direction. If your vehicle is making 450 horsepower with the off the shelf tune and the tuner is able to get your vehicle to make 500 horsepower with a custom tune (a more than 10% improvement), a positive result occurred.
Fire in the Hole
Cranking up the boost to make more torque and horsepower is a common occurrence during a dyno tuning session. When the boost pressure is increased, the cylinder pressure also increases which results in an increase in torque output if the ignition spark doesn’t get “blown out.” Higher cylinder pressures require higher voltages from the ignition system to initiate a spark. When cranking up the boost leads to misfires, one must find a way to either reduce the voltage requirement required in the cylinder or increase the voltage potential of the ignition system.
Before your planned dyno session, purchase the best high-performance spark plugs for your vehicle and gap them to where they need to be for your peak boost level. Many times, “racing” plugs may already come with a smaller gap than the OE spark plugs. At higher boost levels, you may have to gap spark plugs as small as 0.014”. You can always start with closing up the gap about 0.004” and continue to close it down until any misfires go away. If you have a vehicle where spark plug access is a challenge, do some research and try to find out what the best spark plug gap is for others running similar setups and the same boost level.
Synchronicity: ECU to Timing Mark Match
Just because the ignition timing says its 20 degrees BTDC in the ECU doesn’t mean that the timing is 20 degrees BTDC. The actual timing might be 30 degrees BTDC or 10 degrees ATDC. It is essential that the timing be properly synched between the ECU and the actual engine. On many engines, a camshaft position sensor may allow for some mechanical adjustment to get the timing in sync. On some newer engines, there are no mechanical adjustments. Instead, the proper trigger offset values must be put into the ECU to ensure the timing is correct. Before any dyno session, one should always verify that the ignition timing is properly in sync. This will ensure that the timing values can be replicated properly if the camshaft position sensor is removed from the engine in the future. It will also make sure that the values input into the ignition maps are actual values from the running engine.
Get Fresh or Get Screwed
Regardless of the type of fuel that you are running (pump gas, race gas, E85 or even methanol), it is extremely important that fresh fuel is used during the tuning process. All fuels will degrade over time when left in the gas tank. The overall consensus is that pump or race gas up to two months old should be OK. However, pump gas or race gas over one year old should be replaced and not used for tuning. As for E85, the rules are basically the same. When it comes to methanol, it’s not recommended to leave it in a fuel tank for any period of time. Instead, it must be stored in an air tight container to keep it fresh. If methanol has been left in the vehicle, it’s best to flush it out and use fresh methanol before any dyno tuning.
Proper Oil and Oil Fill Level
Using the wrong oil or having an improper fill level (too low or too high) can result in big problems on the dyno. With new engine builds, specialized non-synthetic “break-in” oils must be used to allow proper sealing between the piston rings and the cylinder walls. We recommend following the Club DSPORT engine break-in process (DSPORT Issue #185, October 2017) to optimize the break-in of the engine.
On engines that are already “broken in”, use a premium synthetic oil of the proper viscosity for your application. Be sure that the oil level is centered between the high and low mark of the dipstick. Running too little oil will risk the chance of the oil pump pickup becoming uncovered during a dyno pull. The end result can be a drop-in oil pressure that results in bearing damage. This bearing damage can lead to severe engine failure. If the oil level is too high, excessive foaming of the oil can occur. The froth cannot properly lubricate the engine and the high oil level also generates high crankcase pressures. As a result, seals can fail causing oil leaks, and lubrication issues can also surface. Always run the correct level to avoid these issues.
Proper Alignment and Equalized Air Pressure in the Tires
We’d all been part of the scramble to get a project car finished to make a race. In the rush to get the dyno tuning out of the way, we’ve seen some people not complete the suspension alignment before hitting the dyno. On AWD, FWD or IRS-equipped RWD vehicles, this is a major mistake that can lead to severe injuries. Cars that do not have proper alignment will push or pull in directions that have them fighting the dyno support straps. At the very least, horsepower is wasted as the vehicle is forced to go straight even though the alignment wants a different outcome. In extreme cases, the misalignment may cause a suspension member to fail causing a major dyno fail that can injure those in and around the vehicle. Bottom line, get the vehicle aligned before it hits the dyno. In addition, be sure to equalize the air pressure in all of the drive tires. Having a different air pressure across the drive tires will cause similar stress and strain as a misalignment.
Full Throttle and Full Bottle
Imagine spending $1,000 for a full-day of dyno rental and $1000 spent with your tuner for the day only to figure out after the 8-hour session that the pedal was only opening up the throttle 65-percent. Don’t let this be you! Before you go to the dyno (and before you start your vehicle), check to ensure that you are getting the throttle body to reach its wideopen limit when you have the pedal fully pressed to the floor.
If you are running a nitrous-oxide system, also be sure to have a full bottle. Unless you have a “push” type nitrous-oxide system the bottle pressure will drop faster when the bottle is not full. The more nitrous-oxide used, the lower the bottle pressure will be during the spraying period. To get the most consistent results, always start your dyno sessions with a topped-off bottle of nitrous oxide.
Replace Old/Lazy O2 Sensors
The majority of modern ECUs rely upon the feedback from the oxygen sensor(s) to make fuel trims so that the targeted A/F ratios are hit. Sensors that are in close proximity to the turbocharger will often have a shorter lifespan. The use of leaded racing fuels will also damage the sensor over time. To ensure that the time spent dialing in the VE tables in the ECU is worthwhile, be sure that the O2 sensors are functioning as good as new. If you are putting an engine back together or repairing after any type of failure that put coolant in your exhaust system, replace your 02 sensors.
Correct Wastegate Spring
Before the advent of electronic boost control, maximum boost pressure was set by using an actuator (integral wastegate turbos) or the proper spring(s) (external wastegate) to deliver the desired boost level. With the advent of electronic boost control, boost pressures can be manipulated to go higher than the static boost level set by the choice of actuator or springs in the wastegate. To get the best performance from the engine, select the actuator or wastegate spring combination that will give you the lowest boost pressure you expect to run. If the lowest boost will be 17psi, get the actuator or wastegate spring combination to set the lowest boost level to 17psi. Failure to follow this rule will result in throwing away midrange torque and turbo response. If you are using a 12psi wastegate spring and always relying upon the boost controller to get you to your target minimum of 17psi, you could be giving away 5-to-20 percent of your power and torque since your wastegate is more likely to open due to pressure in the exhaust manifold. We realized about 50-horsepower in the low and midrange on a big-turbo RB26 engine that made 700 horsepower when we upped the 14psi spring to a 21psi spring. The peak boost pressure of 21psi was the same in both tests, but the stiffer wastegate spring setup delivered superior boost response and midrange power. The only application where this may not be advisable would be a FWD traction-limited application that needs to run a significantly lower boost pressure off the starting line.
Check Wastegate Lines / Use Proper Boost Solenoid
A leaking or incorrectly run signal to the wastegate and/or wastegate solenoid can result in a situation where there is no boost control. With no boost control, the engine can create an uncontrolled amount of additional boost pressure that results in catastrophic engine damage.
Before verifying the wastegate lines are correctly routed, it’s important to have the correct boost control solenoid for the application. There are two choices when it comes to boost control solenoids: the 3-port and the 4-port solenoid. The best solenoid for the application depends on the range of boost pressures that will be required.
The more common 3-port solenoid provides a lower amount of boost increase but it offers a higher degree of predictable control and resolution. The 3-port is always the best choice when you will be increasing the boost up to 50-percent over the wastegate level. So, if you are planning to run a setup where the lowest boost pressure desired is 20psi and your highest desired boost level is 30psi or less, the 3-port is the best choice.
The 4-port boost solenoid allows for a higher increase over the base wastegate boost level. This is always the best choice if you need to run boost levels that are 100-percent or more over the wastegate boost level. For example, if you a FWD Honda that launches best with 15psi of boost but you can ramp the boost up to 30psi in the third gear and 35psi in fourth gear, the 4-port is going to be a necessary element.
When you have an application that needs to have a boost range that extends 51-to-99% above the static boost level set by the wastegate, you may need to experiment and see which works better for your application. If you need to have more precise control the 3-port will probably be selected as the winner while the 4-port will win the challenge when higher boost increases are needed.
Depending on the type of wastegate or actuator being used and the type of boost control solenoid being employed, there is only one best routing strategy for each combination. Be sure that all of the plumbing going to the boost control solenoid, wastegate, intake manifold and engine are properly routed according to the correct diagram. Also, be sure to secure all of the hoses properly and ensure that the hoses are away from fans or belts that could cut them or hot areas that can melt the lines.
Check Map Sensor/FPR Hoses
While incorrectly routed boost control lines can cause excessive boost levels or a lack of boost control, they aren’t the only lines that can wreak havoc if they become disconnected. Of course, the line to the MAP sensor is extremely important as it is needed for proper fuel and timing delivery on any engine. However, we’ve seen the often forgotten signal line between the fuel pressure regulator and intake manifold come off and result in a complete engine meltdown. Remember that the fuel pressure regulator is responsible for making sure that the pressure of the fuel in the fuel rail is at the correct value as boost pressures increase. If your base fuel pressure is 43.5psi and you add 43.5psi of boost on top of that, the fuel pressure regulator makes sure that the fuel pressure in the fuel rail is 43.5+43.5 or 87psi. The 87psi fuel is being forced into a 43.5psi manifold, so it is working at a 43.5psi differential. When the line to the fuel pressure regulator comes off, the fuel pressure in the rail stays at the constant 43.5psi. If the boost were to be ramped up to 43.5psi in the intake manifold, the differential pressure would be 0psi. Get that? That means ZERO fuel flow, a extreme lean condition and melted pistons, head and possibly block too. Bottom line, always give that FPR line some respect.
Check for Boost Leaks
You can’t always find all the boost leaks that your car may experience when it explores higher boost levels than ever before. However, just ensuring that all the clamps on the charge piping are tight before your dyno session can often prevent wasting time tracking down the boost leaks on the dyno. You can also have more extensive checking done or show up to the dyno with a front bumper removed to give complete access to all of the charge pipes. On twin turbo applications, be careful when you experience a significant boost drop between pulls. Chances are that one of the charge pipes on one of the banks has a leak. Continuing to run any turbo when there is a boost leak will result in excessive overspeeding of the compressor wheel which can lead to complete turbo failure.
New Fuel Filter
Fuel filters are relatively inexpensive and generally easy to replace. Usually we don’t think about them until they become a problem. Before that happens and to provide your fuel pump(s) with an easier task of supplying all that fuel to the engine, change them.
Clean Injectors
Dirty fuel injectors can easily cause you to waste money on your dyno tuning session or worse lead to engine damage. When fuel injectors get dirty, they do not deliver the peak amount of flow that they were engineered to deliver. Additionally, dirty fuel injectors also deliver poor spray patterns of the fuel making it harder to atomize and blend with the air. In most cases, not all the fuel injectors lose the same amount of flow or exhibit the same degradation in spray pattern. As a result, the cylinders fed by the dirtiest injector may run considerably leaner while also having fuel droplets that are less atomized and harder to ignite. As a result, some cylinders may run considerably leaner than others and some may exhibit knock before the others too. This may result in having to run a less than optimized air/fuel ratio and ignition timing curve to get the engine to run best with these deficiencies in place. The same engine that struggles to make 500 horsepower on the dyno with a few dirty injectors may otherwise have easily made 600+ horsepower with safer air/fuel ratios and EGT levels across all the cylinders.
Ground Strap
It’s probably the simplest but most o en overlooked issue that plagues engines freshly swapped into a vehicle. Failing to have a proper ground path between the battery to the chassis and the chassis to the block and the block to the cylinder head can wreak havoc. Failure to have a proper ground strap in place can often result in significant misfires and other issues. Always inspect the negative battery cable and be sure it has a tight connection at both the battery and the factory grounding point. There is also some type of ground strap between the engine and chassis. It di ers per application, so do your research and make sure there are good connections at both ends.
Preparation for Success
Your car is your performance instrument. Just like a musical instrument, it needs to be in tuned by an expert to produce beautiful music and deliver great performance. Just like you wouldn’t try to tune a guitar with aged strings, you can’t properly tune a vehicle until it’s been properly prepared for the session. While you might need to spend a few hours to a full day to get your car dyno ready, showing up unprepared can result in throwing away money. Since time from a professional tuner and dyno time on a quality dyno can come at considerable costs, your investment into prepping the vehicle for the tuning session will not only save you money, but also get you the best performance results.
