
In the automotive world, heat creates a ticking time bomb. Different vehicle components demand target temperatures for ideal performance, but you’ll run into trouble quick if things get too hot. In the search for performance, items like cooling components and tires must be closely monitored to create an ideal setup. Although tools like infrared temperature guns provide vital information, they only deliver tiny snippets of a bigger picture. This is where infrared cameras and thermal imagers come in, offering users the ability to view temperature differences of an entire area on a digital screen. We received Milwaukee’s M12 102 x 77 Infrared Camera in the DSPORT shop to help us diagnose problems and hunt for improved performance. After some time playing with the infrared camera’s features, we put together a list of how you can use this technology to your advantage.
Text by Cameron Parsons // Photos by Cameron Parsons and Joe Singleton
DSPORT Issue #183

Hardware and Software
One of the major advantages of the Milwaukee M12 102 x 77 Infrared Camera over an infrared thermometer is the measured area. Most thermometers utilize a distance to spot ratio of 6:1, making them only effective at very close range. The M12 102 x 77 Infrared Camera offers a ratio of 83:1, and measures the temperatures of an entire area instead of a single spot. In this case, each of the device’s 7,854 pixels acquire a temperature reading and adjust their color individually to better define the heat signatures in the image. Images are saved onto an SD card and can be analyzed with Milwaukee’s reporting software. The software allows users to pinpoint temperature differences across the images, measure averages across customized areas, and generate reports for customers or future reference.
1. Tire Surfaces

The M12 102×77 Infrared Camera can read temperatures in different color signature options and with different emissivities. These options make heat patterns easy to read with plenty of detail.
You can tell a lot about a car’s setup when viewing the heat distribution of the tires’ surfaces. If you check the tires immediately after a track session, you can determine first whether or not they’ve reached the target temperature for optimal grip. If they’re not hot enough, you need to raise the pressure. You can also see heat patterns of the inside surface versus the outside surface, displaying potential needs for alignment changes.
2. Brake Components

A car’s braking system produces some of the highest temperatures of any component, only with the exception of items like a turbocharger or catalytic converter. The rotors, pads, calipers and even fluid endure high temperatures that the friction produces and transfers. The ability to view a thermal snapshot of these components lets users see friction and heat dissipation on the rotors, as well as how the heat dissipates and radiates through adjacent components.
3. Exhaust Resonance

Cars with dual exhaust systems out of two exhaust manifolds often suffer from unwanted resonance. Crossover tubes serve as a cure by evening out the exhaust pulses between both sides. How do you find the ideal location for this? Since the exhaust gases expand and contract within the piping, they create more pressure in certain areas and as a result more heat. If you install a crossover tube tying these high pressure areas from both sides together, you’ll relieve the built pressure and reduce that annoying resonance.
4. Follow the Current

The infrared camera shows high enough detail to pick out individual fuses drawing power.
Electricity flow produces heat, which can tell you a lot from under the hood. Is there current draw even when the ignition is turned off? Active power consumers pop up easily on a thermal imager when everything else is turned off. You can spot temperature differences at the powered components or even inside the fuse box to track down unwanted parasitic draw.
5. Clogs in the Cooling

Even with the bumper and front grill on, you can see heat spreading across an oil cooler, intercooler and radiator.
An effective cooling system starts with an effective radiator. If any sort of corrosion or particles build up inside the cooling system, it will eventually collect and block flow inside the radiator. Outside the radiator, bent fins impede airflow and thus reduce heat dissipation. A thermal imager enables you to view the differences between the radiator’s inlet and outlet sides. Hot spots on the radiator or an overall lower efficiency will point to signs of damage or blockage in the system.
6. Intercooler Efficiency

Just like the radiator, an intercooler relies on airflow through its fins to operate effectively. If you’re experimenting with positioning and ducting, a thermal image can provide a quick reference of the resultant intercooler efficiency. It won’t match the detail of mounted temperature and pressure sensors at the inlet and outlet, but it’s a much simpler and quicker solution if you’re still testing with different ideas.
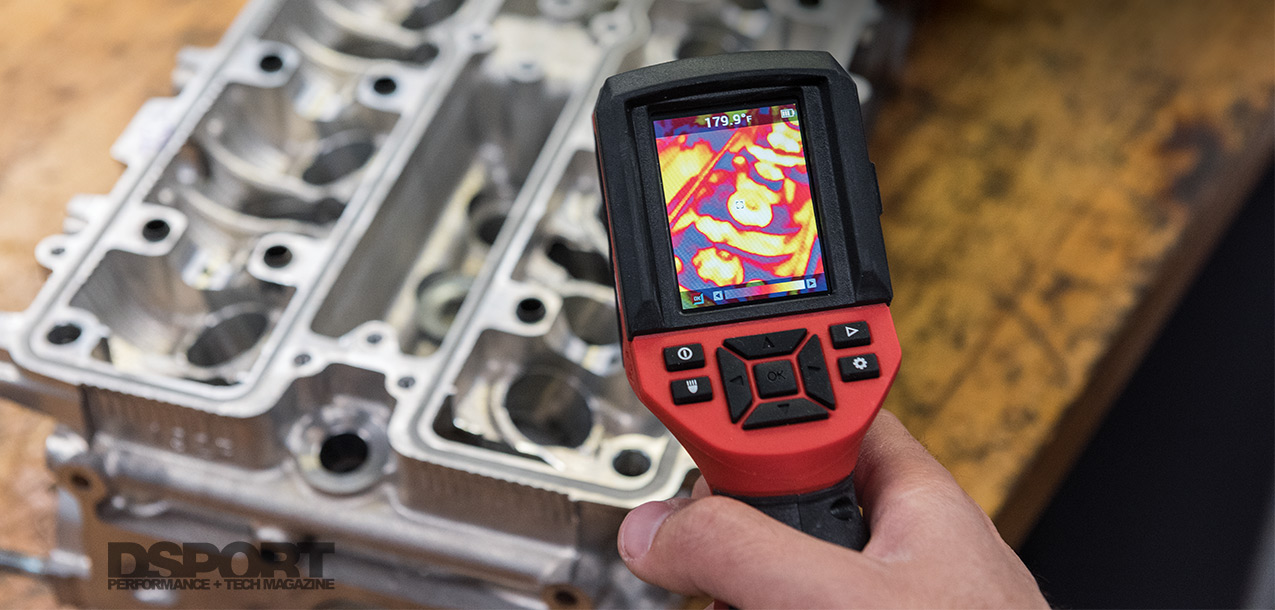
7. Let Cool Before Handling
Some tasks require putting heavy-duty components like blocks, heads, uprights and more into an oven before doing work on them. In turn, you may store some parts in a freezer or in a container with dry ice before performing a task. Since larger items like a block or a head experience varied rates of temperature change at different points (center versus an outside edge), a thermal image reveals if the component needs to go back into the oven or freezer before working further.
8. Worn Bearings
Heat isn’t a concern when a bearing functions correctly. When a bearing becomes worn, however, excess heat is one of the first signs. Think one of the differential axle bearings may be worn? Or one of the belt-driven components is on its way out? Viewing the heat signature compared to the surroundings will point you in the right direction.

9. Firing on All Cylinders
When tracking down a misfiring cylinder, people commonly check the temperatures of the exhaust manifold, monitoring each cylinder one by one. If there’s a big difference in performance, you could even spray water on the manifold pipes to see how quickly it burns off. Thermal cameras help you skip some steps and view the entire manifold at once so that you can immediately tell which cylinder isn’t firing like the others.
10. The Basics
Thermal imaging isn’t just for the hardcore technical elite. It also shortens the time necessary to diagnose simple features and convenience items in a car. You can assure yourself that the climate controls and ducting are working properly. Or flip on the rear defroster to detect any breaks in the lines. If your seat heaters don’t feel like they’re working properly, a thermal camera will reveal the weaker or non-functioning areas. With an infrared temperature gun, you’ll spend a lot of time measuring temperature differences at numerous points, whereas the thermal camera provides the whole picture and all the variances at once.
