High oil consumption, excessive smoke through the exhaust, high blow-by, lower than expected power output and increased oil contamination are just some of the possible results of an improper engine break-in or run-in. While production engines in new vehicles are already “broken-in” at the factory, any high-performance “built” engine requires a proper break-in procedure to ensure peak performance, minimal oil consumption and a long life. Even if the best parts are used and the proper machining and assembly was executed, an improper break-in can result in some or all of the negative consequences. While there is no universally agreed upon method for engine break-in, DSPORT and Club DSPORT have effectively used its methods for exceptional results for more than 15 years. Before sharing our process, we will outline the goals, history and challenges associated with performance engine break-in.
By Michael Ferrara // Photos by Joe Singleton
DSPORT Issue #185
The Goal
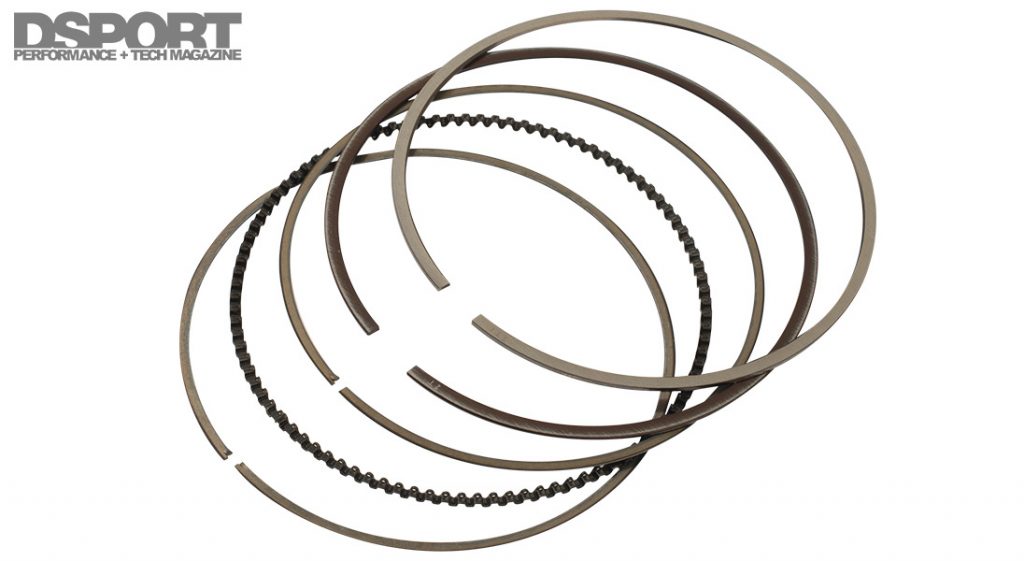
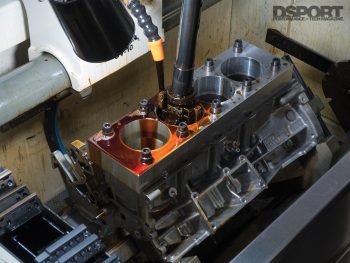 Whether you spent $1,500 on your do-it-yourself budget engine build or $50,000 on a record-setting-capable engine, the performance of either is dependent on the engine’s first minutes of life. An improper break-in procedure will affect performance, reliability and longevity. The primary goal of the break-in process is to establish an ideal wear profile between the piston rings and the cylinder wall. When a proper break-in is executed, the ring will be riding on a film of oil on the bearing loading surface of the cylinder wall while the valleys in the cross-hatched surface provide proper oil retention. Neither the ring, nor the cylinder wall can experience too little or too much wear for a proper break-in. The process of trying to establish this proper wear profile is sometimes referred to as setting or seating the rings. An ideal setting or seating between the rings and the cylinder results in minimal leakage past the rings, minimal oil consumption, reduced cylinder wear, reduced ring wear and exceptional heat transfer between the rings and the cylinder wall.
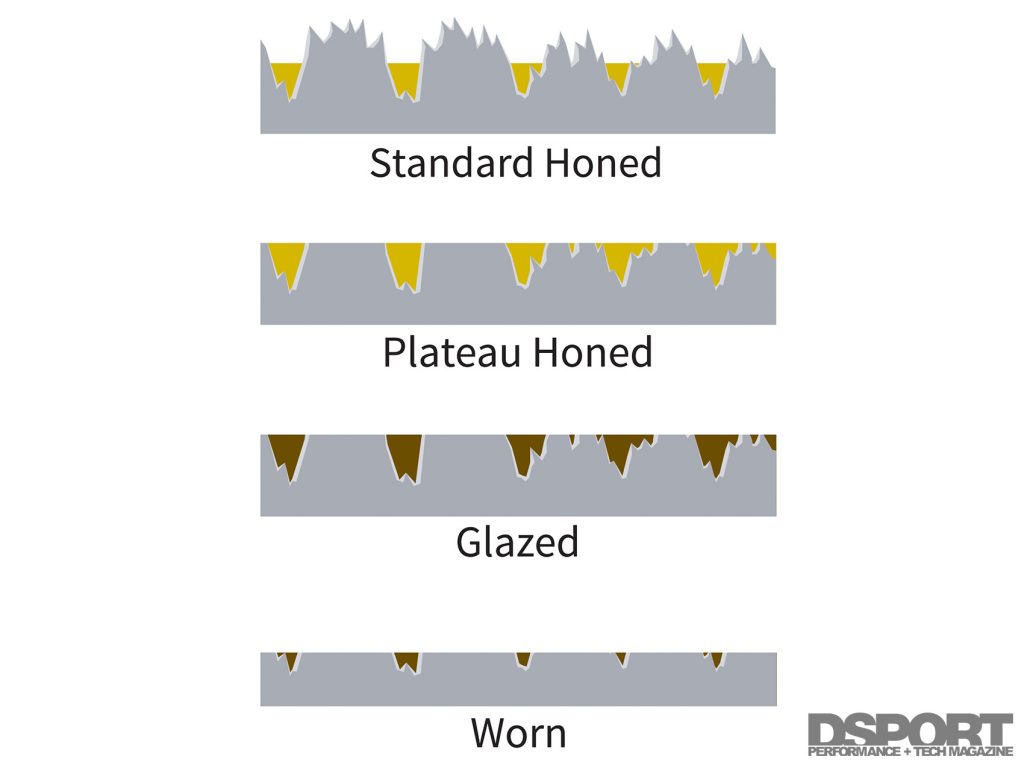
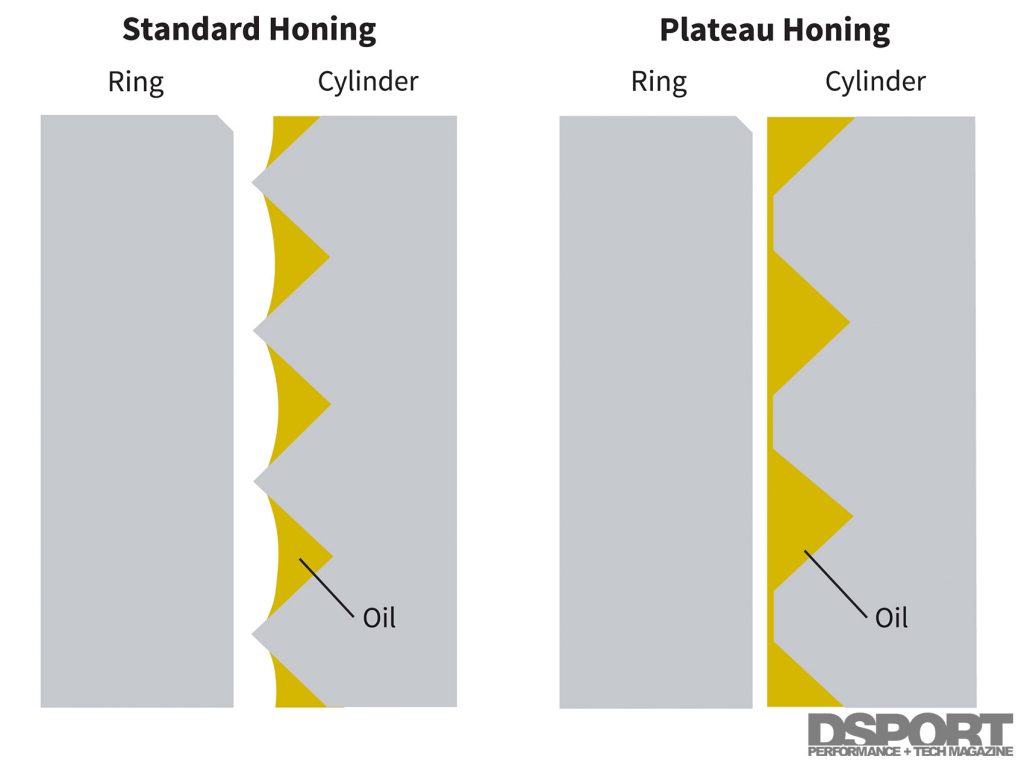 Years ago, the common practice was to hone a cylinder with a single grade of abrasive stone based on the type of ring to be used. This left a surface with sharp peaks that provided limited surface contact with the ring creating a challenging “break-in”. Today, high-performance machine shops employ a plateau honing procedure where stages of finer stones or abrasive brush knock down these peaks, establishing a better load-bearing surface during break-in.
The benefits of proper engine break-in affects all four cycles. During the intake stroke, vacuum present in the cylinder pulls a minimal amount of oil into the cylinder past the well-sealed rings. During the compression stroke, a superior ring seal limits the amount of fresh air-fuel charge that makes its way past the rings and into the crankcase. During the power stroke, a properly broken-in engine will not only minimize the amount of combustion pressure forced past the rings, it will also maximize the amount of heat transfer from the rings to the cylinder walls due to a greater contact patch. During the exhaust stroke, proper break-in ensures that little if any of the exhaust products find a way past the rings and into the crankcase.
The top drawing illustrates some of the peaks and valleys present after a single-stage conventional honing process. The second illustration from top shows a plateau honed surface and the valleys that will hold the lubricating oil in place. When improper break-in occurs, a cylinder wall can become glazed (shiny appearance) with burnt oil and wear particles forced into the valley originally holding oil. Over time, the lack of lubrication wears the cylinder and rings even more as shown in the bottom image.
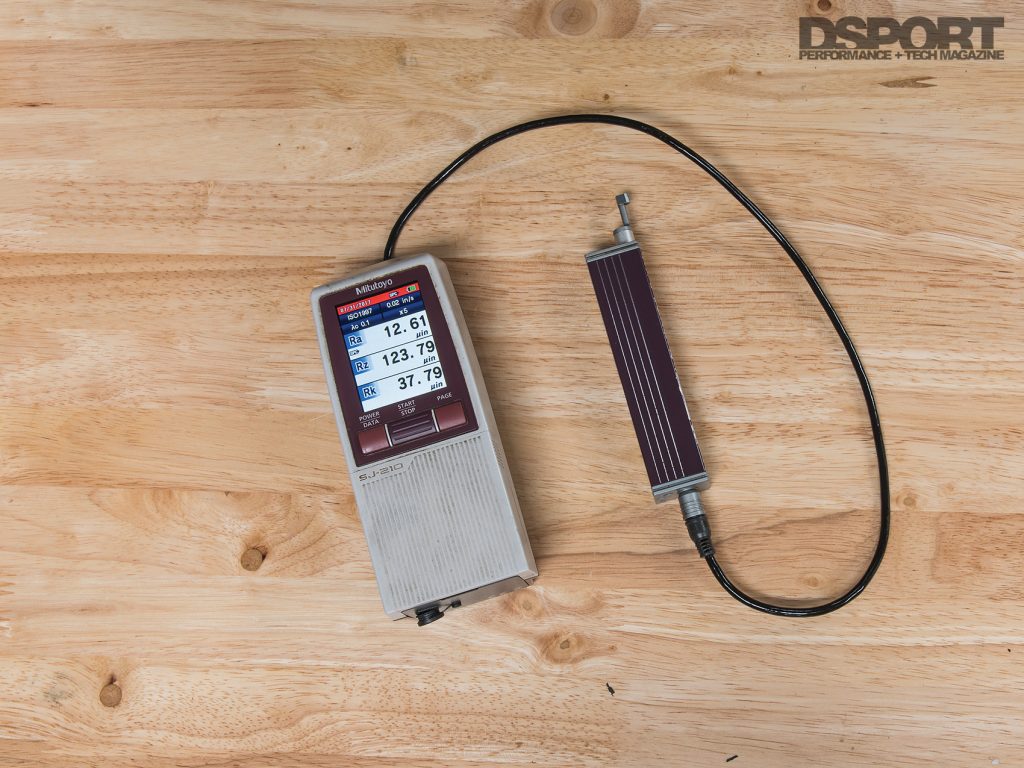
An ideal surface for a cylinder wall would be perfecly flat to maximum contact area while providing a properly-sized resovoir for the oil retention. A plateau honing gets close to this ideal with the Rpk value representing the height of the peaks that will likely be removed during break-in. The Rk value represents the amount of surface that is available to wear away while the RvK value is the measure of the depths of the oil retention valleys
Then and Now
 While “high-performance” and racing engines have been built for over 100 years, many of the opinions surrounding engine break-in techniques have not changed with the times. Today, piston ring technology incorporates superior materials and high-tech hard coatings in many instances. As a result, a 1.0mm-thick PVD-coated steel top ring may be selected today over a plain 2.0mm (5/64”) cast-iron top ring that was popular 20 years ago. Different materials, different face profiles and different coatings all influence how the ring will wear. At the same time, the ability to hone cylinders to a superior profile (rounder and with less taper than ever before) and a surface that’s matched across all cylinders in the engine is possible today while it wasn’t achievable years ago. Hence, the full-proof technique used by your uncle or dad’s friend to break in record-setting V8 race engines even built 10 years ago may not be an ideal technique for a state-of-the-art Reference-series engine built at Club DSPORT today.
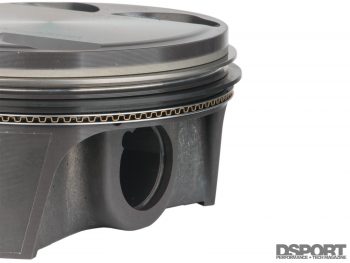
Improved materials and specialized coatings (or treatments) create a hard surface on the face of the rings that accelerate break-in and reduce wear.
Nippon Piston Ring (NPR), Mahle, Riken and Total Seal are the likely manufacturers of the piston rings found on whichever brand of high-performance piston that you’ll find in an engine that uses “mm” instead of “inches” to measure the bore size. All four of these companies are constantly pushing development on higher-strength materials and the application of high-tech coatings or processes useful for piston rings when it comes to the compression and second rings. In addition, these manufacturers are also looking for ways to develop oil rings that provide minimal oil consumption with minimal ring tension (to reduce friction and improve fuel economy). Unfortunately, the ideal surface finish is rarely, if ever, provided to the customer of the new set of pistons and rings. Why? Because less than 1.0-percent of the machine shops in the country have the means to measure or achieve a specific cylinder finish. As a result, they may be delivering engines to customers where some or all of the cylinders are “too rough” or “too smooth” in the most basic terms. In these circumstances, some or all cylinders may fail to properly seat the rings (regardless of the break-in process used). If the machine shop or engine builder that you select doesn’t own a profilometer, doesn’t have the ability to match the surface finish of all of the cylinders and doesn’t have a direct line of communication with the ring manufacturer, you will be rolling the dice as to having an engine that is capable of establishing a proper ring seal.
JOIN THE CLUB
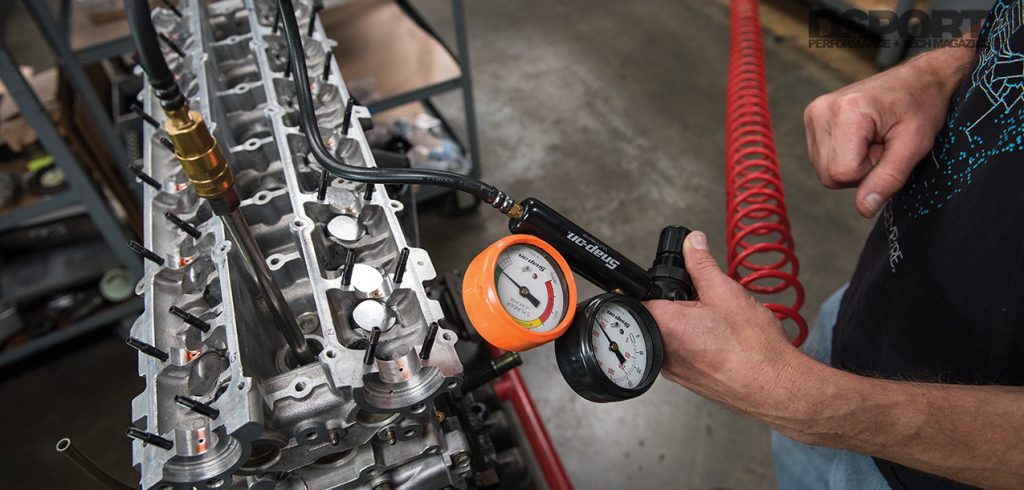
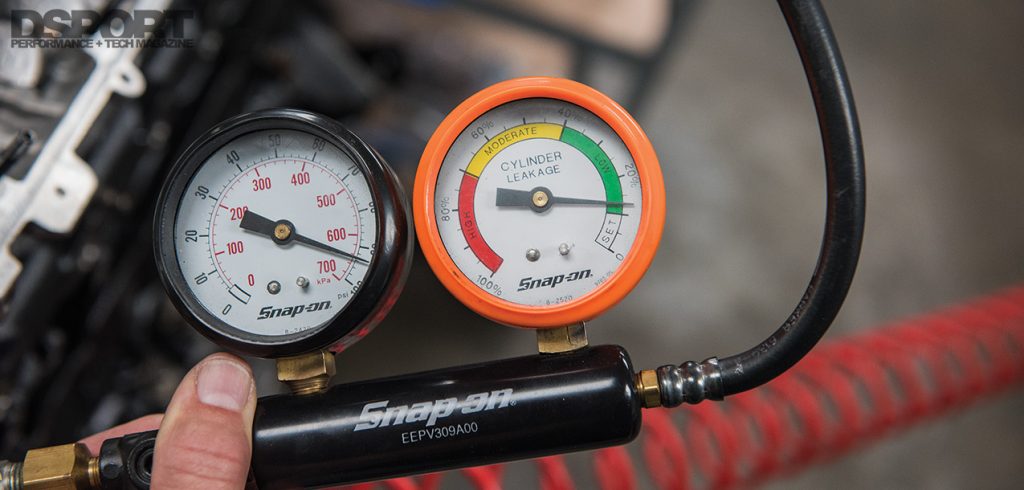
At Club DSPORT as soon as the cylinder head is final torqued to the block, a measurement of cylinder leakdown is recorded for each cylinder. This is the baseline starting “cold” value for leakdown. At this time, it is also noted when the leakage is most likely occurring by listening to the intake port, exhaust port and crankcase. As mentioned before, these cylinder leakdown numbers are substantially better when the valve job for the cylinder head is done with a cylinder head torque plate (a.k.a. “hot” plate) in place. When a Club DSPORT hot plate is used, all of the leakage in each cylinder is only audible at the crankcase.
Evaluating the Quality of Break-In
Just as there are no universally agreed upon methods for engine break-in, there also isn’t any universally agreed upon benchmarks to evaluate the effectiveness or success of a break-in process. Fortunately, we’ve identified some indicators that all properly broken-in engines will share.
First, cylinder leakdown tests of the engine before, during and after the break-in process in both a cold and normal operating temperature state will directly indicate the quality of the seal from the top and second rings. Each and every cylinder should improve during the break-in process until a point where the leakdown stabilized to a final number. If the number goes down initially, but then begins to increase, some part of the break-in procedure being used may not be ideal for the engine undergoing the process.
If your engine builder didn’t supply the cylinder leakdown figures on your new engine, be sure to record the values before the break-in process. You will also need to take readings during the break-in process.
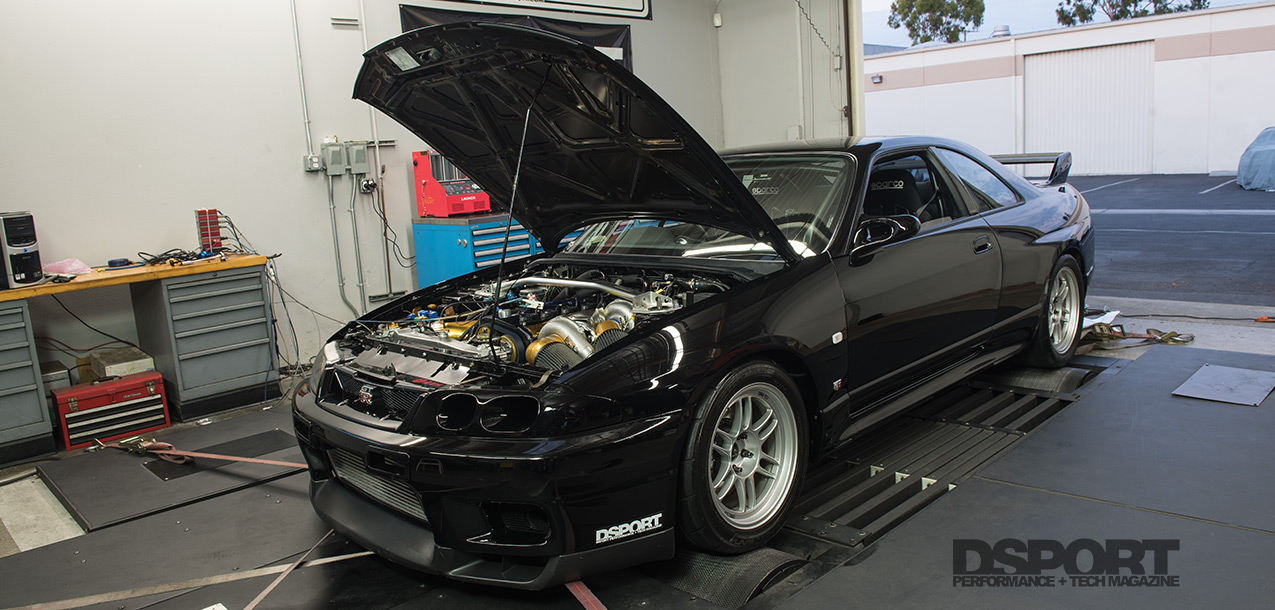
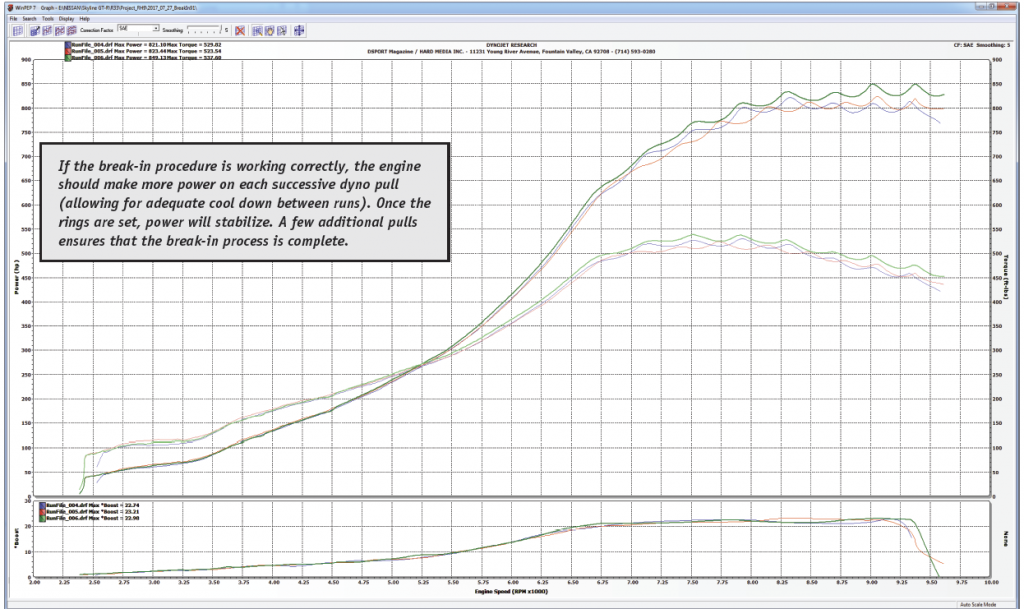
Second, the chassis dyno being used for engine break-in can also be used as an indicator. The break-in process should be done with the electronic boost solenoid control bypassed to limit boost pressure to the wastegate spring. This should deliver very consistent boost pressures during the break-in. Without changing any fuel or ignition calibrations to the engine, the engine should show a consistent improvement in power output as the ring seal improves during the break in process. When a point is reached when the power no longer continues to increase, the top and second rings are likely to be nearly or fully seated. A few more passes following the break-in procedure are recommended to ensure a fully seated condition.
Third, when a PCV system is in place, measuring the crankcase pressure may also serve as an indicator to the quality of the break-in and resulting ring seal. If crankcase pressure can be logged during a dyno run, there should be a reduction in pressure as ring seal is improved during the break-in process. Unfortunately, many competition engines have been modified to reduce or eliminate crankcase pressure even under cases of extreme blowby. Hence, this may only be viable for engines with non-modified crankcase ventilation systems.
Fourth, keeping a log of oil consumption may be a great indication of the quality of the break-in procedure, but it will likely be too late to improve the situation at this point in the process. Still, an inspection of the oil at every fill up looking for changes in color and smell can indicate the quality of the ring seal. If the oil in the new engine smells of fuel and turns black quickly, chances are that the break-in process was limited in its success.
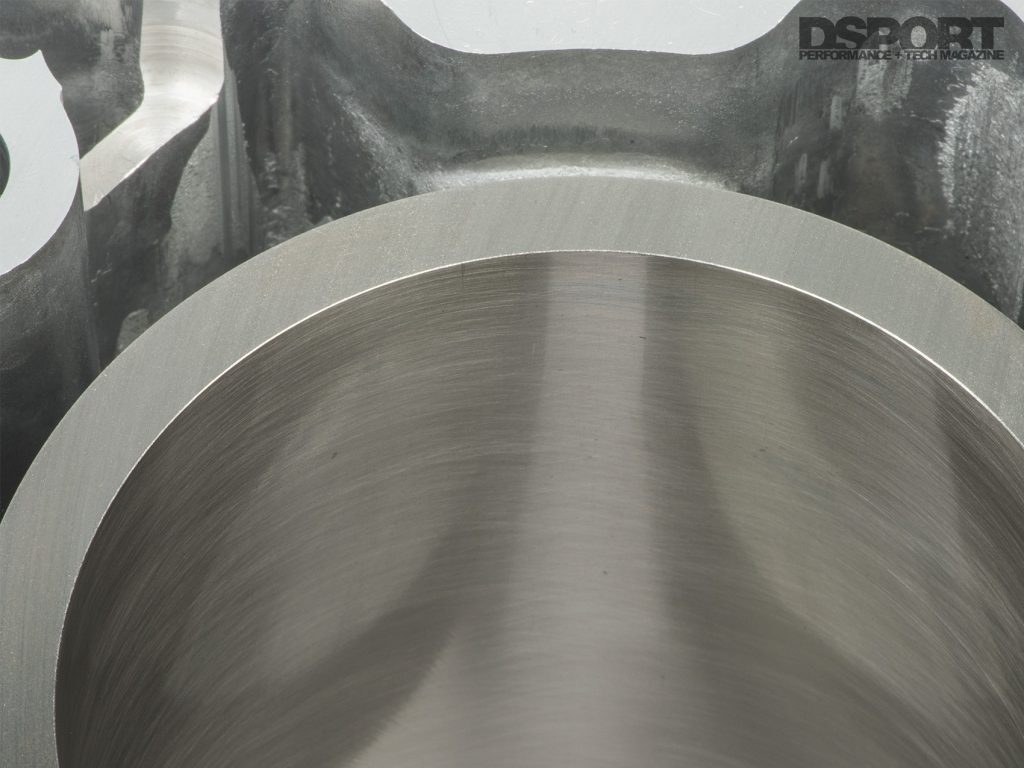
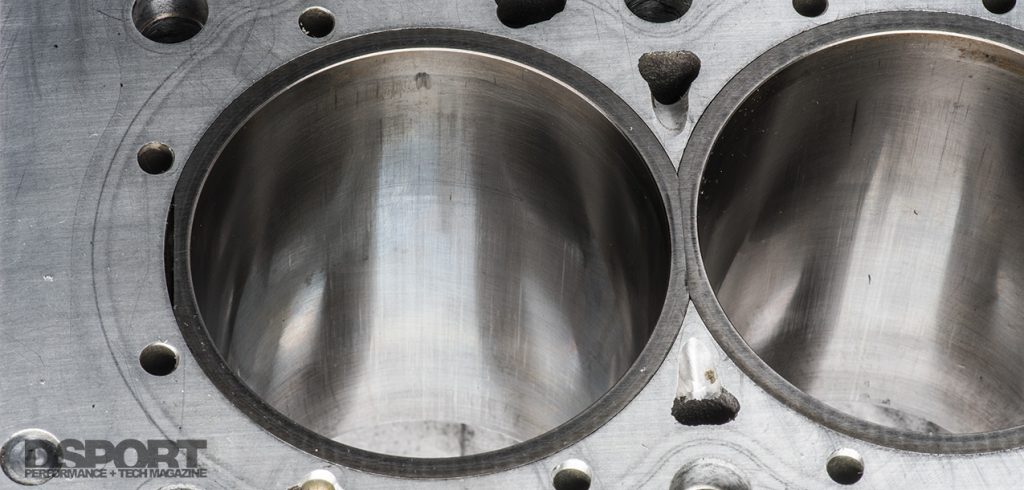
The angle of the crosshatch pattern will determine the speed at which the rings rotate on the piston. This pattern must remain constant from the top to bottom of the cylinder. The cylinder wall of this Club DSPORT big-bore FA20 has the cross-hatch angle, RpK, Rk and RvK values optimized while maintaining a roundness better than 0.0003”.
Finally, inspection of the cylinder bores can often indicate the quality of the break-in procedure. Depending on the engine, a bore scope can sometimes be used to take a look at the cylinder walls. When properly broken-in, the cylinder walls should still show the cross-hatched pattern with an absence of vertical lines or shiny spots n the bore. If the crosshatch pattern is gone and the cylinder bore appears shiny, excessive wear has occurred on the bore and the cylinders should be re-honed and a new set of rings should be installed.
Break-In Pitfalls
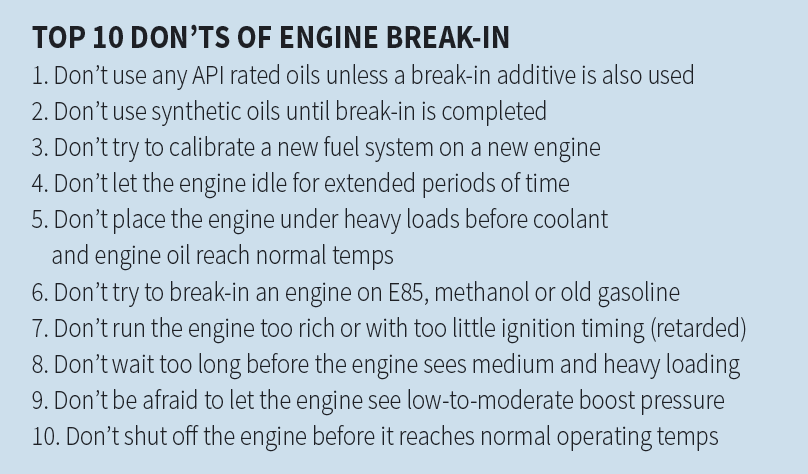
So what causes an engine to have an unsuccessful break-in? Two of the most common mistakes involve fuel wash and improper loading of the engine. Fuel wash occurs when an engine is flooded with fuel on initial start-up or before a proper ring seating has occurred. The excess fuel strips the cylinder of the oil film normally present between the pistons rings and cylinder wall. With no oil in place, metal-to-metal contact results in scuffing. Scuffing can also occur if there is an absence of an oil film during the assembly process and the engine is dry started. How can fuel wash be avoided? Since engines running E85 are harder to start and more likely to be flooded, brand-new engines should be started on gasoline whenever possible (OEM actually use a dry fuel like natural gas or propane when new engines are started to avoid any chance of fuel wash). In addition, the fuel injectors should be new or have been serviced to ensure that they are not leaking additional fuel into the cylinders. On engines using lambda feedback, a set of fresh O2 sensors is also advisable.
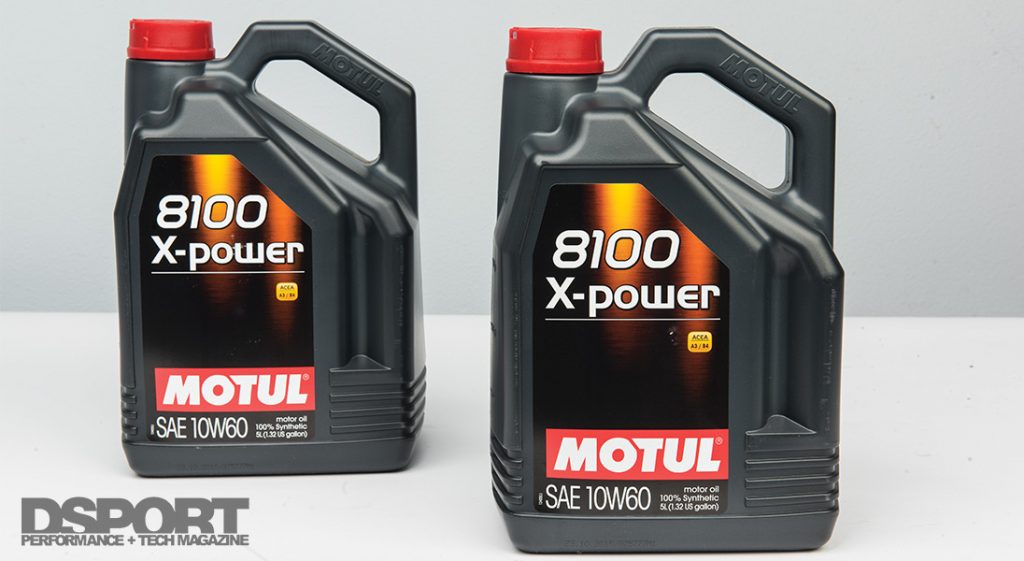
A quality synthetic oil is definitely the right choice AFTER the engine is broken-in. Use it too early and you may never seat the rings.
Even when fuel wash is avoided, an improper loading of the engine during its first minutes of life can also lead to a failed break-in and seating of the piston rings. If the engine spends too much time getting to normal operating temperature and then is not loaded enough, the rings may not see the temperatures and pressures required to exert the proper amount of force on the cylinder wall. An absence of the proper force will lead to an establishment of small contact patches instead of a complete band of contact across each entire ring and cylinder. The improperly set ring allows combustion pressure to escape past the areas where contact was never established. As a result, many advocate a fast and hard procedure for the loading of a freshly built engine.
Pre-Start Ritual
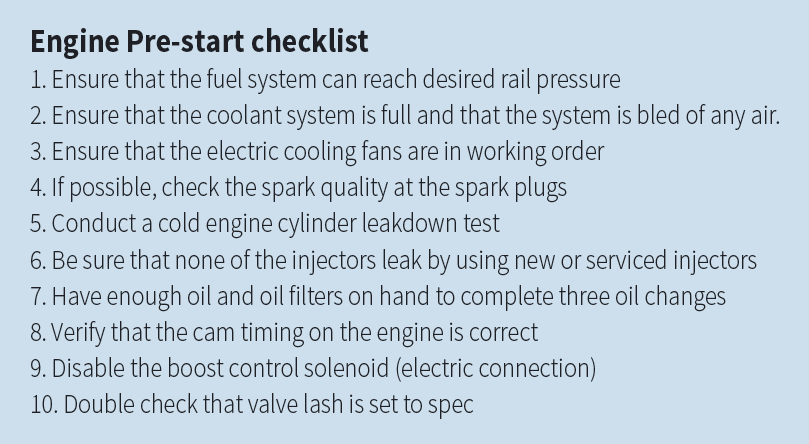
The purpose of the pre-start ritual for proper engine break-in is to do everything possible to get the engine fired up as quickly as possible while running a proper air-fuel ratio and reaching normal operating temps in short order. One way to ensure this is to never attempt to break-in an engine at the same time you are trying to calibrate a new engine management system and fuel system setup. Trying to accomplish both at the same time is a recipe for disaster. Instead, it’s best to get the fuel and spark calibration as dialed as possible on the original engine, before the new engine is installed. Alternately, using a complete factory fuel and engine management system on a fresh engine may also have significantly better results than rolling the dice on being able to get a decent calibration completed during the short window of opportunity.
It is also advisable to check the condition of the ignition system and the quality of the spark that is delivered. With the electrical connection to the injectors removed, the ECU can be tricked into firing the coils when the cam angle sensor is rotated. This doesn’t work on all vehicles, but it will on some. Checking that all coils fire and a strong blue spark is delivered when the threaded portion of the spark plug is grounded to the engine means that the ignition system should be capable of lighting off the air-fuel mixture required to get the engine running.
Performing the cold engine cylinder leakdown test will not only establish the baseline condition of the “before” break-in engine, it may also shed the light on a problem that can be addressed before the engine is fired.
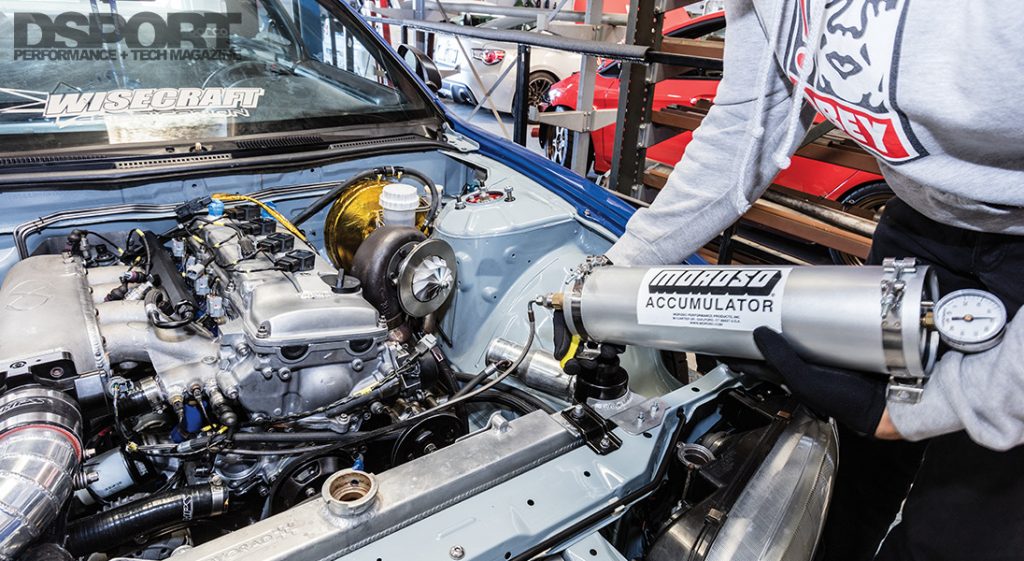
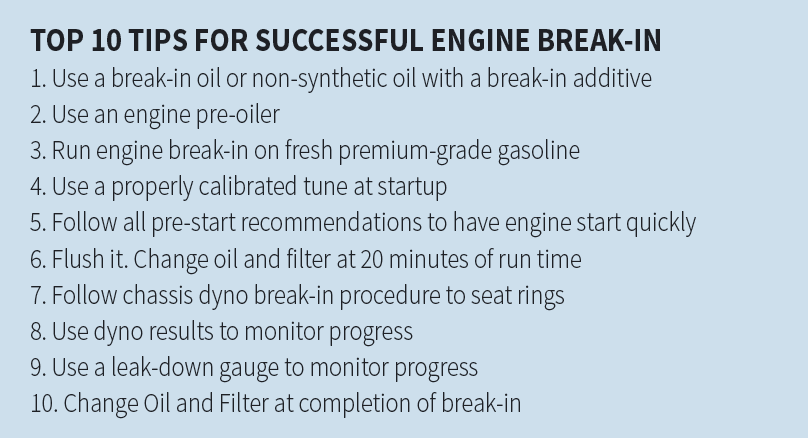
Oil selection is critical to proper break-in. A number of manufacturers offer specific blends of mineral oils and additives specifically for “engine break-in.” These oils are highly recommended as both the base oil and the additive package is designed specifically for this purpose. If you do not have access to an engine break-in oil, the next best choice is to select a high-quality non-synthetic oil and combine it with an engine break-in concentrate. Engine break-in concentrates include special anti-wear additives that help to protect parts upon initial break-in. Using an API-graded non-synthetic oil alone may not provide enough anti-wear protection as API graded oils have had most of the anti-wear additives removed over the past years for emissions purposes. Finally, avoid semi-synthetic and full-synthetic oils entirely as break-in oils. These oils will not allow for the required amount of wear and will deliver an improper break-in that is similar to an engine that didn’t see enough load during break-in. Ideally, an engine pre-oiler is used to prime the oiling system so that running oil pressure was reached even before the engine is started. This ensures that there are no components in the engine’s lubrication system that will be run dry at startup. Additionally, priming of the fuel system to establish the running fuel pressure in the fuel rail is also recommended for quick start-up.
Using an engine pre-oiler or a Moroso Accumulator to feed the engine pressurized oil before being fired up for the first time ensures that the oiling system is primed and ready to go.
While it is often difficult to accomplish, getting the engine’s coolant temperature closer to its running temp will also improve the chances of a quick start-up. When this cannot be accomplished, simply choosing to start the engine at the warmest part of the day will also be advantageous.
Break-In Procedure: Fire Up to Flush
With just some basic conventional motor oil filling the crankcase, the first priority with a fresh engine is to get it fired up and to its normal operating temperature as quickly as possible. Once the engine fires up, it’s best to keep the engine speed varying between 1,500 and 3,500 RPM until the normal engine coolant temperature is reached. Varying of the engine speed will help ensure that a set wear pattern isn’t established before the engine is at normal operating temps. Once the engine reaches normal operating temps, shut the engine off and perform an oil and oil filter change. This flushing procedure removes the bulk of any assembly lubes used on the engine along with contaminants that may have been missed in the cleaning process before assembly of the engine. Fill the engine with break-in oil or conventional oil with a break-in additive at this point.
Break-In Procedure: Dyno Time
Set the rev-limiter between 50-to-60-percent of redline and verify that boost will not exceed the wastegate setting. With its fresh break-in oil and new oil filter in place, the engine is ready to see some load on the dyno as soon as normal operating temperatures are reached again. On the chassis dyno, get the car up to speed and into the gear where it is typically dyno tested. With an inertia-based dyno, start at about 50-percent throttle and let the engine work its way through the RPMs up to just before the rev limiter. Once near the rev limiter, come off the throttle and let the engine coast down remaining in gear back down to your starting RPM for the pull (usually about 2,000-2,500RPM). Repeat this for a total of three-to-five passes at 50-percent throttle. The number of passes will be indicative of the engine’s ability to stay within its normal operating temps. Each pass should take no longer than 2.0-seconds per 1,000RPM covered. If it takes longer, move to a lower gear and repeat the test. Do not engage the clutch or put the transmission in neutral during the run-in time. For brake-type chassis dynos, set the load so that the engine RPM sweep speed is between 1.0- and 2.0-seconds per 1,000 RPM. Once these three passes are completed, coast the vehicle down to idle, apply the dyno brake and shut off the engine. Take a cylinder leakdown reading of the easiest cylinder to access and record the value.
At this point the engine should be allowed to cool down for 15-20 minutes. This cooling down period allows the valves to conform to the valve seats while also providing adequate time for heat to transfer from the piston rings that may only be partially seated to the cylinder walls. Repeat the process and record leakdown. Next, raise the rev limiter to 70-to-80 percent of redline. Again, the engine should be started and brought up to operating temp for the next series of pulls. This time the process is repeated to the higher engine speed at 75-percent throttle. After three to five passes are completed, coast the vehicle down to idle, apply the dyno brake and shut off the engine. Take a cylinder leakdown reading of the easiest cylinder to access and record the value during the 15-20 minute rest period before the next set of pulls.
Now the rev limiter can be set to its actual redline. For the final series of passes, throttle will be at 100-percent too. Set the dyno up to record the horsepower from each of the passes. Make the first full pull to redline and then coast the vehicle down to idle, apply the dyno brake and shut off the engine. Take a cylinder leakdown reading of the easiest cylinder to access and record the value during the 15-to-20 minute rest period before the next pull. At this point, it’s essential to keep the time between pulls as similar as possible. Also, try to get the engine coolant, oil temp and intake air temps as similar as possible. This may require a shorter or longer cool down period between runs. During this process, you will hopefully witness two consistencies. First, the power and torque output of the engine should increase with each pull as the ring seal improves with the proper seating of the piston rings against the cylinder wall. Second, the measured cylinder leakdown should decrease with each successive pull for the same reason. At some point in the process, the engine will stop producing additional power and it will no longer show decreases in the amount of leakage from the cylinders. At this point, the rings and cylinders have made a nearly complete or a fully complete setting. An additional two or three pulls should be made to verify this condition.
At this point, the engine oil and oil filter can be changed to the oil that is recommended for normal operation. Since the break-in has been verified as successful and complete, it is OK to switch to a synthetic oil at this point for its superior protection.
Break-In Procedure: Road Warrior
Ideally, you will be able to break-in your engine on a chassis dyno as described above. However, it’s not realistic to address the many that will choose to break-in a new engine on the street. The most important aspect here is to make sure that you have a vehicle that is roadworthy and safe and to choose a location that will not put you or other drivers in harm’s way. The process for breaking in the engine on the road follows a similar pattern to the chassis dyno loading. However, it may require lower gears as to not exceed safe speeds. In this case, a higher number of passes should be made at each stage. Letting the vehicle cool down for 15-20 minutes between road sessions, is key. While it may not be as easy or practical as in the case of the dyno method, taking cylinder leakdown tests to record the effectiveness of the process is essential. These readings will be the only indicator of the likelihood of success in the break-in process.
Winning Results
More power, more torque, improved engine durability, extended engine life, zero blowby and minimal oil contamination are some of the benefits of a proper break-in session for a new engine. While poor machine work and inferior quality components may dictate a different course of action to achieve a proper break-in, the process, procedures and methods outlined here will have excellent results for most good-to-excellent quality engine builds. By employing dyno results and cylinder leakdown results, the progress and success of the break-in process can be tracked. Using these tools as indicators prevents the process from ending too soon (not achieving the desired result) or being pushed too long (creating more wear than necessary). Since any procedure is open for improvement, we’d love to hear about your experience using the Club DSPORT procedure and the results that you obtain.


