If you’re running “hellaflush” levels of negative camber on your streetcar and deem it fast, you should be ashamed of yourself. Extreme camber and an ultra-low ride height may sound like a good idea to some, but there’s a harsh reality that too often goes unknown. This kind of setup burns through tires, stresses suspension components and, worst of all, erases whatever remnants of handling performance your car once had. Achieving a proper alignment for the track may not look as extreme as some of the vehicles that show up to the local late night car meets, but you’ll be well on the path to maximizing grip and improving your car’s handling.
Text by Cameron Parsons // Photos by Cameron Parsons // Illustrations by Paul Laguette
DSPORT Issue #166
The Big Three
Alignment comes down to setting up how your tires adhere to the road surface. Some might assume that positioning the wheels straight up and down and pointing them in the right direction does the job well enough, but this is rarely the case. An effective alignment takes into consideration the contact patch of rubber to the road and how the forces of the vehicle travel through the suspension and tires. There are three primary components that influence these areas: toe, camber and caster.
Making the Turn
Toe-out assists in turn-in response, while Ackerman steering produces additional toe-out when negotiating turns. Nearly every car on the road today features the Ackerman steering principle. As the vehicle travels around a corner (1), the inside wheel (2) angles in more aggressively than the outside wheel (3). This difference in steering angle (4) allows the wheels to influence the steering more naturally, as the inside wheel must travel around a tighter turning radius than the outside wheel.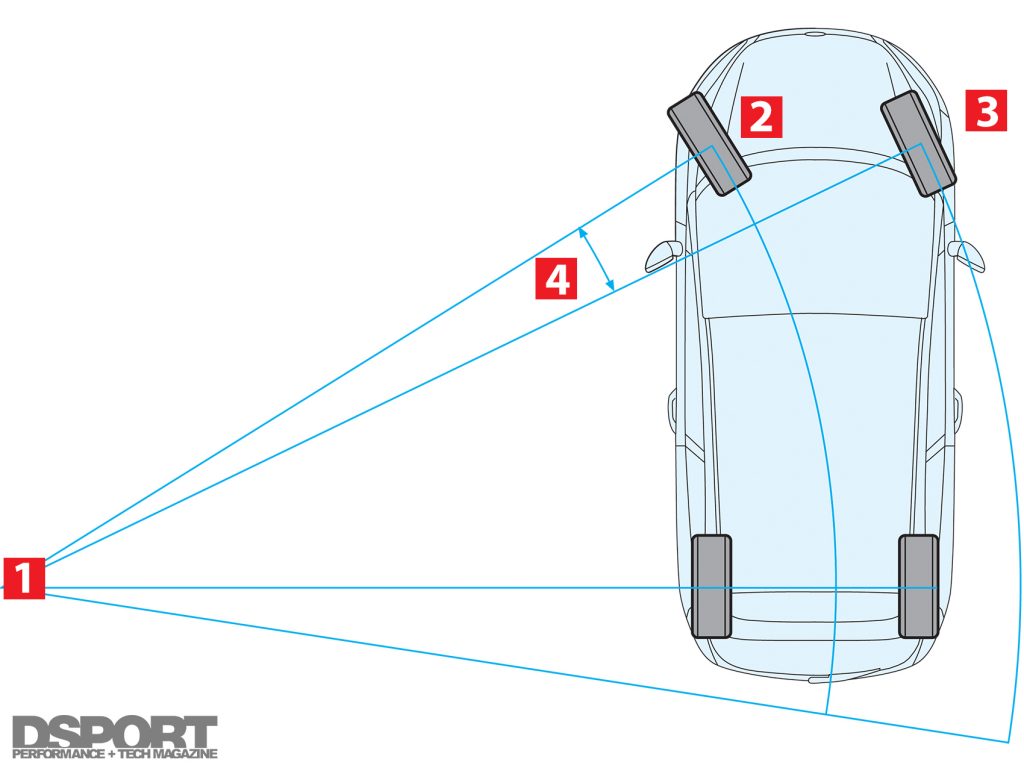
Although most racecars and streetcars both utilize varied amounts of Ackerman steering, racecars generally employ toe-out while streetcars are opposite with toe-in.
Toe to Toe
The simplest and possibly most commonly adjusted setting is the vehicle’s toe. The basic question to ask here is “are the wheels pointed straight?” If the front of the wheels point away from each other, this is negative toe, also known as toe-out. Positive toe, or toe-in, occurs when the front of the wheels point toward each other. Adjusting the amount of toe affects the vehicle’s responsiveness for turning as well as its straight-line stability at speed.
 When driving at high speeds, you’re looking for as little resistance as possible. Four wheels pointed perfectly straight prevent the car from wandering and causing excessive tire wear. However, with the exception of drag racing, the car will have to turn sooner or later. Most drivers prefer a small amount of toe-out on the front wheels for their track setup. This type of setup, if not overdone, assists in the vehicle’s turn-in capabilities. When turning the wheel of a vehicle with toe-out, the inside wheel is angled more aggressively than the outside wheel, providing an advantage in turning response since the inside and outside wheels travel around a different length radius through a corner.
Toe-in delivers an opposite effect, improving straight-line stability at the sacrifice of turn-in responsiveness. To that end, many racers set up their RWD cars with a small amount of toe-in on the rear wheels if the suspension arms allow for changes. Running toe-out on the front end and toe-in on the rear delivers the best of both worlds, with front-end responsiveness and rear-end stability. Keep in mind that these adjustments to the front and rear toe should be minimal, often times only by 1/8- or 1/16-inch. While these settings may prove beneficial on the track, they can prove more costly due to an increase in tire wear, so set it up accordingly.
Tools for Good Measure:
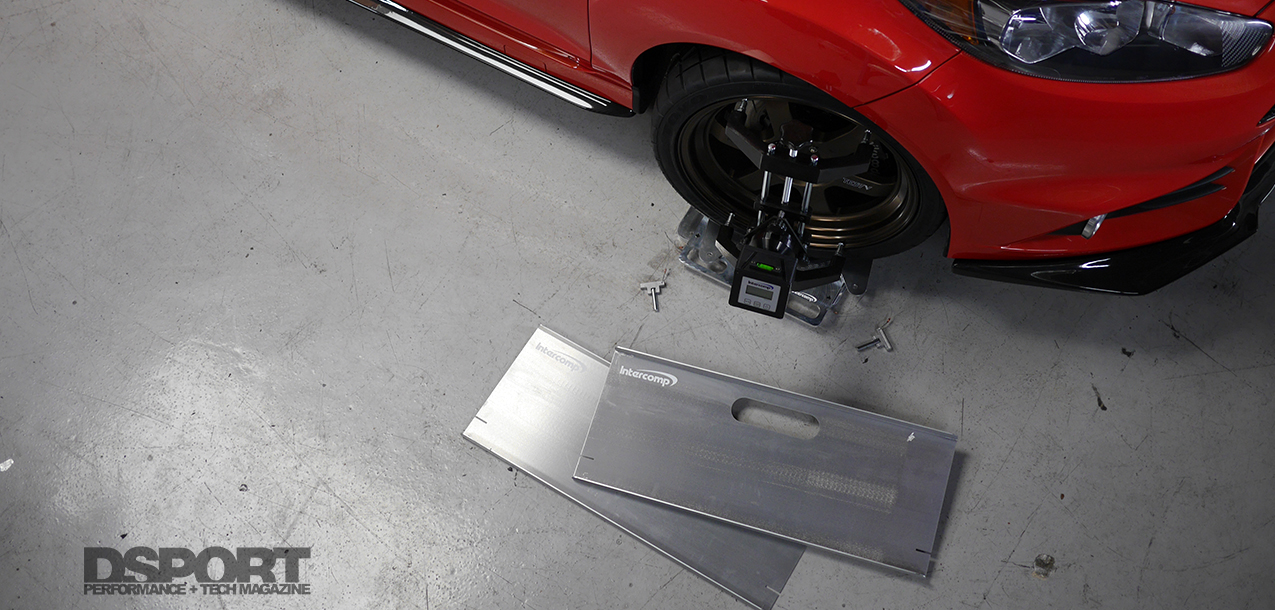
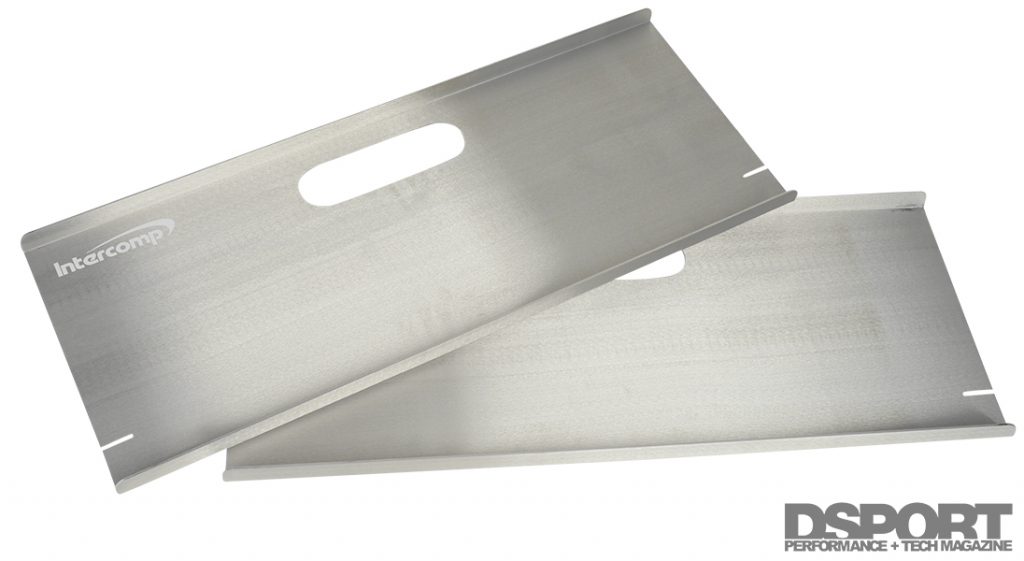
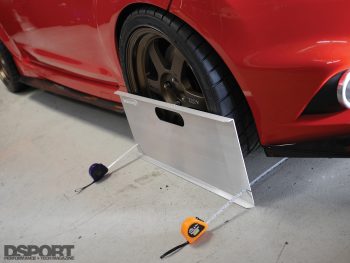
A pair of toe plates (Intercomp part no. 102009) simplify the process of measuring toe. With the car level and steering wheel locked center, each plate secures flat against the two opposing tires. Hook a tape measure on the slot of one toe plate and measure the distance to the opposite side. Once you measure the distances between the front edges and rear edges on the plates, compare the two to reveal where the toe setting currently sits. Most drivers prefer only 1/16- to 1/8-inch of toe-out on the front end to improve turn-in, depending on the vehicle and its drivetrain configuration. Remember, even a small change like 1/4-inch of toe out versus 1/16-inch of toe out can influence the handling and tire wear of a vehicle, so make small adjustments at a time.
Effects of Camber Settings
(1) A wheel with positive camber struggles to grip the road with the full width of the tire, and fights the lateral force of the road pulling sideways against the bottom of the tire.
(2) A wheel aligned straight up and down may appear ideal, however, lateral forces will still pull it toward positive camber and utilize only a small portion of the tire’s available surface (3).
(4) A proper, non-excessive amount of negative camber utilizes the full tire width and aids in exerting downward force to maximize grip.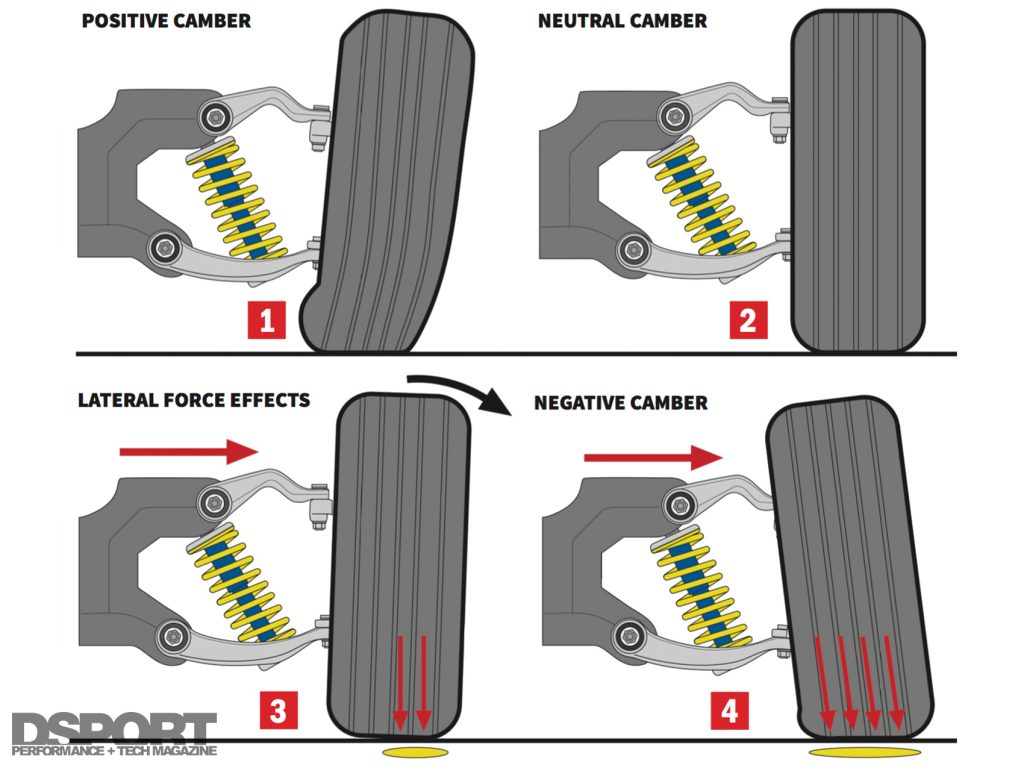
Full Tilt
Camber, the alignment component that visually stands out the most, refers to the vertical angle of the wheels. Here, you ask “are the wheels straight up and down?” If the top of the wheels lean in toward the top of the car, they are set up with negative camber. If the top of the wheels lean outward, they are set up with positive camber. Camber affects the tires’ contact patch and therefore the level of grip on straightaways and through turns.
 Similar to toe, setup is simpler when your plan is to always drive in a straight line. When setting up for making turns around a racetrack, however, you should take the tire contact patch and suspension geometry into account. Driving through a corner at high speeds affects the dynamics of a car and its components in multiple ways. The force of gravity pushes the car down, while the forces from turning attempt to push it sideways. As a result, the weight of the car shifts down and toward the outside wheels, compressing the dampers and springs. Assuming that suspension travel allows the wheels to move only straight up and down, the outside tires work their hardest to grip the road surface in this situation, flexing the tire, wheel and suspension in the direction of extra positive camber.
Camber setups for the street differ greatly from track setups, as the latter sacrifices tire wear in order to enhance grip. Although the details and reasoning for camber setups may sound complicated, finding the right setup for your car and driving style on the track is easier than you might expect. As we discussed in the tire tuning article in issue #160, you can learn a lot by measuring your tire temperatures. Since ideal camber maximizes the contact patch with the road surface, utilizing the full width of each tire for grip, a consistent temperature (within five- to ten-degrees Fahrenheit) across the inside, middle and outside of each individual tire would reflect an optimal setup. Once you find this baseline, you might fine tune for slightly higher temperatures on the inside and middle of the tires than on the outside, depending on the car. If 0.5-degrees of negative camber results in high temperatures on the outside of the tires and cold temperatures on the inside, this shows that the outside of the tires are doing all the work, while the inside and middle are simply along for the ride. In this situation, you should experiment with increasing to a full degree of negative camber to take advantage of the full width of the tire and gauge the results.
Tools for Good Measure:
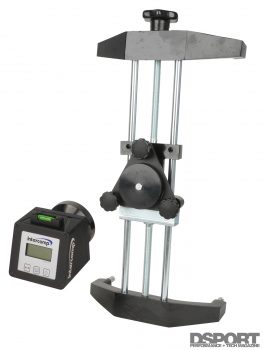
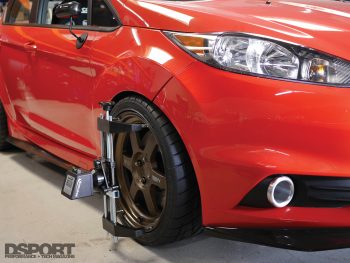
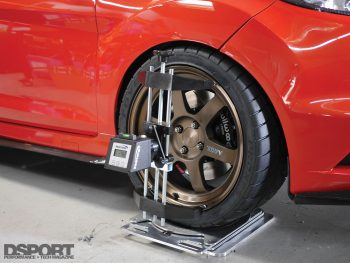
For dialing in camber, a digital gauge for precise measurements is a must. A purpose-built digital caster and camber gauge (Intercomp part no. 100005) and rim clamp (Intercomp part no. 100007) together provide the means to set the camber angle exactly to your liking. Using the clamp and gauge to mate perfectly flat with the wheel will display the amount of camber, negative or positive, to one-tenth of a degree. Increments of one-half of a degree at a time will usually provide a noticeable difference in drivability, tire wear and lap times. On rarer occasion, highly aggressive setups for streetcars and racecars at the track can reach up to three-degrees of negative camber and still prove beneficial. If you take it much further than that, you better be driving a Formula One car.
 Caster Settings
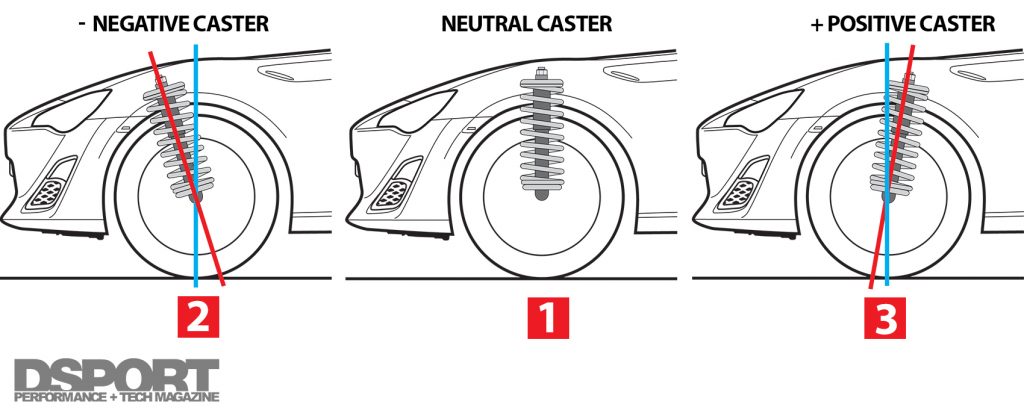
(1) Caster is based on the axis at which the wheel pivots or turns. If this axis were straight up and down, the car would have neutral caster.
(2) Positive caster increases negative camber gain while turning, thus increasing grip. It also improves straight-line stability, but at the cost of increased steering effort.
(3) Dialing the setup toward negative caster reduces effort required to turn the wheel. However, cars do not utilize negative caster as it causes the vehicle to wander.
Forward and Back
Caster, often the most difficult component to visualize, refers to the angle of the steering pivot point. Viewing the car from the side, draw a straight line connecting the upper and lower ball joints or lower ball joint and strut tower mount to determine this steering pivot angle. The caster is considered positive if the line is angled forward, and negative if angled backward. The caster angle influences the vehicle’s stability at high speeds, the front wheels’ camber in relation to steering angle, and effort required to turn the wheel.
 Caster often goes untouched or at least less frequently changed when at the track. Most racers prefer positive caster anywhere in the range of two- to five-degrees, as it enhances stability at high speeds and increases tire lean (as if adding negative camber) when turning. The same effect applies to the front wheels on a shopping cart (also positive caster), which tend to hold straight when the cart is in motion. The main downside to positive caster is that although it generally improves grip and stability, it requires more effort from the driver to turn the steering wheel. Many people believe that driving a car is easy and effortless, but a couple laps in a properly set up racecar often leave them questioning the effectiveness of their current workout routine. Many drivers come to the crossroads where they must choose to either reduce the caster or raise their workout intensity.
Tools for Good Measure:
Measuring caster is done in a very similar way to measuring camber, with the help of a caster and camber gauge (Intercomp part no. 100005) and rim clamp (Intercomp part no. 100007). A set of turn plates (Intercomp part no. 102007) simplify the process even further. With the front wheels on the turn plates, turn them to either the 15- or 20-degree mark (turn right if measuring the right wheel, left if measuring the left ). With the clamp and gauge mounted to the wheel and set to caster mode, level the gauge and then zero it. Turn the wheel to center, and then to the opposite 15- or 20-degree mark. Once stopped at this angle, level the gauge again and it will provide the caster angle.
Everything in Moderation
Nearly every vehicle component that you can adjust or tune has a sweet spot. Going full so on the chassis and suspension may lead to excessive body roll and a high-grip but sloppy handling. However, a fully stiff setup can make for dangerously snappy oversteer and put you into a wall. Somewhere in between lies a healthy compromise that matches the car’s driving potential to your driving style and ability. When working with alignment settings, you’ll find that small changes make a big difference in your car’s behavior, and that every car responds to these changes differently. Factory settings often serve as the best baseline to start with, before proceeding to make minimal changes based on what sort of performance you crave out of your vehicle. Next time you find yourself at the racetrack, take notes on how the car drives a er each session. Focus on one element at a time, such as turn-in, stability or grip levels, and make only one change at a time in an effort to improve performance. It won’t be long until you find yourself driving circles around those “hellaflush” show cars.