
DSPORT Issue #236
Text by Bassem Girgis // Photos by Joe Singleton
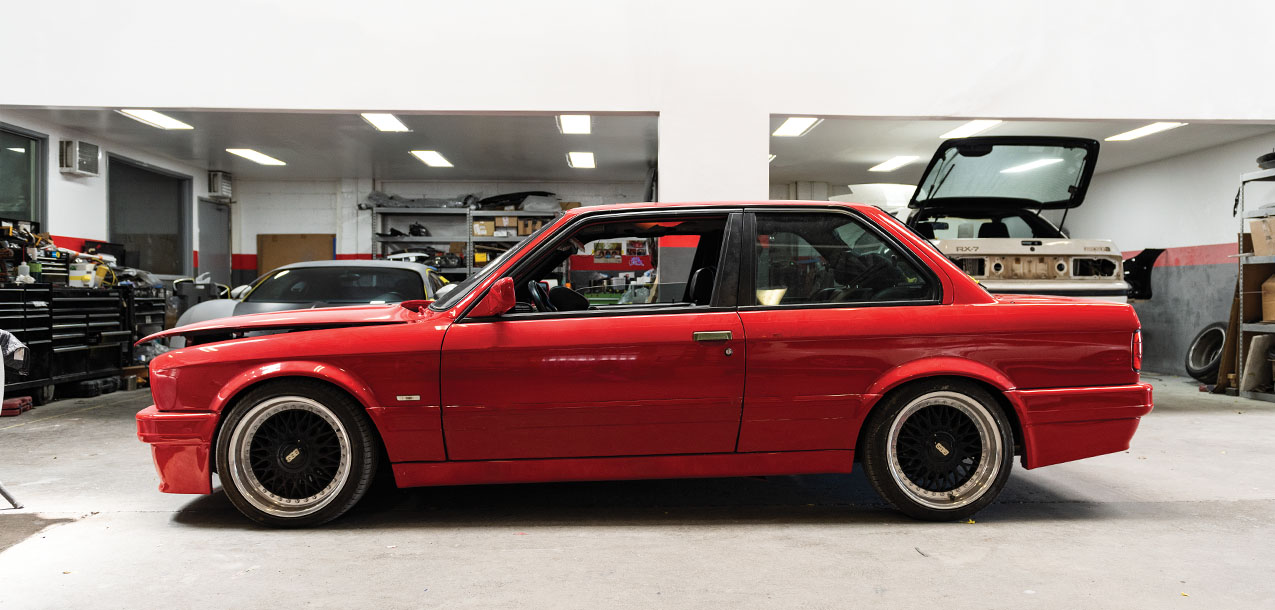
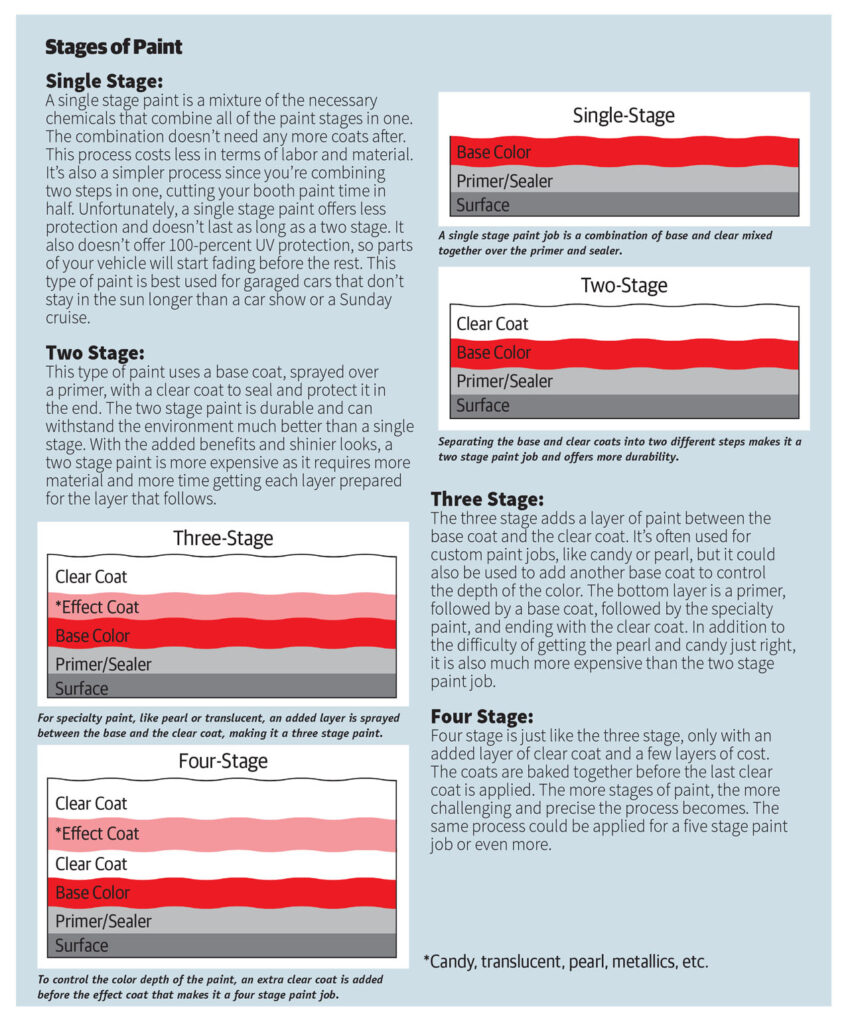
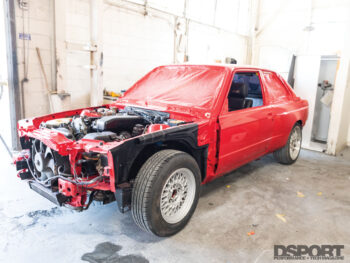
In 2017, we picked up a second generation Lexus LS400. After wondering why our intern would do that, we all started believing in the project based solely on her passion. It was set to turn into a VIP style vehicle, which meant a great paint job would make or break the plan. After sitting for nearly five years, it was time to finally get the LS400 out for paint and get project Love Story back on track. We reached out to our friends at DTM AUTOBODY to transform her vision into reality. We’ve featured numerous cars sporting DTM AUTOBODY’s work, proving they’re capable of providing show-quality paint jobs. The process of painting a car is much more involved than one may think. These are the basic stages of an automotive paint job and what you could do to minimize the cost and maximize the results.
The Trifecta
Any paint job will involve three things upon initiation: the decision, the assessment, and the plan. The first of the trifecta is the decision. Beyond the decision of painting your car, you have to decide on whether you are doing the same color or a color change, the type of paint, and how many stages of paint you would like. The second of the trifecta is the assessment. This includes any damage to the body that would need to be addressed or any areas of concern, like rust. Finally, the third of the trifecta is the plan. This usually aligns with the first of the trifecta, which includes the budget and timeline. The same color paint would cost much less than a change of color, the same goes for whether you choose a single stage paint, 2-stage paint, 3-stage paint, or more. As for the timeline, this is usually a concern for someone with a deadline. If it’s a SEMA build or you’re trying to finish it before the car show season, you will need to change some things to meet your deadline, or perhaps even do some of the work yourself to speed up the process. Once the trifecta is met, the 11 stages of paint start. You have a decision in each of the stages to increase quality, save money, and possibly even give yourself something to do.
Stage 1: Disassembly
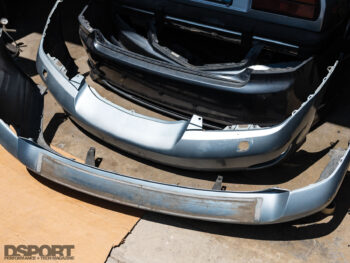
Perhaps one of the stages where you have the most control over, doing the disassembly yourself can save you a ton of money. Anything that you don’t want painted should come off the vehicle. Paint shops usually bill you hourly for labor, so the more you can save them on hours, the more they can save you on dollars. If you are only painting one door, you don’t have too much to remove; however, if you are doing a full body paint, then you’ll have to remove everything on the body, including headlights, taillights, grille, side markers, and just about everything that is a different color. If you are aiming for a change of color, you will have to remove the interior as well to get inside the doors and cabin to match the exterior, as well as the doors, hood, and trunk to allow for better access to sanding around corners. You will also need to remove the engine to sand and paint inside the bay. Changing the color will cost much more in labor rather than the paint material itself. So if you are willing to do the first two stages on this list yourself, you could change the color of the car without paying more than double the cost of a same-color paint job.
Stage 2: Stripping
There are three main ways to strip the existing paint on your vehicle: chemical paint removal, manual paint removal, and sandblasting. The first method is chemical paint removal. As the name implies, this method involves using a chemical removal on small parts of the vehicle, stripping the paint, then moving on to the next part until the car is completely stripped (given you are completely stripping the paint and not painting over it – if you are painting over your OEM paint, see Stage 3). Chemical strippers can be done using high pressure machines; however, the process is not gentle on the body panels. The second method is the manual paint removal, which is also the most time and effort consuming. This involves sandpaper, a lot of arm strength, and even more will. For the ones looking to do it themselves, the second method is the safest and involves the lowest risk of harming the body, while also being the least expensive way (although the most effort). The sandpaper method will require multiple grades of sandpaper. Starting with rough grit sandpaper and ending with a finer grit (if stripping down to bare metal). This ensures you don’t gouge the metal once the paint is stripped. You can also use an electric sander to expedite the process. Sandblasting may be satisfying to watch; however, it does present quite a risk and could warp some of your panels if you do it for too long on the same areas. Our recommendation if you want to do it yourself would be to start with a sander, and end with fine-grit sandpaper to ensure you don’t damage the metal.
Stage 3: Blocking OEM Paint
Believe it or not, most paint jobs don’t involve stripping the paint to bare metal. The OEM paint can serve as a great foundation for the new paint. Before spraying paint over it and expecting it to stick, however, you have to block the OEM paint to make sure it’s straight with no bumps or irregularities. More importantly, you have to create a rougher texture so the new paint can stick to it, the same way you would approach the primer. Blocking the OEM paint requires sanding it down, starting with a rougher sandpaper, and making your way down to finer sandpaper. During this process, you could potentially hit bare metal depending on how thin the paint is or how much you had to sand it down to get that flat, straight surface. When you hit bare metal, you’ll have to primer that spot and sand it down until you get it even with the rest of the paint before moving forward in the stages.
Stage 4: Address Body Work
Love it or hate it, you have to do it. If you want your car to have a great paint job, you have to address everything from rust spots to small dents. The body needs to be perfectly straight before applying primer and initiating the paint job. Tackling this stage yourself will come down to your experience and level of comfort. Body work is one of the toughest aspects of automotive repair. You have to ensure the body is perfectly straight before expecting a good paint job. While the smallest dents may not show on your 20-year-old paint job, it will definitely be the highlight of your fresh, new one. The bigger types of damages, like rust, would require welding and it’s not recommended for enthusiasts without prior bodywork experience. Take your time addressing every flaw before attempting to paint the car.
Stage 5: Primer
This coat of paint-like substance helps your paint adhere to the bare metal of the car. Without it, the paint won’t bond to the vehicle, forcing your paint to peel off and leaving you with bare metal and rust. In addition to serving as the bond between your paint and vehicle’s body, the primer also provides added protection from rust and moisture. With the car stripped down and the body work addressed, the primer is applied as the first coat of paint on your vehicle. Primer is used to fix any imperfections in the body itself. The primer alone won’t be enough, however. While it provides the right protection, an added layer is needed for adhesion.
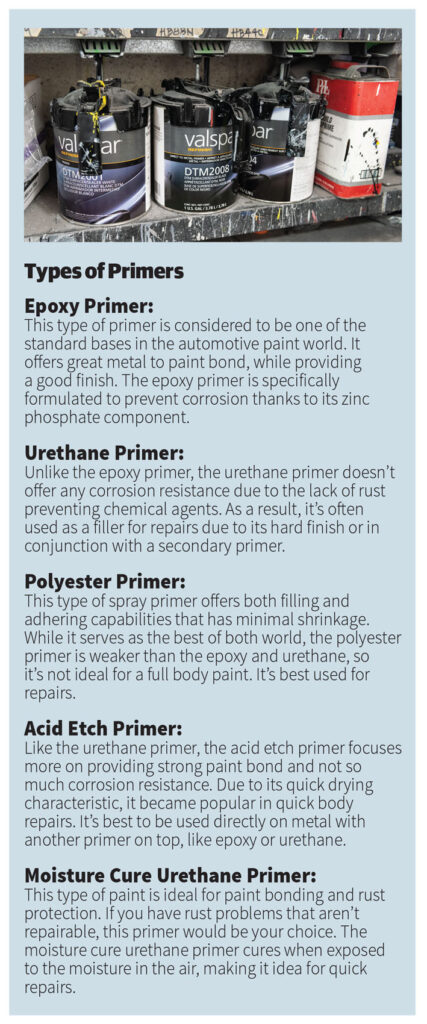
Stage 6: Blocking Primer
Applying a coat of primer is not the final step before the base coat; you will have to block it first. Blocking the primer requires putting the primer on, sanding it down, then rinsing and repeating when needed. This ensures there are no scratches on your primer, as well as providing a smooth, straight surface for the paint. More importantly than smoothing out the surface, sanding gives it a rough texture that is crucial in the mechanical adhesion of the paint. The rough texture, however, is fine enough that it won’t be seen when the base coat is applied. You can use a dual action sander gently on the flat surfaces, but you will have to do some hand sanding on non-flats. Sanding primer usually starts with 80-grit sandpaper, then 180, 220, 320, 400, and sometimes 600. On solid colors, like black paint, 400-grit is all you need as your final sanding. However, for metallic colors, you should end with 600-grit sandpaper. This ensures the metallic particles don’t fall into the sand scratches and show up on the paint. Always clean the surface between sandpaper change, and wash it with water and soap in the end before moving on to the next stage. Be open to obstacles arising, like going through the primer, putting more primer on, then sanding again.
Stage 7: Sealer
We’ve discussed primers and their abilities to repair and offer a bond between the paint and the body, but like the saying “a jack of all trades is a master of none,” you need an additional step to ensure perfect bonding. That’s when primer sealers come into play. Primer sealers are non-porous, which means they resist absorbing water or moisture. This allows it to create a tight barrier between the primer and the base coat, as well as reduce any reactions that can cause the paint to lift. More importantly, sealers have the main job of increasing adhesion. They are not designed for repairs, instead, they form a tight bond to increase the paint life. There are sealers that require sanding; however, if you sand your primer properly, you should use a sealer that doesn’t require sanding to avoid having any dirt or debris before the base coat, which could cause problems like fisheye finish on your final paint.
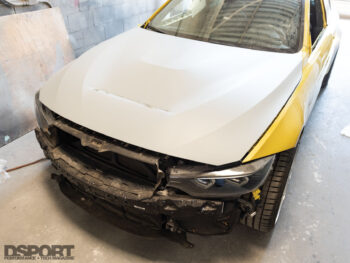
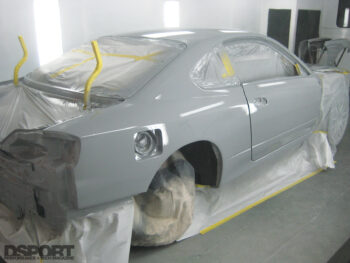
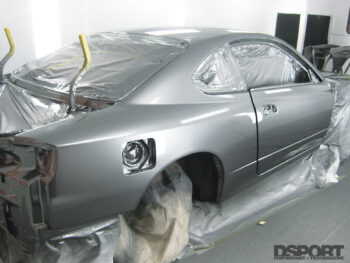
Stage 8: Base Coat
A base coat is the paint that will go over your primer and sealer. There are two types of base coats: solvent-based and water-based. Due to government regulations, the solvent-based paint is quickly exiting the scene and water-based paints are becoming more popular. The solvent-based paint contains 84-percent solvent content called VOC (Volatile Organic Compound) and 16-percent solids. The VOC has been proven to cause health damage, so a move to water-based paint, which contains 70-percent water, 20-percent solids, and 10-percent solvent, has been in the works to becoming the standard. The water-based paint is considered better for health, the environment, while requiring less clear coat and providing brighter, clearer paint. Base coats are not hardened, however, they are simply raw paint. This means it has no protection, which is why a clear coat is a must.
How many coats of base paint will vary depending on the color of your primer in relation to the color of your base, as well as how much sanding of the base coat is needed. Spraying white paint over black primer will usually require a thicker coat of base in order to cover the dark primer. The same goes for light base over dark primer. It’s best to apply a thin coat of base, sand for any imperfection, then do another coat. It’s not the base coat’s job to do any type of protection, so don’t add more coats to achieve that. This will be the role of the clear coat. There are absolutely no benefits to too many color coats. The general rule that paint shops go by is three coats. They simply add more coats to achieve the true color and not a watered-down version of the color. Deeper colors tend to require more layers to achieve the same color intended.
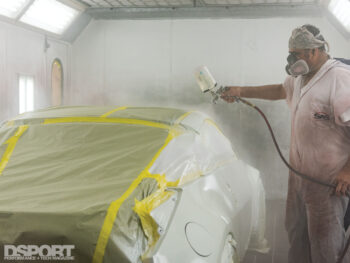
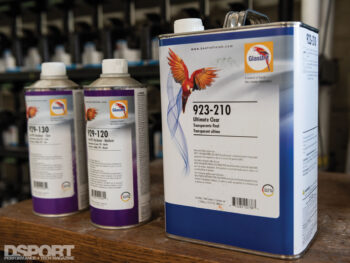
Stage 9: Clear Coat
The clear coat is applied over your base coat simply for protection. Mixing the base coat and the clear coat in one batch is known as a single stage paint. Applying a clear coat over your base coat is known as a two-stage paint. The clear coat has no color, but it’s applied to your base coat to protect it from any dirt or debris that could scratch your base coat and expose your primer. Most clear coats also offer UV protection. This protects your base color from fading when exposed to UV rays. In addition to the protection, the clear coat gives your car that clean, glossy finish that maintains its new look with the proper maintenance.
When choosing a clear coat, you will have to consider its gloss level, transparency, and UV protection. The gloss level is measured from 0-100. Zero being the least glossy and 100 being the highest gloss. While all clear coats are non-pigmented, their level of transparency could change the color of your base paint. Choosing the most transparent paint will give you the same look you saw before applying it, only shinier and glossier. Finally, to avoid fading, always choose a clear coat that is formulated with UV resistant compounds. The thickness of the clear coat is crucial. Each time you buff your car, it takes a small layer off the clear coat. Eventually, you will end up with no clear coat at all. Too thick of a coat, however, and you can start seeing orange peel. Too many layers of clear coat could also make it less flexible and more susceptible to cracking. Three layers of clear coat that isn’t applied too thick is the magic formula for a long-lasting clear coat that looks glossy and shiny.

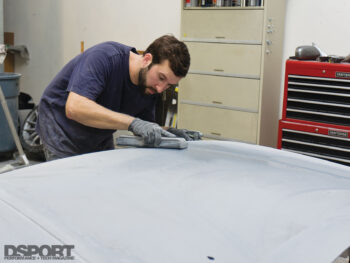
Stage 10: Color Sanding
Between the clear coat and the celebration, you will have two stages to get through. To prepare the clear coat for the final stage, you will need to color sand it. This is where you get your clear coat to be as smooth as possible to achieve the glossy look you’ve envisioned when you decided to paint your car. A bucket of water, a drop of dishwashing soap, and a variety of sandpaper is all you need to get this stage done. The first time around, using a 600-grit sandpaper will eliminate the risk of orange peel or major defects in the clear coat. This will be followed by much finer sandpaper, like a 1,500-grit, to fully smooth out that surface. The trick here will be to sand the clear coat evenly, getting rid of any high spots or faded areas. You may have to switch back to a 600-grit sandpaper for the dull areas, but be careful not to take too much off the clear coat.
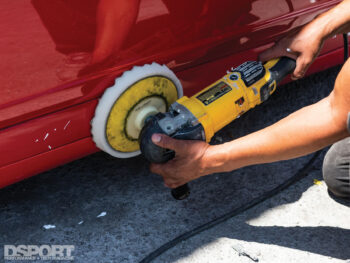
Stage 11: Buffing
Buffing is the very last stage of automotive paint. Buffing applies a polish to your paint and is usually done using an electric buffer at low speeds. This will remove any small scratches caused by the last stage from the sandpaper. If you see swirls left on the paint, you can use a softer buffing pad with a finishing polish and go over it again. For added protection, apply a coat of wax after buffing. This serves as an added layer over your clear coat.
The Quality
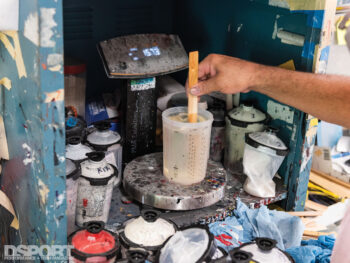
There are a few key factors that can make a paint shop better than another. Wages can make or break a paint shop. If the paint shop charges the customer $20 per hour in labor, it means they pay their employees minimum wage to be able to offer such competitive price. This simply means unqualified assistance. Given how many critical steps go into a solid paint job, it’s clear that skills are even more important than the quality of paint material. With unskilled painters, attention to details end up going out of the window as well. While a reputable paint shop won’t start on a vehicle before every last flaw is addressed, cheaper paint shops tend to overlook the smaller imperfections. The other factor is the quality of material, even down to the sandpaper. A quality sandpaper is not the same as a no-name brand. Poor quality sandpaper could create non-uniformed texture that could result in a poor paint job.
The True Cost
While labor plays a much larger role in the receipt you will receive for your car paint, material could also be quite costly. According to Long of DTM AUTOBODY, the clear coat alone for a 2-stage paint job could cost $300-$400, with an additional $300 for the base coat, and over $750 worth of material to get the job done. This is enough to make you wonder how some paint places could afford to charge $399 for a full paint job. The reality is, for a full restoration on an older car, you should expect approximately 200-man hours for the work at $75 per hour (Orange County, CA), 50-hours for preparation, and the material involved. For a modern sports car like a Subaru BRZ, 50-man hours and prep time could get the job done. If you’re painting a sedan, you can expect to add 10-hours to this tab.
Reality Check
While doing the disassembly, stripping, and primer work yourself could save you a large chunk of the money, you have to talk to your paint shop first. In reality, paint shops don’t recommend this practice. The first problem with this is the alignment of all the panels. If they don’t remove the parts and they don’t get to put it back themselves, you can have misalignment problems that they simply can’t help you with. The other issue you could face here is compatibility. Paint shops use material that they’ve worked with and believe in. If you use whatever primer you get off the counter, you may be forcing them to put in more work to remove it and use the compatible primer they are used to. The best thing to do is to talk to your paint shop and clearly ask them what you can do to lower the cost.
The Bottom Line
Painting a car from A to Z is definitely not a DIY project you should tackle unless you are a professional. However, there are at least four stages out of the 11 stages that you can do to save yourself a good amount of money. When choosing the right shop to do your paint, ask questions, look at examples that they did, and discuss the things you plan on doing yourself. In the end, having a show quality paint job is no easy feat, but cutting on the cost by doing some of the work yourself and choosing the right shop could get you there.
