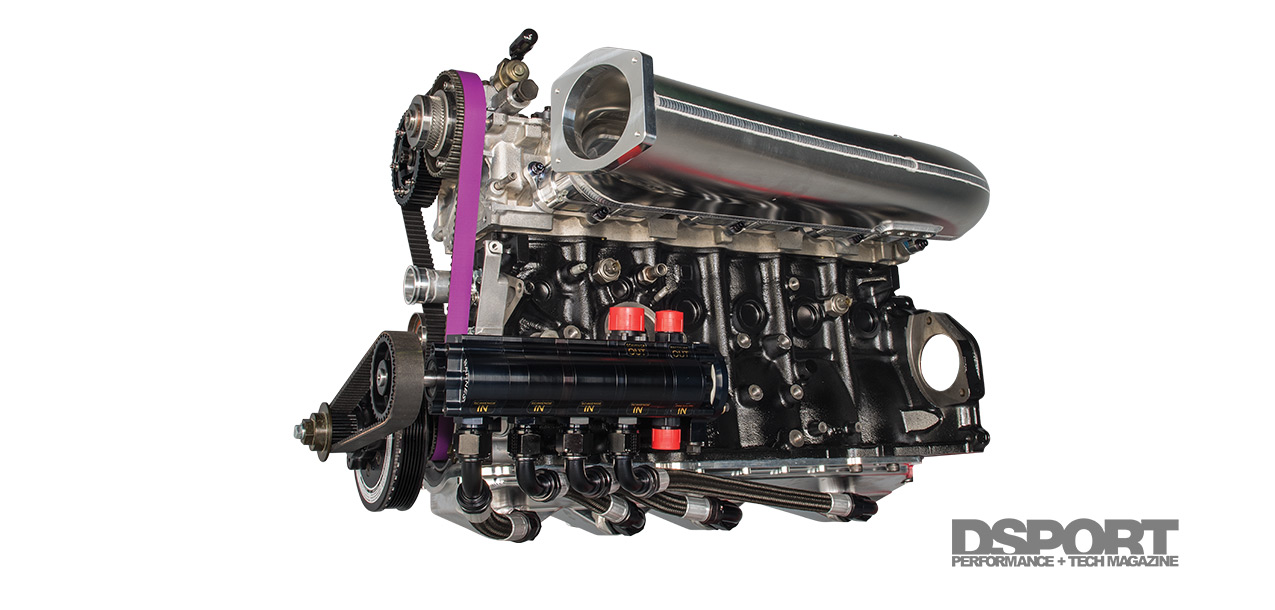
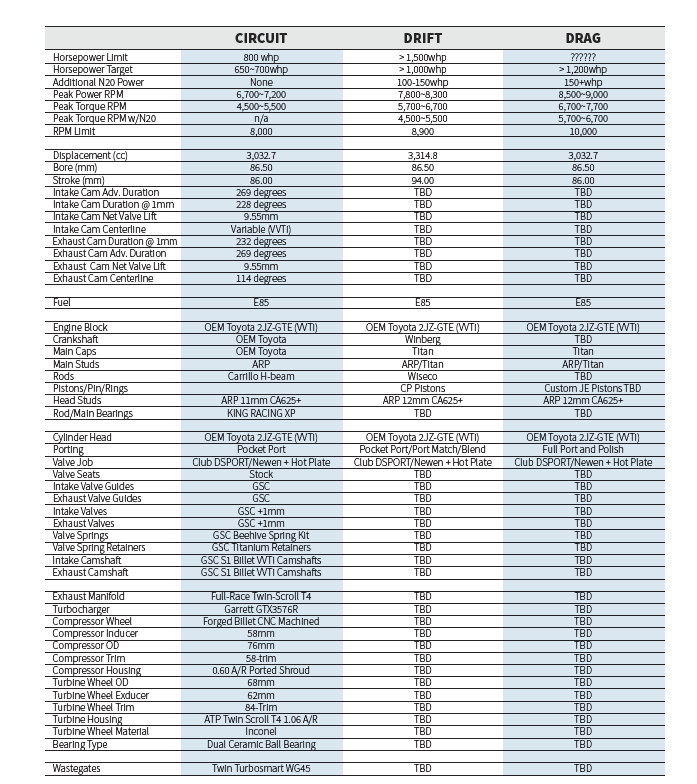
Chances are you’ve fallen into watching an episode of Iron Chef. If you haven’t, the format pits visiting chefs against one of the resident Iron Chefs at Kitchen Stadium. Both the visiting and Iron Chef must come up with original recipes around the same theme ingredient. When Club DSPORT was tasked with building a number of Toyota 2JZ engines for different applications, we thought there would be no better way to showcase the versatility of this popular platform. After outlining the origins, strengths and weaknesses of the 2JZ engine platform, we’ll showcase a detailed and complete 2JZ build for circuit, professional drift and drag racing over multiple installments.
Text by Michael Ferrara // Photos by Joe Singleton
DSPORT Issue #184
Power Potential
Thanks to a full 3.0-liters of displacement and thick cylinder walls, Toyota’s 2JZ inline-six-cylinder engine has proven to be an excellent platform for high-horsepower builds. As with any engine platform, additional upgrades need to be made as power handling demands and the percentage of time at full power increase. Hence, a 1,000whp 2JZ engine requires different parts and processes than a 600whp engine. A 1,000whp 2JZ optimized for a street car would be considerably different than a 1,000whp 2JZ used for professional drift competition or endurance racing where an engine is at full power for a greater percentage of its operating time. Fortunately, the 2JZ three ways series will cover a pretty wide gamut while delivering some tasty recipes for peak performance, reliability and efficiency. Before we get into the specifics of the 650-700whp time-attack/circuit 2JZ build, let’s take a look at the processes at Club DSPORT for any 2JZ build regardless of power output.
Block Prep
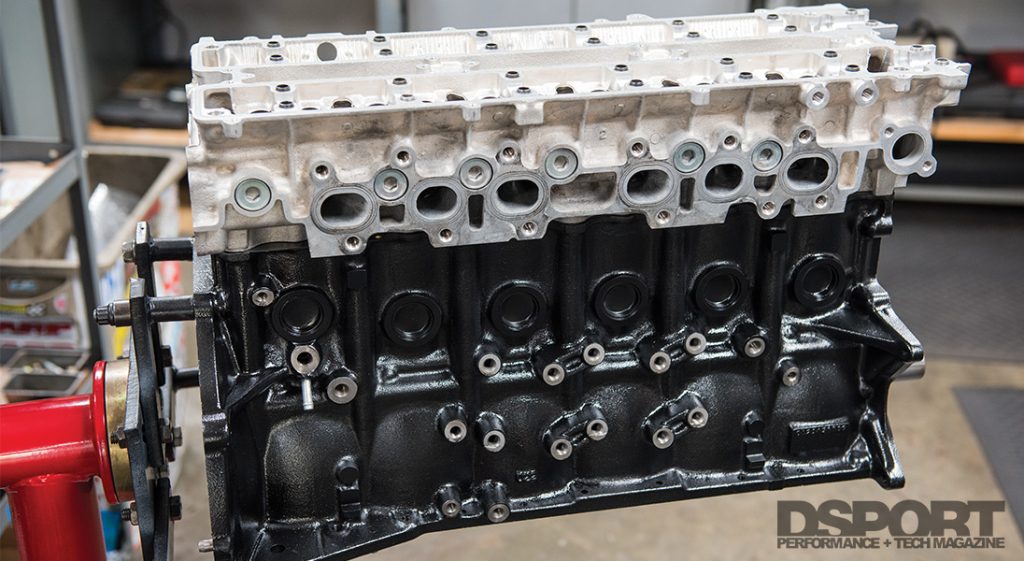
While corrosion can affect any engine block, the 2JZ’s cast-iron material and its siamesed cylinders make it prone to overheating. When significant corrosion occurs, coolant passages become blocked. Since the 2JZ block has siamesed cylinders (adjacent cylinders share a common wall) there is no coolant flow between the cylinders and this causes a localized hot spot that can vaporize the coolant. Toyota addressed this by incorporating steam holes in the deck surface. It is these small holes that often become corroded and clogged. If not properly addressed, these will cause overheating issues and potential engine damage from resulting detonation.
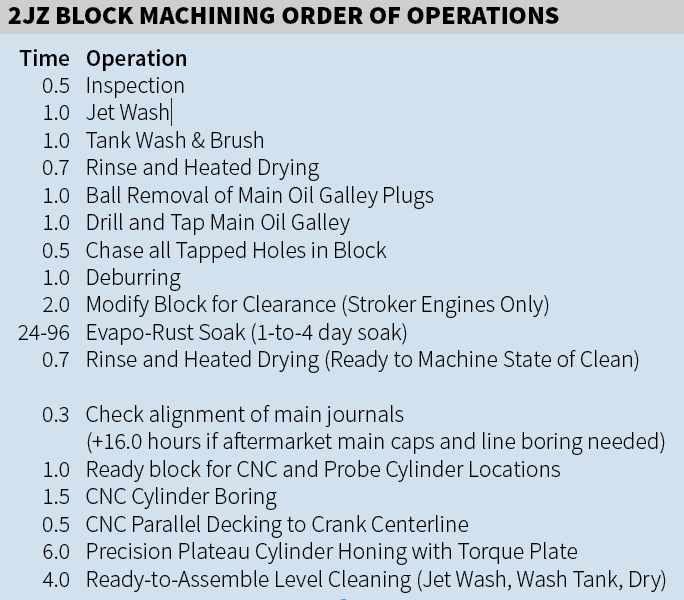
After a visual inspection, every used 2JZ block built at Club DSPORT is subjected to a thorough round of cleaning in the jet washer. After jet washing, the block is placed in the wash tank to be hand washed while all of the reachable passages are brushed clean. The block is then rinsed before drying in the oven. Next, the balls that block off the main oil galleys must be removed from the block. This requires the TIG welding of a stud to each ball and the use of a slide-puller to remove. Removal of these balls allows direct access to the main oil galley which must be completely free of contaminants. The holes where the balls previously resided are tapped for pipe plugs. At this time all of the threaded holes in the block are chased with a tap to clean the threads of any contaminants or corrosion. From there, the block receives a deburring. If a stroker crankshaft will be used, the block will also have reliefs ground for clearance of the rods at the bottom of the cylinders. After the chips are blown off the block, it’s time to let the block soak in Evapo-Rust to remove rust from the block. Depending on the amount of rust in the block, a one-to-four day soak is usually performed. After the soak, the block is allowed to air dry.
Times listed above are averages for 2JZ engine blocks. Typically, 20-to-38 labor hours and an additional 24-96 hours of soak time are required to meet Club DSPORT Reference specifications.
Block Machining
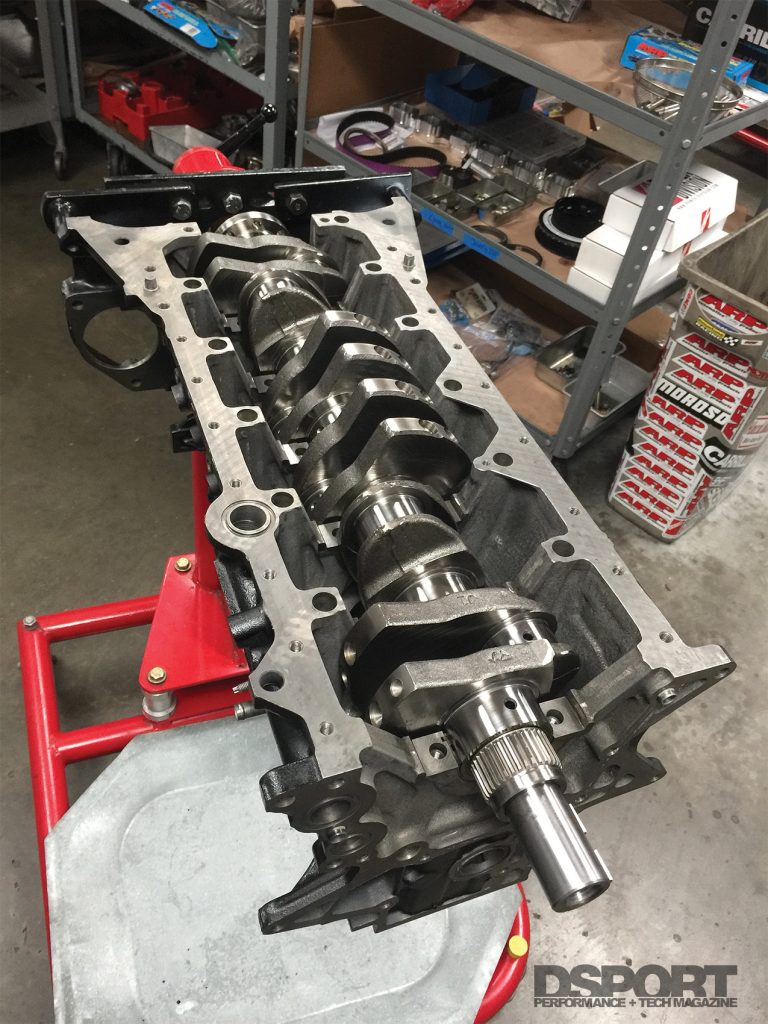
The block is now in a ready-to-machine state of clean. From here, the block is placed deck side down on a granite block so the main journals can be checked for sizing and alignment. If they are out of spec, the block will need to be line bored to be corrected. Any block failing this test may be considered a candidate for aftermarket main caps and a line boring operation. This process is also recommended on any application over 800whp and on endurance applications over 700whp (we will cover this process in a Part 2 along with the 12mm head stud conversion also recommended for exceeding 800whp). If the block’s mains are in alignment and in spec, the block is readied for the 4-axis CNC engine machining center by placing 2JZ adapter rings on the 2.0-inch main bar and installing the bar into the block.
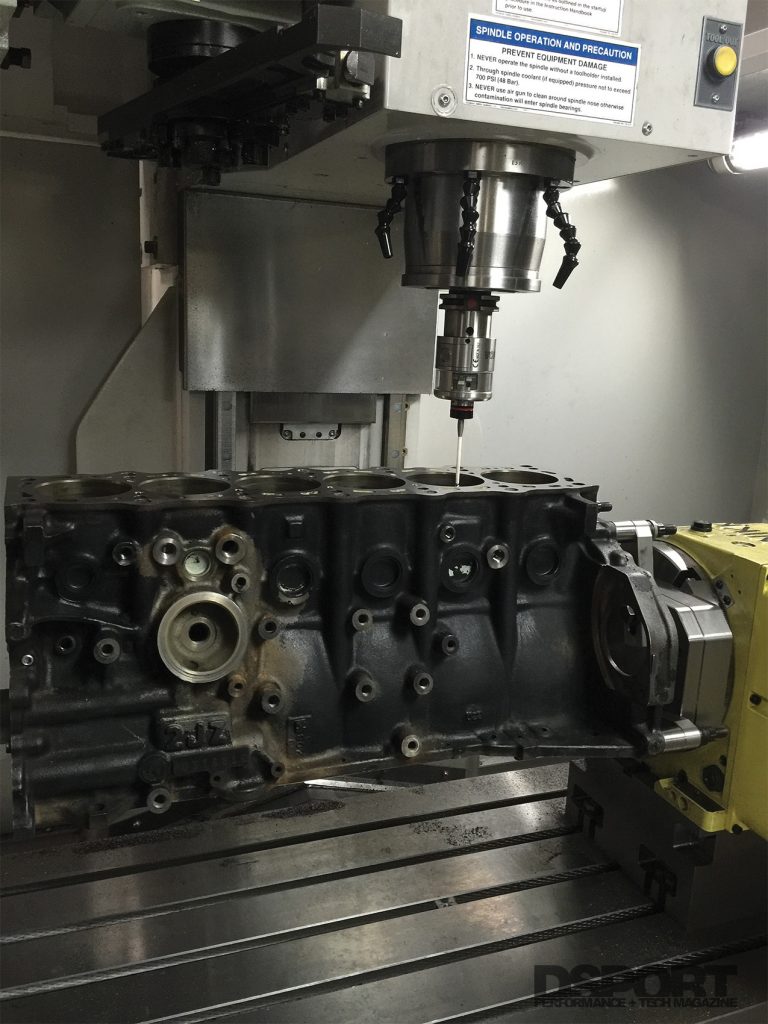
The first operation in the CNC machine probes each of the cylinders to establish each cylinder’s exact location relative to each other. These numbers are compared to the factory specs and adjustments are made if there are benefits to offsetting the cylinder position. Boring of the cylinders is done with precision boring heads fitted with CBN cutters set up to the proper dimension thanks to the optical tool setter. The cylinders are bored about 100-125 microns undersize so that there is enough material left for cylinder honing. Once the cylinder boring cycle is completed, the deck surface is machined removing the least amount of material necessary for a flat and defect free surface. In most cases, 0.0015~0.0035” of material is removed. At this point, the cylinders are probed for the final time to record the final positions on the build sheet. The finish of the machined deck surface is also checked with a profilometer to ensure that surface roughness is minimized. At this point, the block leaves the CNC machining center for the final machining operations.
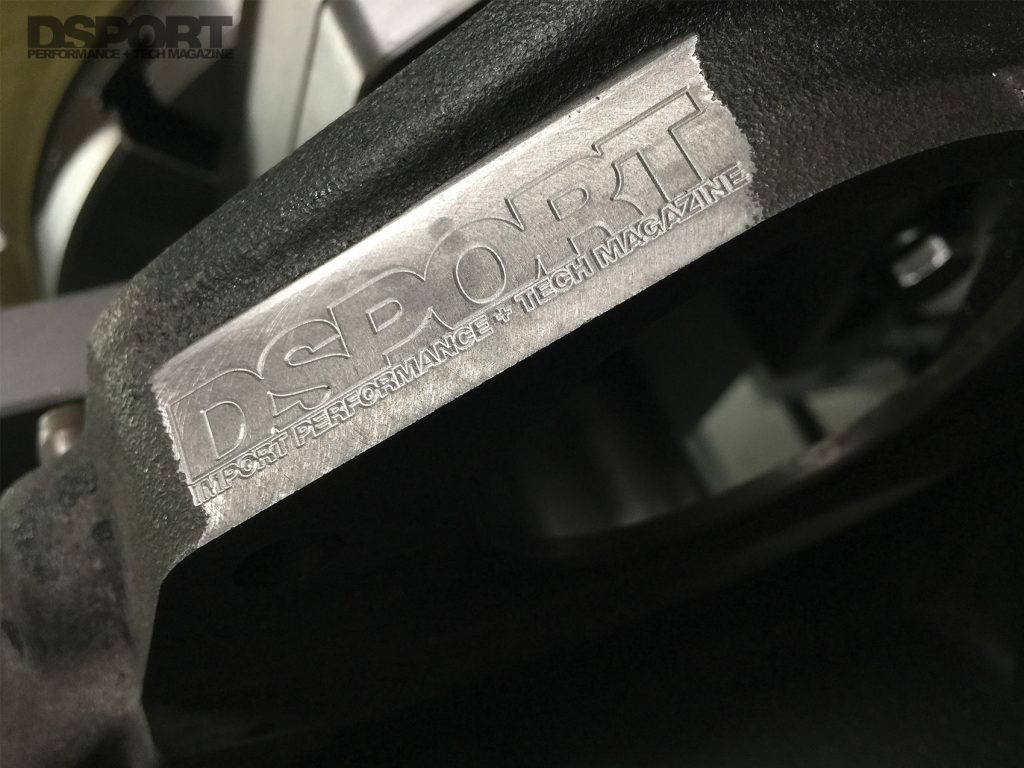
To identify the block as a Club DSPORT Reference-Series 2JZ, the DSPORT Magazine logo was machined onto the bellhousing area.
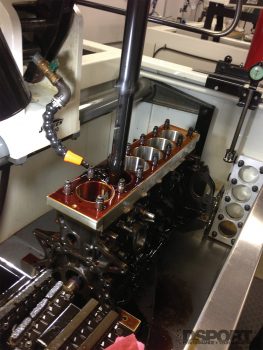 With the 2.0-inch main bar removed from the block, the block receives a quick blow off before being set into the cylinder honing machine. Once secure in the Sunnen SV-10 Cylinder Hone, a torque plate is set in place with the same brand head gasket and head studs that will be used. In this case, a set of ARP CA625+ head studs were torqued up to secure the Toyota OEM MLS head gasket in place. After a measurement of each of the pistons, the dial bore gauge is set up for the desired bore size that delivers the proper amount of piston-to-wall clearance. The honing process uses a unique combination of standard and diamond abrasives to achieve the desired finish. While Sunnen advertises the SV-10 as an automated cylinder hone, best results require an experienced operator. The right “feel” is required to maximize roundness, minimize taper, hit the final bore dimension and achieve a matched surface finish in each cylinder. The operator is literally trying to accomplish four things at once. A profilometer is used to check the surface roughness of each of the bores while using different “grit” diamonds or vitified stones to achieve the same surface finish in each cylinder. Even though every cylinder is made from the same material, the hardness of each cylinder wall varies. As such, a different combination of diamonds and stones may need to be used on each cylinder to match the finishes. This time consuming process may take the better part of an entire day. Once a matched cylinder finish has been achieved at the final bore dimension, the machining processes for the engine block are completed. After a thorough cleaning, the block is ready to become the home for the rotating assembly.
Build #1: Time Attack
While the block machining for all three performance combinations will be virtually identical, the selection of parts will vary. In the case of Jason Huang’s 700whp time-attack 2JZ build, no custom designed parts were needed. Instead, the right mix of high-quality shelf-stock parts were selected to deliver the performance, reliability and longevity demanded by the rigors of time-attack racing.
Rotating Assembly
Two main factors set the stage for the selection of rotating assembly components: the intended usage of the engine and the budget. First, the usage of the vehicle (time-attack) required an engine with responsive power delivery. A big 1,000whp turbo wouldn’t be responsive enough for road racing without the addition of nitrous-oxide injection to overcome the lag. A turbocharger/engine combination capable of 650-to-700whp with adequate response was a reasonable expectation.
Second, while the budget set aside for the engine build was significant, it wasn’t limitless. Prudent decisions needed to be made to extract the maximum value from the budget. While a stroker combination would have shifted the powerband to lower engine speeds and improved turbo response, the cost was more than making the valvetrain upgrades to extend the redline of the engine. Instead of starting the party earlier, a decision was made to simply stay up later.
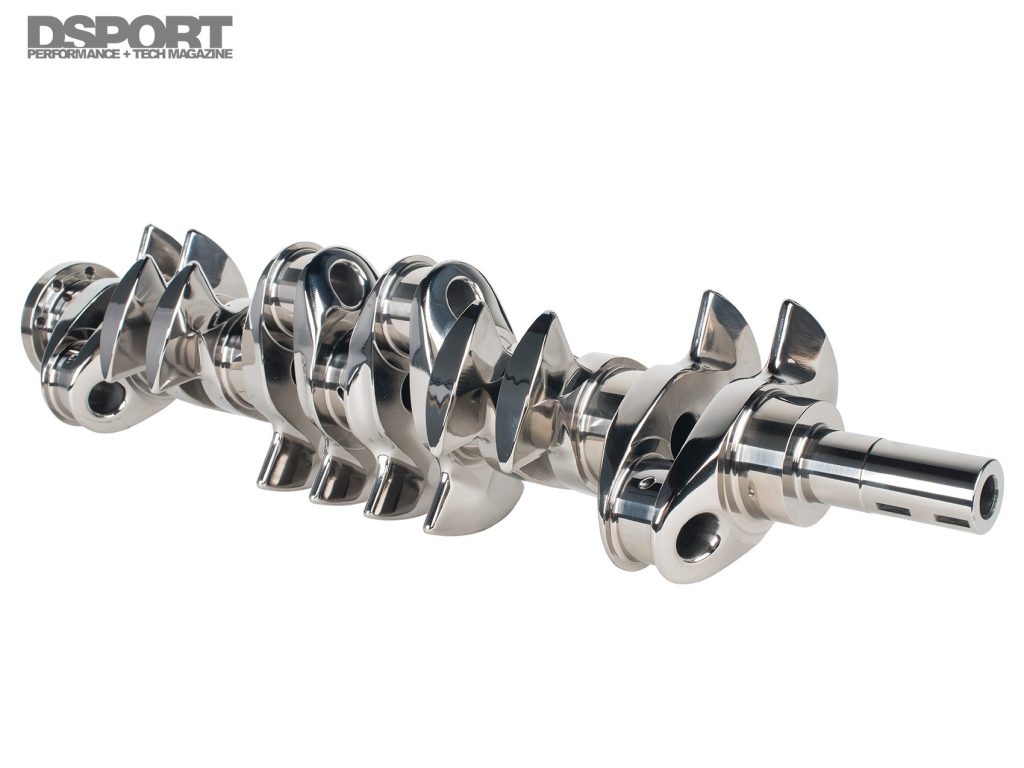
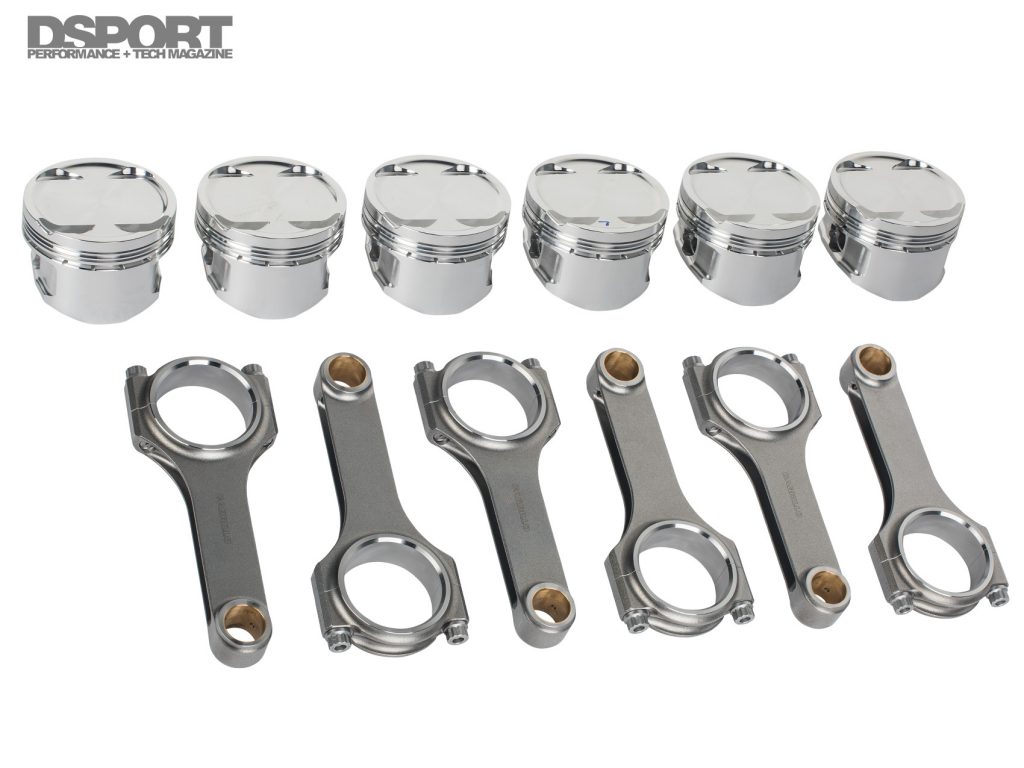
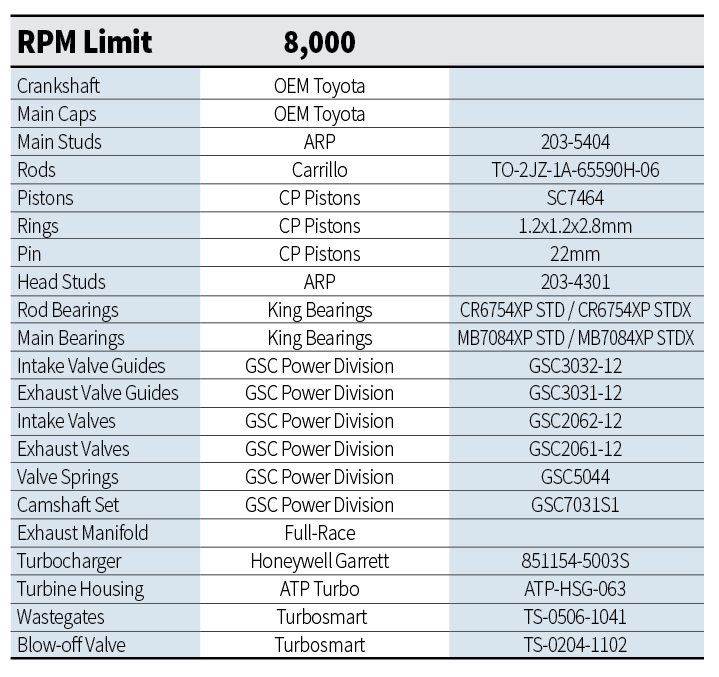
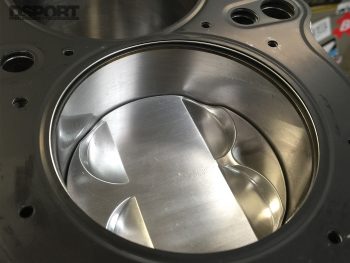 The original crankshaft was inspected for straightness and cracks before receiving a polish and detail. In this case, the crankshaft was sent out for straightening and measured just 0.0004” of runout upon its return. The crankshaft was then dynamically balanced to less than 0.25 grams without the flywheel in place. A second stage of balancing was conducted to balance the flywheel with it attached and a final stage was performed on the clutch cover to balance it. This three-stage process ensures that the crankshaft itself is balanced along with the components attached to it. The prepped crankshaft was installed into the block with ARP main studs and King Racing XP-series bearings. To get a more consistent final bearing clearance, a mixture of STD and STDX bearing were used for both the mains and rods. The STDX bearing shells are 0.0005” thinner, allowing for 0.0005” or 0.0010” of additional oil clearance when one or two of these shells are used. A set of 9.0:1 CP Pistons were hung on Carrillo connecting rods. The CP Pistons are made from 2618 alloy and feature a steel nitride top ring, perfect for high boost and endurance applications. Club DSPORT file fit the rings to the proper spec for the fuel, power level and type of usage that would be experienced by the engine. The Carrillo H-beam connecting rods are the reference connecting rod for the industry delivering extreme power handling capabilities thanks to quality materials and design. These rods were installed to spec by measuring the exact amount of preload stretch in the rod bolt. This method is far superior to relying upon a torque wrench for high-tension fasteners.
Top End
For 2JZ-GTE engines, there is both a standard and a VVTi cylinder head option. Each has its place, but the VVTi option has gained popularity for applications requiring peak midrange torque production and turbo response. With VVTi, the intake camshaft can be controlled to advance its position to provide additional low-end and midrange power output.
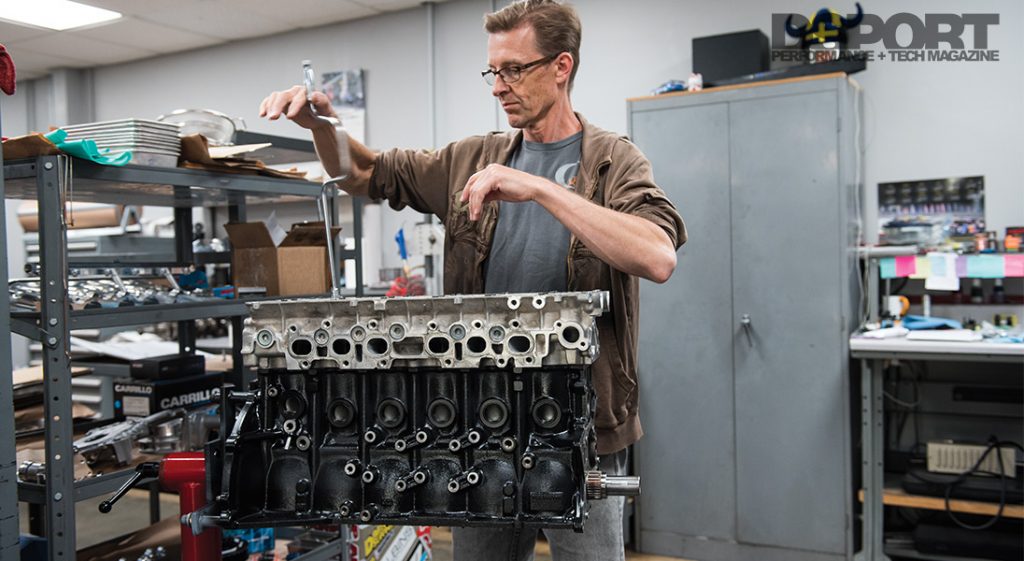
Unless you are starting with a brand new head, replacing the valve guides is worth the additional cost. New guides can accomplish three things. First, high-quality aftermarket bronze valve guides are made from materials that offer superior heat transfer over the factory guides. Second, the material used in high performance guides is less susceptible to seizure and can be run at tighter clearances. Running valve stems to guide clearances on the tight side of the range delivers longer guide life, increased horsepower and improved valve seal. Third, new guides that are free of taper or out of roundness allow for a valve job with superior concentricity. We selected GSC valve guides along with the supporting GSC camshaft and valvetrain components.
Performing the valve job with a cylinder head torque plate in place assures good valve sealing once the head is torqued in place. This is especially beneficial when CA625+ ARP head studs are used.
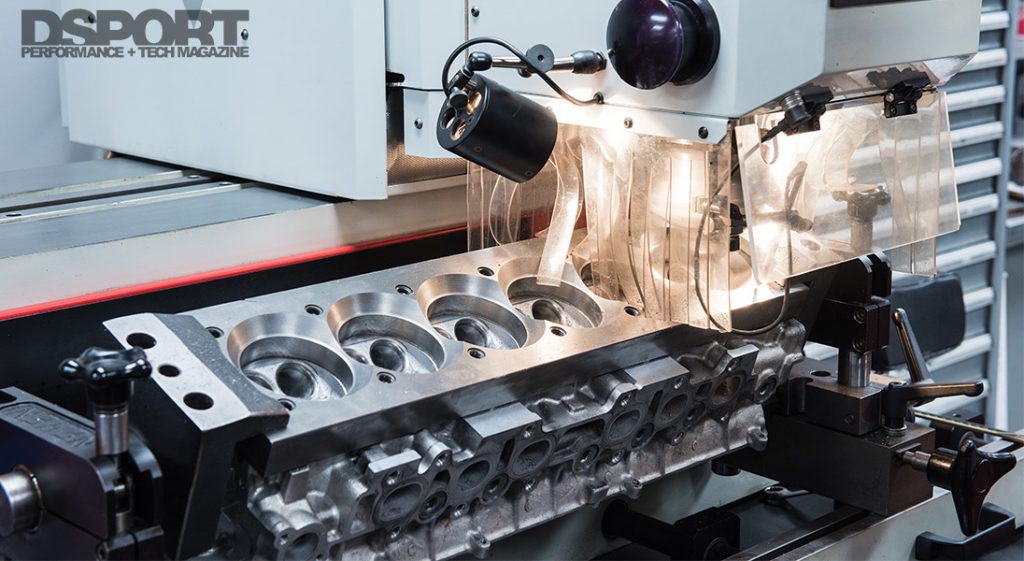
No matter which head is selected, any 2JZ cylinder head will benefit immensely from porting, a competition valve job and valvetrain upgrades. Since peak response was the goal, optimization of the flow without reducing flow velocity was the aim. A full-radius competition valve job was performed on a Newen EPOC fixed-turning station. The Newen also blended the seat into the throat of the port at the optimum diameter for the +1mm valves from GSC. Just a slight amount of hand blending of the port was needed to complete the pocket port. This type of cylinder head porting seeks to gain significant increases in flow without slowing down the port velocities with unnecessarily big ports.
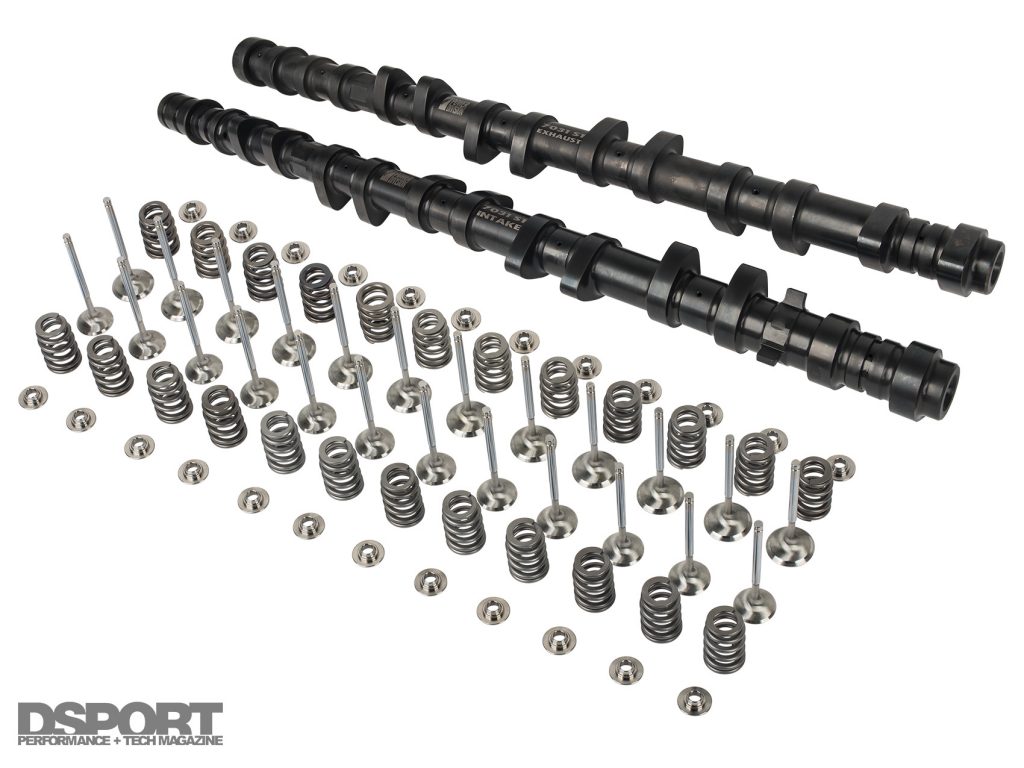
GSC now offers billet camshafts along with valves, springs and titanium retainers. We opted for the +1mm valves and did a pocket porting to the cylinder head to take advantage of the larger valves without decreasing the port velocities.
The valves are now orchestrated by a pair of S1 GSC billet VVTi camshafts and GSC beehive valve spring kit with titanium retainers. According to GSC, these camshafts are designed to establish a powerband from 3,500-8,000RPM while delivering an additional 40-to-70whp over the factory grinds. Thanks to tuned runner lengths and a superior design, the engine will have an easier time directing air into the cylinders thanks to the Hypertune intake manifold. The manifold will also house the Fuel Injector Clinic (FIC) 2150cc High-Z injectors. These injectors will easily be able to support 650whp on E85.
Keeping it Dry
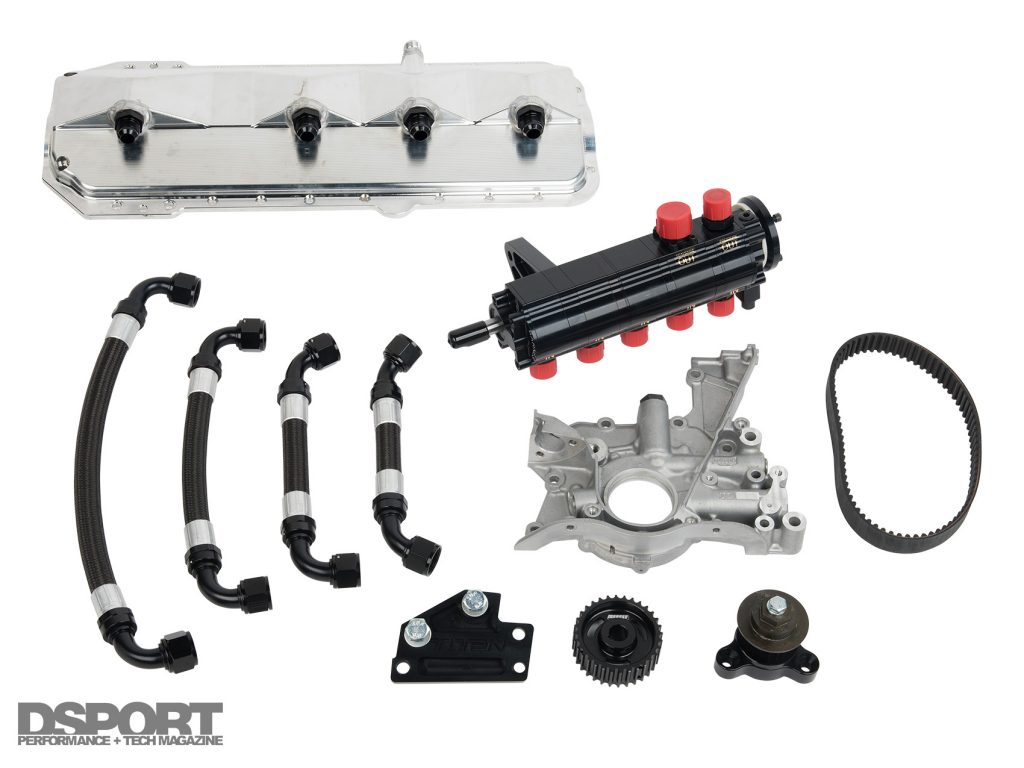
When wet-sump systems are used for road racing, an aftermarket oil pan with proper oil direction to the pickup is a must. However, these pans are usually chassis specific and not intended for engine swaps. While the initial expense may seem prohibitive, there really is no substitute for a properly-designed dry-sump oiling system. While the oiling system of the 2JZ has no real flaws, it is a wet sump system that is always susceptible to oil starvation if the pickup becomes uncovered during high-G operation. Dry-sump systems also provide the benefit of a shorter height to the pan, allowing the engine to be positioned lower in the vehicle for a lower center of gravity while still providing adequate ground clearance. For this application, a Titan Motorsports dry sump kit was teamed with a Hypersports billet dry-sump oil pan and Moroso oil filter block off plate. In addition to providing superior oil supply to the engine under high cornering loads, the dry-sump also eliminates crankcase pressure (runs at a vacuum instead) and provides a means to drive a mechanical fuel pump.
Switching to dry-sump is normally a challenging affair but the Hypertuned dry-sump oil pan and Titan Motorsports kit made the conversion simple.
Boost is Best
There is no bolt-on component more influential than the turbocharger system, which establishes the character of an engine combination. Pick a turbo without limited flow and it may deliver exceptional response, but it may allow the engine to hit the power goal. Pick a turbo with excessive flow potential and it’s likely that response will suffer significantly. With the power limit for the engine restricted due to the factory main caps, max flow capacity of the turbocharger needed to support about 650whp. To reach this level while delivering exceptional response, a Garrett GTX3576R-Gen2 turbocharger was chosen. This 58mm class turbocharger (size of the compressor’s inducer) features the latest technologies available from Garrett. The Gen 2’s major improvement over the original GTX series can be found in significantly enhanced compressor wheel aerodynamics, improved ported shroud and a lightweight backplate. These updates deliver improved flow performance and better anti-surge control. The improved flow delivers more power for a given boost level while the improved surge line allows more boost to be realized at lower engine speeds without compressor surging.
To power the turbocharger, a Full-Race Twin-Scroll T4 exhaust manifold was selected. This manifold feeds an ATP 1.06 A/R twin scroll turbine housing that’s teamed with the Garrett GTX3575R Gen 2 super core. When the target boost levels have been achieved, a pair of Turbosmart WG45 wastegates bleed surplus exhaust gas away from the turbine. At the lift of the throttle, the Turbosmart Race Port blow off valves relieve pressure before the throttle body to keep the turbo out of surge.
Coming Together
At press time, this engine was being shoehorned into the FR-S chassis along with a T56 transmission. Once the custom motorsports harness is completed for the MoTeC, we’ll have the vehicle on the dyno for tuning. Once the mapping is complete, it’s off to attack the timers.
Looking Ahead
With the recipe for a 650-700whp time-attack 2JZ completed, we look forward to cooking up our 2JZ recipe for a professional drift application. This engine will be bigger, stronger and deliver roughly double the output of the time-attack 2JZ. We also plan to outline the 2JZ cylinder head processes in more detail along with the line boring and head stud upgrade operations. If you’re a fan of 2JZ dishes, you are going to love these big power recipes. Stay tuned.


