
Wouldn’t it be nice to start a car project that is a record holder before you even begin? That’s the case with our Project Bug’s Life, except it’s not nice because it holds the record as the car with the least horsepower to ever turn the rollers on our dyno. With two Aircooled Bugs in our D’GARAGE lineup, one being on the road to becoming the quickest in the world, and the other being the slowest in the history of DSPORT’s projects, the initial goal would be to beat the second slowest car to ever make a pass on our dyno. While being second to last is never something you’d be proud to tell your parents, in our case, it means doubling or even tripling our horsepower with this 1970 VW Bug’s 1,600cc naturally-aspirated engine without the use of forced-induction. Here’s the plan.
Text by Bassem Girgis // Photos by Joe Singleton
DSPORT Issue #234

Second Time’s a Charm
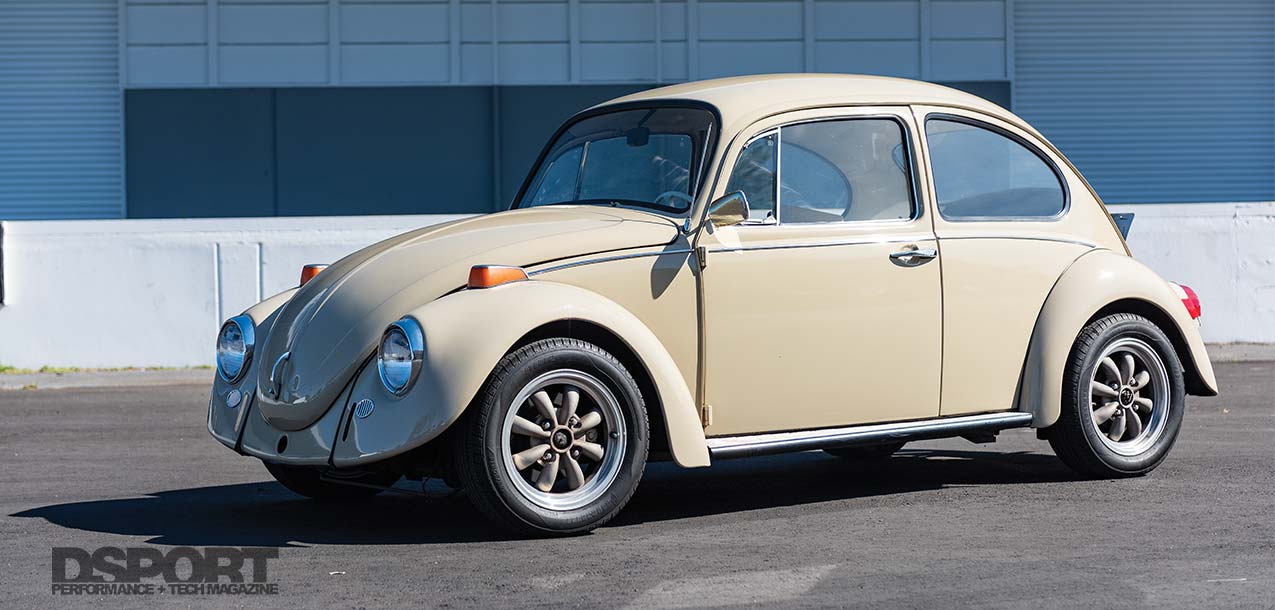
Owned by yours truly, buying a Bug has been a dream a lifetime in the making. After getting a 1964 that the term “rolling shell” would be considered a stretch for it, this 1970 VW Bug presented itself. Being around Jeff Payne’s Bug and being around its journey to becoming the world’s quickest aircooled Bug, the sky was the limit for this project. As Ron of Ron Lummus Racing said, “this is the most amazing car ever built.” The simplicity of the Beetle makes it one of the easiest cars to work with, and if you desire more power, the journey is quite simple with some proper guidance. Do you need to make your engine bigger? Simply change the cylinders. Do you need to make it handle better? Tires and shocks would do the trick. This simplicity applies to most components on this platform. With the Bug in our procession, it was time to set the plan.

Ride Enhancement
 While our Bug is 51 years old, the driver and passenger seats are even older. These two seats came from an earlier Bug that’s pre-1967. Somewhere along the line, these seats had another layer of upholstery over the original and both were torn. Under the material, the metal frames for the seats where broken and the ride was a ticket to the chiropractor and pure frustration. The original plan was to find original seats, but the idea proved to be easier said than done. There was nothing on the market with a justified price tag, and the conditions were even worse than what we had. We turned to Procar by Scat to see their seat options. Since we wanted to keep the interior as stock-looking as possible, we opted for the Procar by Scat Pro-90 Lowback seats in bright red. An optional high-back seat was also available, but we chose to go with an earlier look. The black color option is available in vinyl, leather, or velour; while the beige, grey, red, and while are only available in vinyl. The seat comes with the sliders and offers adjustable incline and recline, all while being much safer than the factory solution that was proven risky in the past in an emergency situation. For $271 per seat plus $79 for each adapter, this solution saved us a ton of time and even more dollars. The adapter is bolted right into the factory sliders attached to the pan, so you don’t have to drill in the pan itself. If you ever decide to return to stock seats, you can easily remove the Pro-90 seats and attached the stock ones right to the original rail. While the Pro-90 are much lower than the stock, the adapters make up the difference to return you back to stock height. The result was a completely enhanced ride, increased safety, and hassle-free solution for a fraction of the cost.


The Plan
The best way to approach a car project is to set a main plan and a few milestones before you can get there. This would keep you encouraged and will give you the sense of achievement as you go. With access to a dyno, a VW expert in Jeff, and wildness for imagination, we figured the main goal was to make it quicker than a Subaru BRZ. Since both share a flat-four engine, we thought it would make for quite the Old vs New battle. Throughout the project, we will experiment with different combinations, power-adders, and old-school tuning. The first milestone will be to address the obvious flaws, followed by letting go of its current record as the car with the least horsepower in DSPORT dyno’s history. Before jumping into making power and getting upgrades, we first had to assess what we have.

Simple in design, the air cooled VW engine doesn’t need much to stay alive at stock power levels. Air comes into the engine compartment and into the centrifugal fan. The fan sprays the air around the shroud and onto both cylinder heads. The problem with the stock oil cooler on pre-1971 engines was the placement inside the fan shroud. When the air goes through the cooler, it comes out warm, thus forcing cylinders 3 and 4 to run hotter than cylinders 1 and 2.

In order for us to install the engine’s cooling tin, the engine had to come out briefly. This was definitely the easiest engine removal and installation, especially with the help of VW Bug legend Jeff Payne.
Aircooled “Technology”
Simple, yet very sensitive, the VW aircooled engine doesn’t need much to survive with stock power levels, but the smallest missing component could be the end of the engine. The flat-four engine in the Bug relies on the vents right under the rear glass and on the rear lid for cooling. The air flow travels around the roof and into these vents. The air then goes into the centrifugal fan placed directly under the vents. The fan blows the air across the heads and cylinders via its shrouding. Attached in the fan shroud is an oil cooler that cools the oil but places pre-heated air over the number 3 and 4 cylinders, causing them to run hotter than the other side. In 1971, VW placed that oil cooler outside of the shroud to cool the number 3 and 4 cylinders properly, which was nicknamed “doghouse cooler.” With the proper engine tin completely sealing the top of the engine from the bottom, cold air would cool the heads and come out hot from under them and through the exhaust as hot air. Not sealing the compartment shut would create a twirl that would bring the hot air back into the engine compartment, slowly toasting your engine and eventually causing real damage. With this “technology” understood, we had to keep the engine lid off the car until we take the engine out to install the tin that sits between it and the transaxle. Once the engine is removed, the cooling tin can be installed and the Bug can go back to its former looks with the lid on without sacrificing cooling.

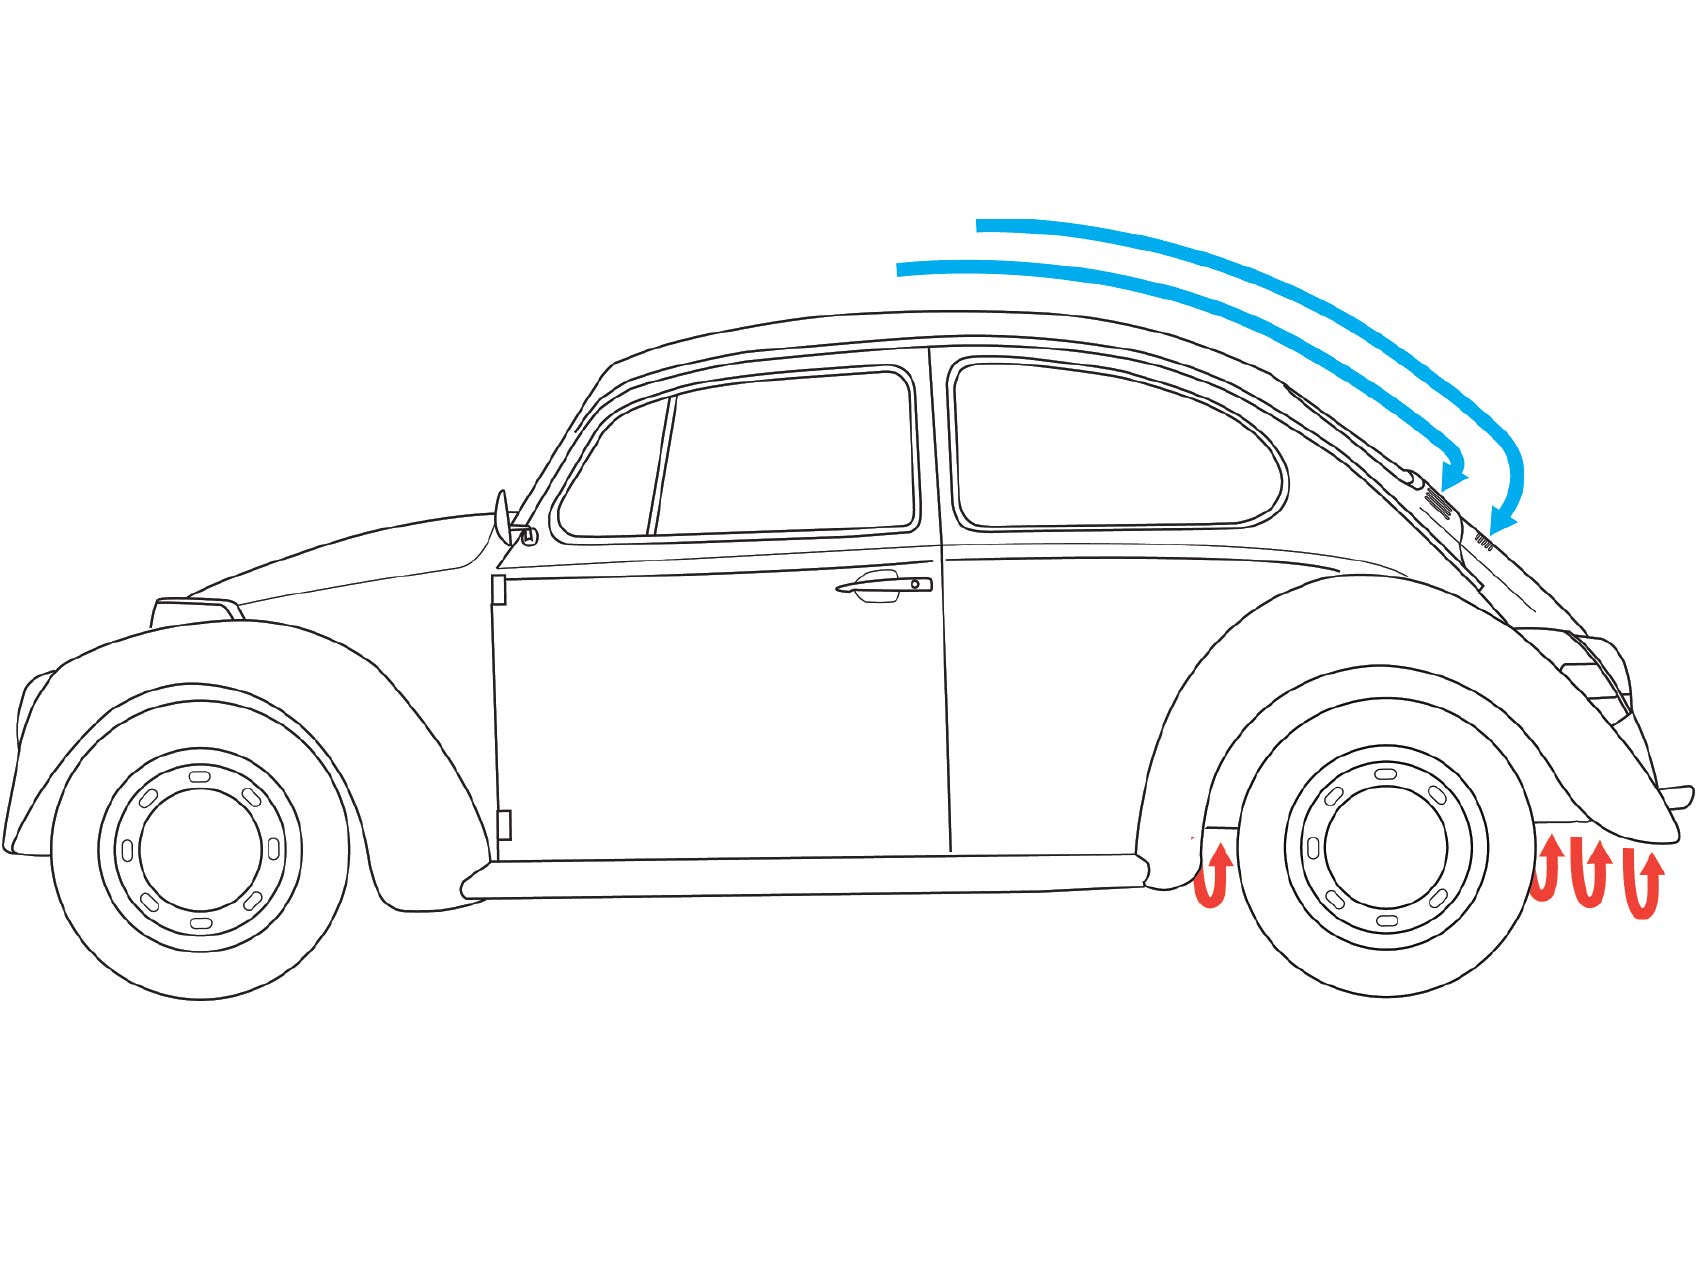
(L) To ensure the air cooled engine is getting its proper cooling, the engine compartment has to be sealed. The cool air goes through the vents, into the fan shroud, and onto the cylinder heads. The hot air is sealed on the other side of the heads from the bottom and away from the compartment. Sealing the top of the engine from the bottom is critical to its safety and cooling. (R) Missing as little as one of the main engine cooling tin, the cool air will enter the compartment through the vents, through the fan shroud, and onto the cylinder heads, then twirl back up into the compartment. This will slowly toast your engine, forcing it to run hotter and hotter and eventually damaging the engine. In the absence of the tin, the lid has to stay off.
The Assessment
In order for us to assess the project properly, we had to split it into three parts. Our main assessment would be to address any mechanical flaws. This would allow us to conduct our testing accurately and ensure we get repetitive results. After taking care of any mechanical problems, we can get the Bug on the dyno to see if it’s making the power we think it should make with its current engine combination, and try to extract any hidden power without the addition of any parts yet. Finally, we have to write a list of all the cosmetics and necessities the car may need to drive properly and eventually look good. At first sight, the car was leaking a great deal of oil from both valve covers and the oil sump drain plug. Easy fixes, except the valve covers leaking could either be a simple gasket issue or it could mean the heads may need machining to get a flat surface on them. The second issue we faced was the starter. The car sometimes would start and other times it would not, so addressing that first would be the natural thing to do. The day we got the car, we sent a photo to Jeff Payne. He complimented the car and said, “just don’t put the engine lid on or your engine will overheat.” New to aircooled engines, we had to dig deeper and see how these engines are cooled and how missing as little as one engine tin could prove catastrophic to the engine.

On the Dyno
With the stock 1,600cc engine, only sporting a cam that we know nothing about and a dual-carb setup, we strapped the Bug to the dyno to see what we’re dealing with. With this current setup, the Bug should be putting down anywhere from 35whp to 45whp. In the first pull, the Bug put down 39.69whp and 70.41 lb-ft of torque. The engine held the horsepower from 2,700 RPM to 5,000 RPM where it couldn’t rev any higher. While these numbers look like they could be true, we realized that the carbs are only opening up around 50-percent of the way. The dual-carb setup has a linkage connecting the throttle cable to both carbs. With some linkage adjustment, we were able to get the carbs to open up almost full throttle. The second run on the dyno resulted in 55.69whp and 75.90 lb-ft of torque. This is a 16whp gain and almost 5 lb-ft of torque. The RPM limit increased by almost 500 RPM since we couldn’t go into full throttle before, and allowed the car to stay in power longer and increased the top speed significantly. With such small adjustments and significant gains, we are realizing that we need to address all of the flaws to extract all potential power before going the upgrade route. Further carb linkage adjustments were made after the dyno session, so we should potentially see up to 5whp more next time we dyno it.
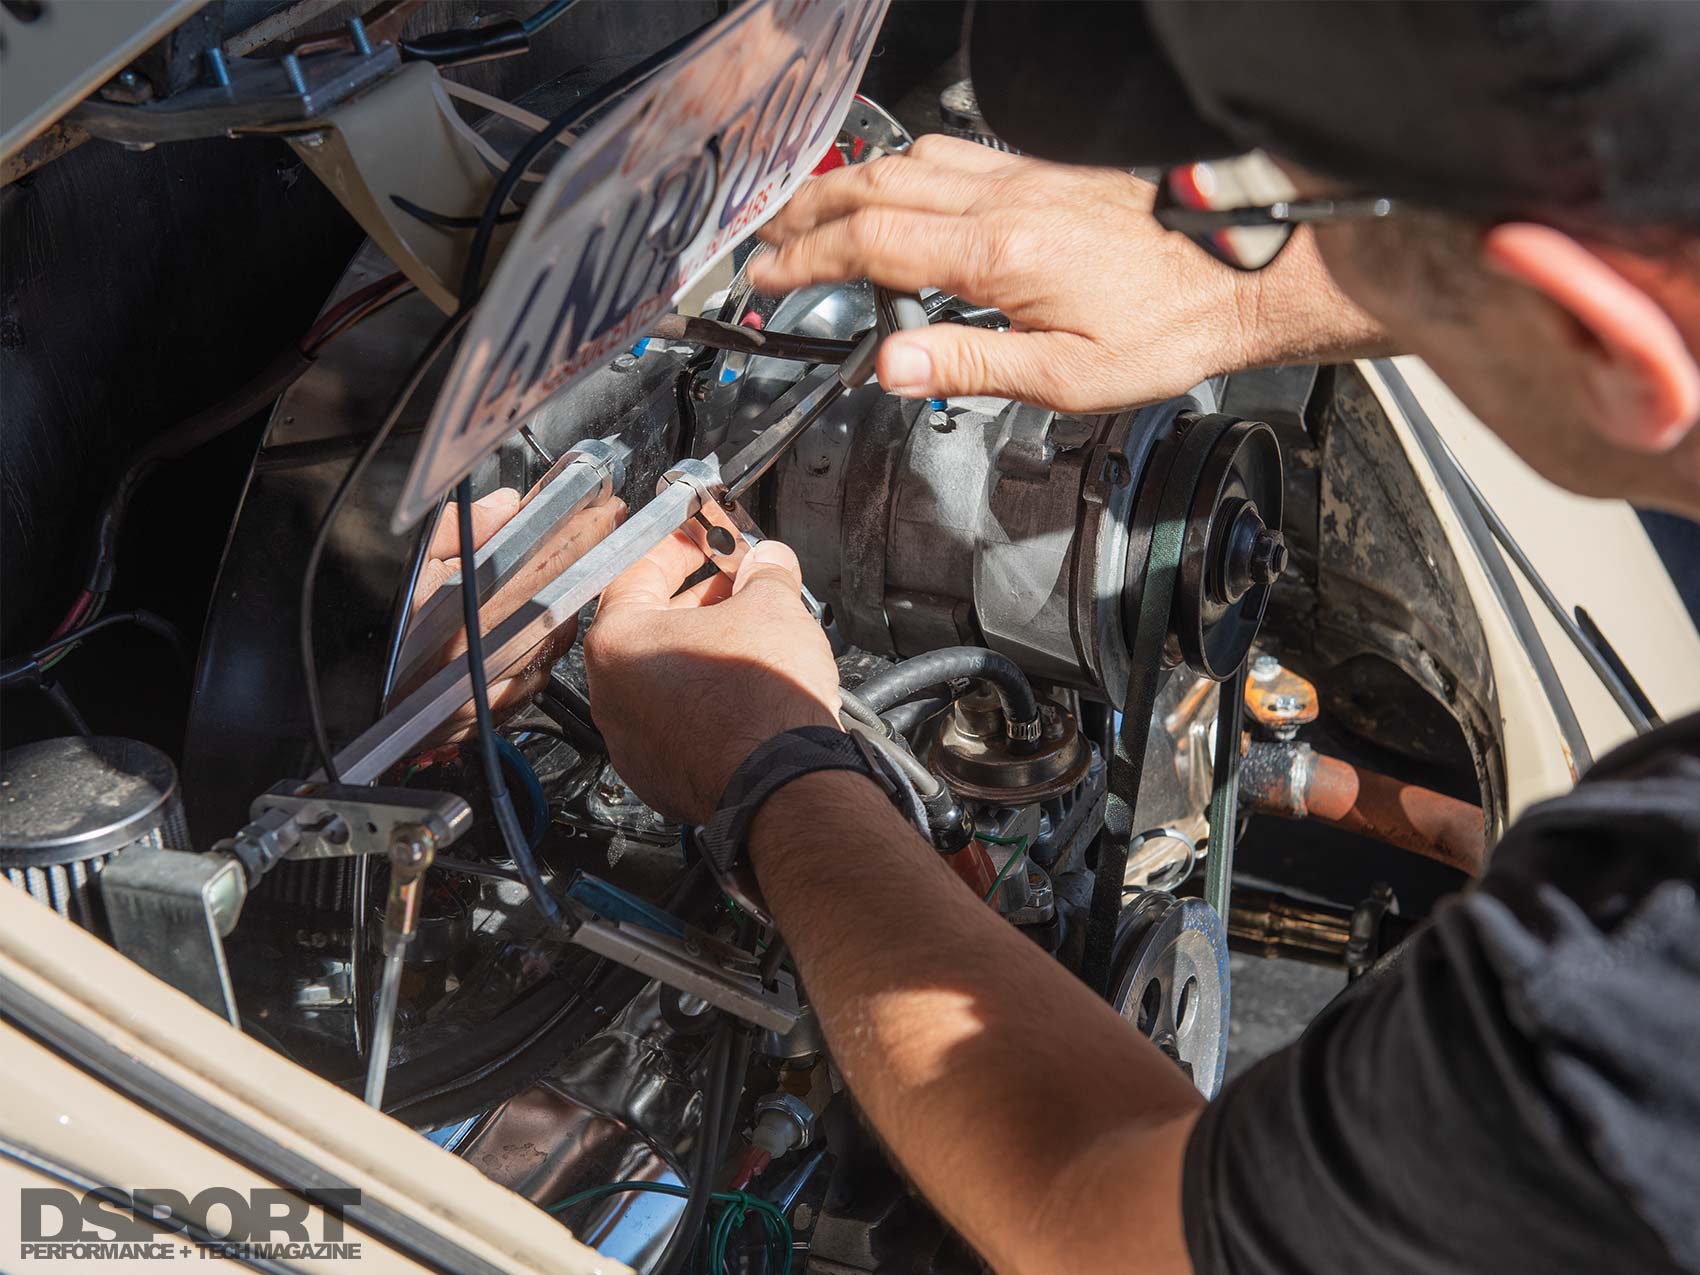

(L) While adjusting a single carburetor is easy, trying to sync up dual carbs is a bit more challenging. Adjusting the linkage allowed us to run full throttle and delivered 16whp gain after only opening up 50-percent. (R) A jack, jack stands, and some really basic tools is all you need to remove and install a VW air cooled engine. Aside from three electrical connections and two fuel lines, only four studs hold the engine in place. For clearance purposes, the carbs had to be removed to get the engine out.

The stock engine features an aftermarket cam and dual carbs. It delivered 39.69whp. With some carb linkage adjustments, 16whp gain was realized.
Done and Done
For the past three weeks, we’ve been checking off items on this car. The small, worn-out steering wheel was replaced with an EMPI original replica. We replaced the shifter with an EMPI one that has a reverse lock-out trigger to avoid going into reverse when trying to get into second. With some fine adjustments to the shifter, we should be able to get into all gears without restrictions or grinds, especially now that we adjusted the clutch cable properly. The oil leaks were all fixed. The valve cover gaskets were replaced and they were enough to stop the leak along with the new drain plug. The carburetor linkage is simple, but with some fine adjustments, we could see another two-to-five horsepower gain. The engine came out and back in, and all of the engine tin was installed to ensure our 1,600cc aircooled engine is getting its fair share of cooling. With that, we were finally able to put the rear lid on. Stay tuned as we experiment with timing, fuel, and air and take a step back in time tuning this vehicle. We will address switching to a doghouse oil cooler and measure the temperature changes, and finally, we will continue chasing the Subaru BRZ and try to get this 51-year-old car to put down 170whp.
