
Henry Ford has been credited with saying, “Failure is simply the opportunity to begin again, this time more intelligently.” While we often see people trying and trying again after multiple failures, it’s the “this time more intelligently” portion of the advice that many disregard. Not taking advantage of all the information presented during the postmortem of an engine failure may lead to repeat failure again and again. If every engine failure that ever occurred was accompanied by a high-resolution datalog from every sensor following the last minute of the engine’s life, determining the cause of failure would be much easier. In the real world, the datalog that is available after an engine failure is typically just the broken engine. While just about anyone that owns their own set of tools can disassemble an engine and tell “What” broke, the “How” and “Why” the part broke requires a much higher degree of intelligence and experience. To help you make more intelligent decisions, we will have assembled the basics of engine failure analysis to speed up your development process.
Text by Michael Ferrara // Staff Photos
DSPORT Issue #229

Club DSPORT: Learning from Other’s Mistakes
The race engine building process at Club DSPORT works so well that there has never been a Club DSPORT engine failure in the six years since the program was launched. The three Club DSPORT engines that have failed during that time were victims of installation errors. Two engines had the bearings wiped out due to improperly installed remote oil filter mounts while a third suffered an oil pump gear failure when a non-recommended harmonic damper was used.
 If you can’t learn from your own mistakes, learn as much as possible from the mistakes of others. With the popularity of RB engine builds on the rise, we’ve recently been flooded with rebuilds of RB26 engines from shops around the country. Most of these engines were built by builders claiming to be familiar with the RB26, but in actuality have little or no experience. A combination of subpar machine work, poor parts selection and assembly errors have resulted in many enthusiasts paying two to three times what they should have to do it right the second time around. Fortunately, we’ve been able to identify the why and how these engine failures occurred in 98-percent of the cases. Let’s take a look at the four-stage process to proper engine disassembly and inspection for failure analysis.
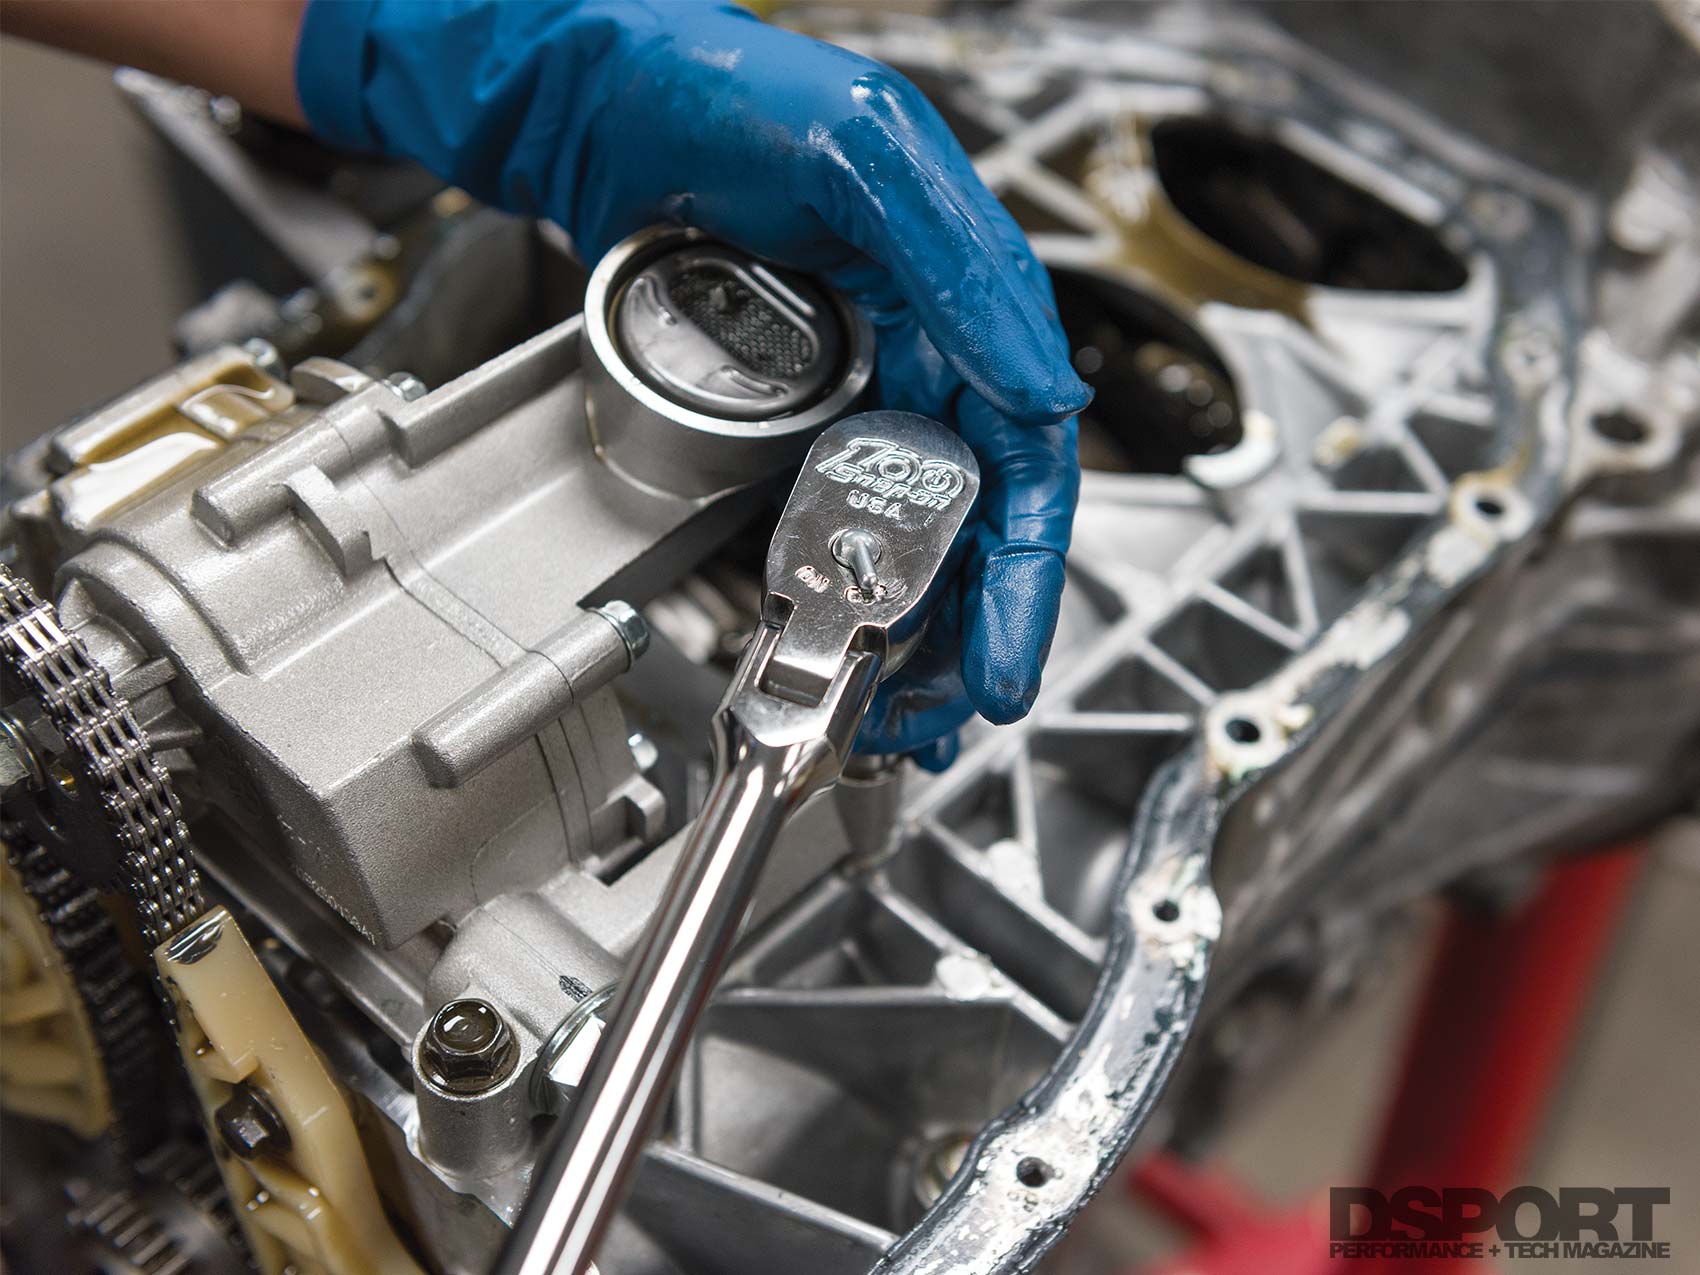
Hand tools are a must during engine teardown when you are looking to find problems. Using hand tools for disassembly adds the sense of “feel” to the process. Also, be sure to take as many pictures as possible along the way.
Stage 1: Careful Disassembly
Determining what part broke is usually, but not always, the easiest part of the failure analysis process. During the disassembly process avoid being in a rush. Taking time to use hand tools to loosen and remove nuts and bolts provides an opportunity to “feel” an issue that may not be presenting itself visually. If you grab your power mini-impact and start removing the fasteners, you miss the opportunity to feel fasteners that may have been loose or overtightened. You may also miss feeling a fastener that was cross-threaded. Once a fastener is removed inspect it for signs of thread damage, galling or burrs under lighted magnification. The nuts, washers and bolts should all be inspected.

The spark plugs are one of the few parts of the engine that can be easily removed yet can give a good insight on what to expect during a teardown. The number two spark plug is missing the side electrode that has been melted off. When you see this, expect to see valvetrain and/or piston damage in that same cylinder.
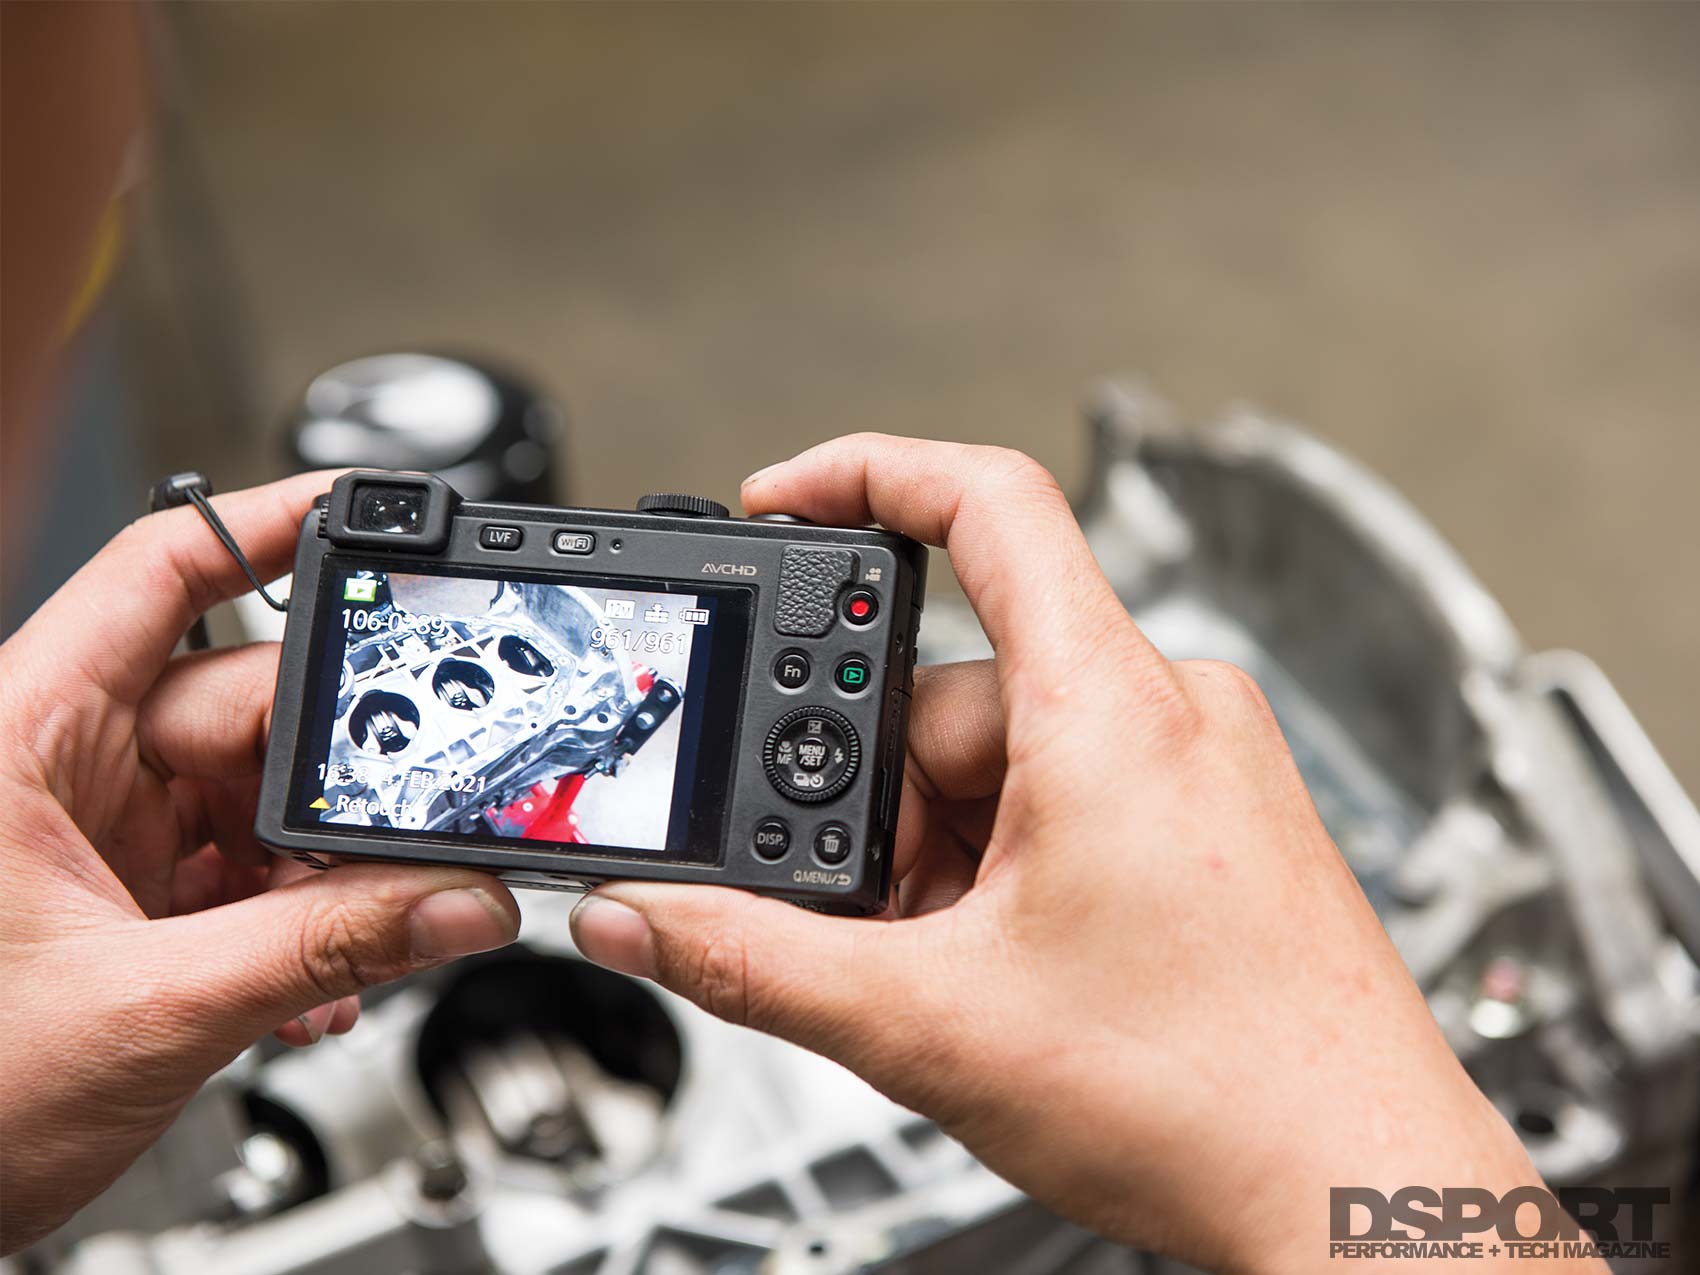
During the disassembly process, it is important to keep all the parts organized in such a way that you know the exact location of where the part came from on the engine. This will not only help speed the reassembly process in the future, but also allow re-inspection of select parts when a later find in the engine warrants this action. Until the disassembly of the engine is complete, refrain from cleaning or washing any of the fasteners or parts. As you make progress during the disassembly, take multiple pictures from various angles even if they seem unnecessary at this point. These pictures may capture key crime scene evidence that misses an untrained eye.

Two RB26 exhaust ports are pictured above. The one on the left looks dry and normal while the one on the right is wet and oily. This oil either came into the port through the exhaust valve guide and seal or through the cylinder into the exhaust port. A dry cylinder will mean it’s the guide/seal, a wet cylinder will mean it’s a piston/ring/cylinder issue.
Step 2: Play Photo Hunt to Spot the Difference
We’ve all played a version of “Photo Hunt” or “Spot the Difference” at one time or another. These are those games that show two nearly identical pictures where there are a few differences between the two images. On any multi-cylinder engine, there are many components that will be similar or identical to each other. There will be four, six or eight pistons that are similar, the same number of combustion chambers, one rod bearing per cylinder and a complete assembly of valvetrain parts for each cylinder. By comparing how like components look compared to each other, a great deal can sometimes be learned. This process can often lead to a discovery of the problem being local to a cylinder or global across all the cylinders.

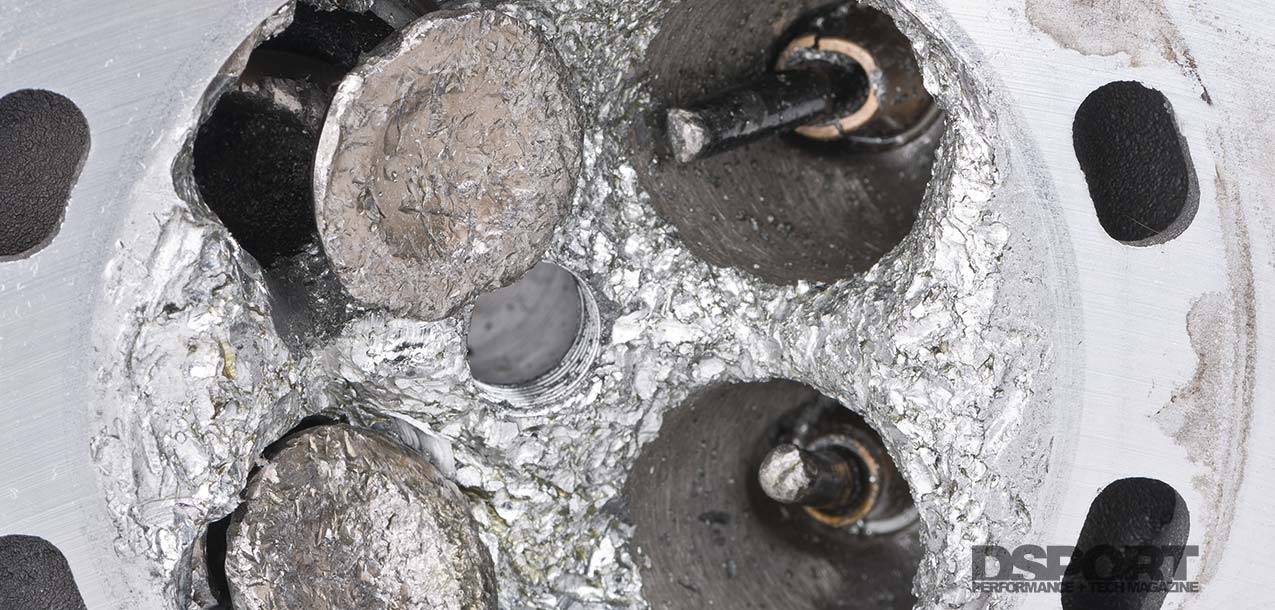
Notice anything different about the piston in the middle? It has spun around 90-degrees from its original position. Even before pulling the bottom end of the engine apart, it’s obvious the link between the piston and crankshaft (connecting rod) has failed in this case. The marks on the crown of the piston were made by the valves making contact with the piston as it rotated in the cylinder. Obviously someone had cleaned this piston with brake cleaner so we cannot compare to the rest. Save the cleaning of the parts till the end.

All of the pistons have a very similar look yet one (Cyl. #2) has been melted near the exhaust valve relief. In this case, there may be a local issue (injector failure) that occured right before failure or we may just be looking at a global issue that just happened to kill the #2 piston first.
Going Local
When the parts in one cylinder look significantly different than the parts in the other cylinders, the failure is localized to that cylinder. For example, a piston lighter in color than the rest of the pistons that also shows evidence of extreme temperatures that induced melting indicates a condition that caused that one cylinder to run lean. This would most likely be a result of a lack of adequate fuel entering that cylinder. This failure could be the result of a faulty connection, bad injector or bad injector driver in the ECU.
Staying Global
When an engine is running properly, all similar components should have a similar appearance. However, just because they all look similar does not indicate that everything is right. On the contrary, the problem could be global and affecting all the cylinders equally. Let’s say the engine that was “built” had loose piston-to-wall clearances that resulted in elevated piston noise and false knock events. The tuner may have found big power increases turning down the knock sensor sensitivity. When a situation occurs where the decreased knock sensor sensitivity doesn’t pick up the real knock events occurring from a bad tank of gas, the engine had regular knock in all cylinders. Eventually, a single piston cracks the ring lands and the engine bellows smoke. Even though a failure occurred in just one cylinder, this could be out of randomness. The failure that occurred could have equally occurred in any one of the other cylinders. In this case, we see a global issue producing a local failure.
A local failure can also result from a localized issue. A problem with a single injector may have caused a single cylinder to run excessive lean. The end result was one melted piston.
Perhaps the most-costly failures involve a global issue that produces a global failure. If there was a global issue like a fuel delivery issue where the fuel pump couldn’t meet fuel requirements, all of the cylinders would be impacted with lean fuel ratios that elevated in-cylinder temps. In this case, we may see a situation where the cylinders show indications of a lean running condition. All of the pistons may get damaged in this case.
Step 3: Parts Tell the Tale
Within the engine, there are few parts that by themselves can often tell a tale of what happened during the failure. The spark plugs are about the only parts in an engine that are generally accessible before the teardown of an engine. Spark plug inspection can often determine if the issue is global or localized. If all of the side electrodes are intact but one that has been melted off, there is a fuel delivery issue to the cylinder that is home to the damaged spark plug. If all the spark plugs are relatively dry except one that is soaked with oil, there is likely an issue in the cylinder that has a wet spark plug. While not being able to identify a local issue, using a filter cutting wrench on the oil filter can provide some insight on if there was a lubrication issue. If the filter media is packed with bearing material, a spun bearing is likely to be found.

 An engine’s main and rod bearings can not only provide information regarding the engine’s lubrication system, they can also show evidence of knock. To learn the most from the bearings in an engine, it is essential to have a diagram of the oil flow path for the engine. Most engines feature an oil routing that runs the following course. Oil is suctioned through the pickup section to the crank driven oil pump. The oil pump increases the pressure of the oil and then it is sent down a main galley to the oil filter housing. At the oil filter housing, the oil from the pump is sent through the filter section of the oil filter before feeding the main oil galley. In most engines, the priority is to feed the main bearings so the filtered high-pressure oil is sent to galleys that feed the main bearings. The pressurized oil sent to the main bearings gets fed through holes drilled in the crankshaft that feed this oil to the rod bearings. Oil jets are also tied into the main oil galley and there is usually a secondary galley that feeds pressurized oil into the cylinder head to lubricate the valvetrain. If the main bearings look great but a rod bearing has failed, this can be an indication that something occurred that limited the amount of oil needed. Perhaps the pickup became uncovered and sucked air instead of oil and a drop in oil pressure occurred. In these situations, the last bearings to get oil will usually suffer first. When the rod bearings all look good but the center one or more main bearings get wiped out, this could be an indication that the crankshaft cracked, got bent, or is bending at high loads. It is also important to note how the upper and lower shells of each bearing pair look compared to each other. In cases where the top shell looks flattened, this can either be evidence of actual piston to cylinder head contact at high engine speeds or it can be evidence of detonation/knock events.
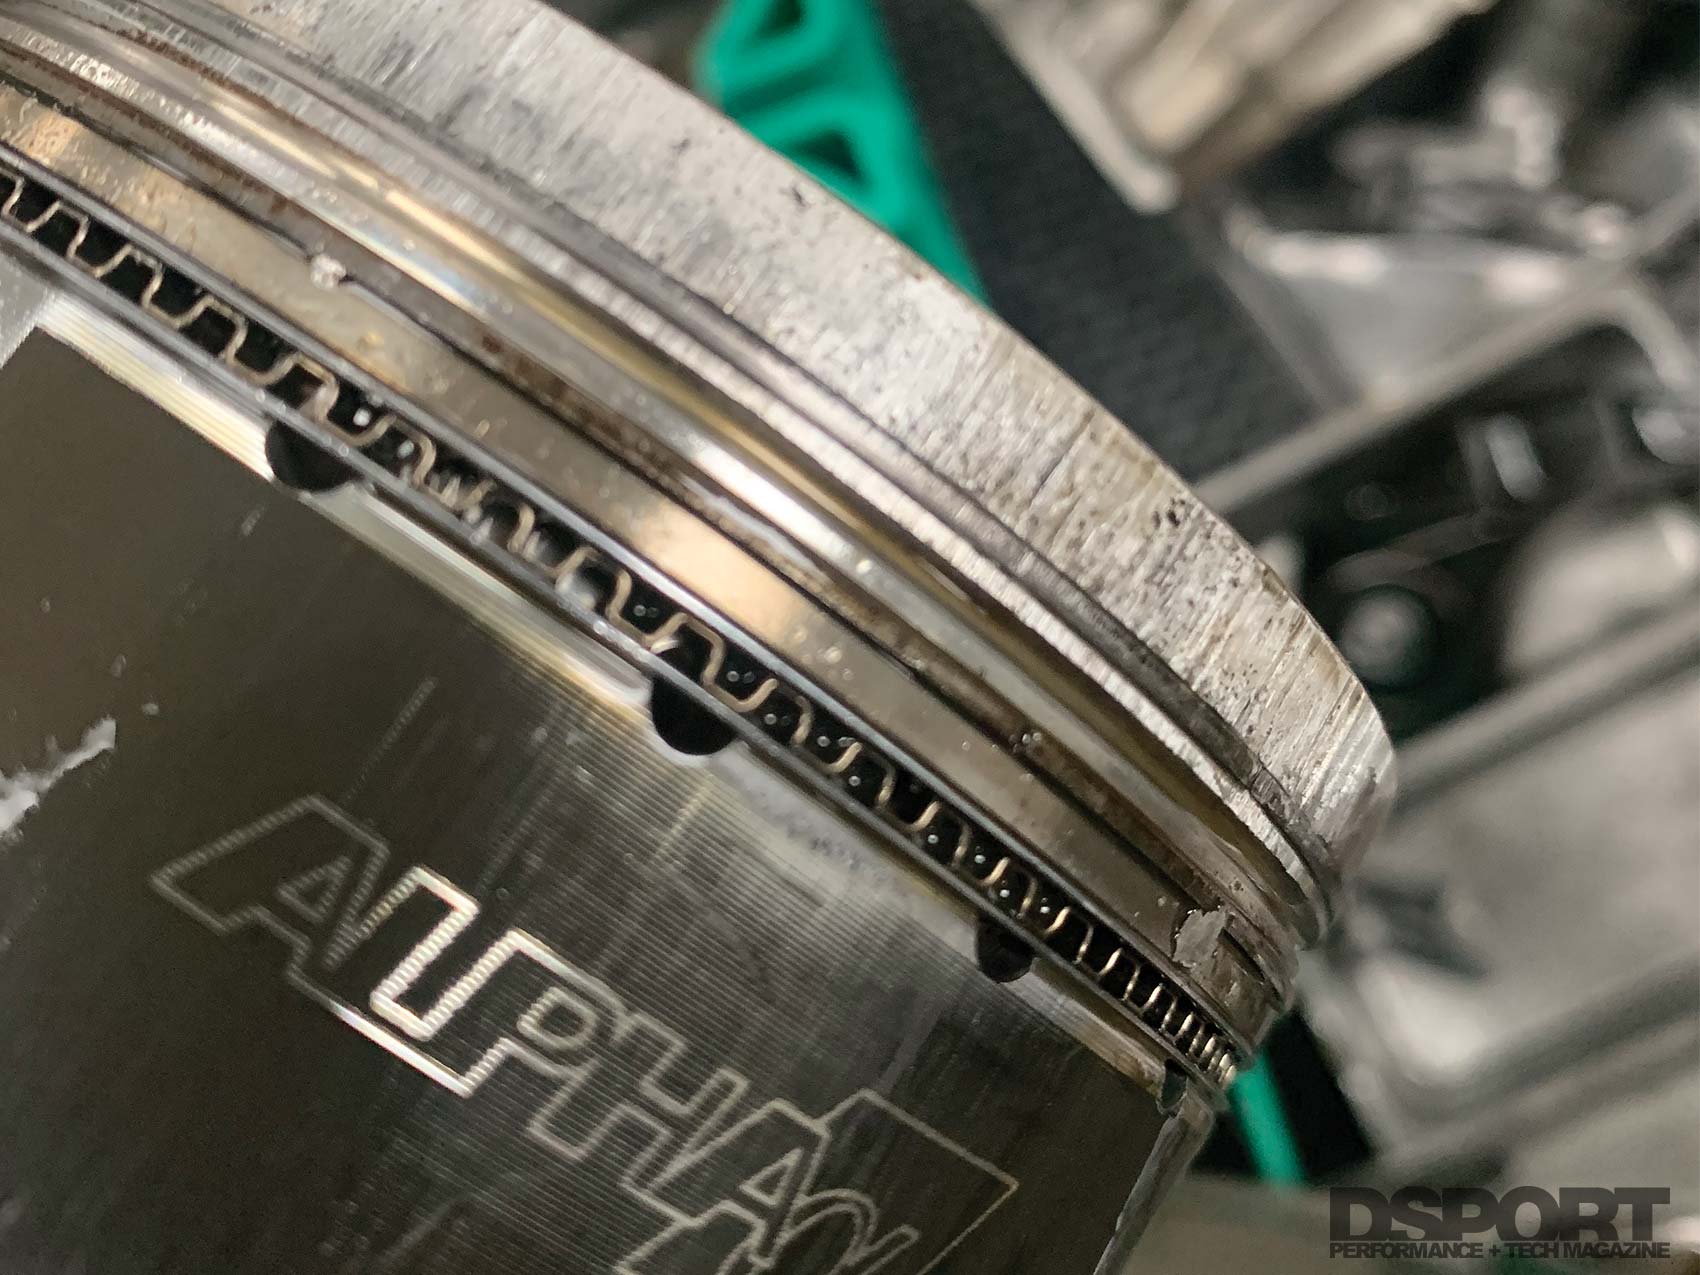

The top ring lands on these pistons all show evidence of significant contact with the cylinder walls. In this case, a lean condition caused cylinder temps to rise beyond safe levels causing the piston to expand and grind into the bore. Running 1/2-mile racing without monitoring EGT temps can often lead to this issue when EGTs go too high.
While the piston crowns tell a story as soon as the cylinder head comes off an engine, the piston’s ring lands and skirts along with the piston rings may hold even more clues to the reasons for an engine failure. During inspection, look for evidence of melting and make sure that the piston rings move freely in the ring grooves. Also inspect the face of the ring (portion that rides on the cylinder wall). This wear pattern should be consistent across the ring face. If the face is highly polished from top to bottom, this is usually the result of improper break-in.
Looking at the heads, the first area to inspect is the intake and exhaust ports. Take pictures here (as you should have been doing at all the other stages) for your records. Note if the ports are dry or wet. Look to see if there is a buildup on the backside of the valves. Take notice of the color on the valve faces and the presence or absence of carbon. Again, look for local anomalies during the inspection process. Ports should be dry. Normal carbon buildup is proportional to the amount of mileage on the engine. Direct-injection engines that do not also have port fuel injection may have insane amounts of valve deposits. That’s normal although it can be addressed to eliminate this issue in the future.

Step 4: Measure, Measure, Measure
Your naked eyes and your eyes equipped with magnification are great tools in the inspection process. Surfaces that have contact resulting in dull finishes generally indicate everything is good in terms of lubrication. Surfaces that didn’t start off with a mirror-finish polish that end up with a mirror finish polish usually indicate a lack of adequate lubrication. While the eyes are great tools, effective failure analysis requires a full complement of measuring instruments. These instruments are the same ones used during the machining and assembly of an engine.

Before the engine is torn down, a cylinder leak down test can be performed to identify what cylinders may need additional inspection.
When performing a failure-analysis on a non-Club DSPORT built engine, we are able to measure all critical clearances and establish if they are within a normal operational window or if they are beyond a standard. Measuring the straightness of the crankshaft is one of the primary measuring operations. A bent crankshaft can be the cause or the result when bearing damage occurs. Checking bearing clearances, cylinder roundness, piston-to-cylinder wall thickness and a host of other critical measurements often lead to pinpointing the issue.
To really get the most information possible, more information about the original engine build are needed. A blueprinted and documented engine build, like those done at Club DSPORT, establish a record of all critical measurements. With these on hand, a comparison can be made with the engine measurements as built and during a service event. When we serviced one of Club DSPORT 2JZ engines after a Pike’s Peak outing, we found that no parts actually required servicing. Since that time, this engine has made three more Pike’s Peak events and is running better than ever.

A vacuum check on the cylinder head can help identify which cylinders have a poor valve seal. It’s best to do this test after all components have been cleaned and when the valves are installed without the springs adding tension.
The Bottom Line
Made in China parts dressed in Australian packaging, aluminum connecting rods in your daily driver, “good enough” machine work that doesn’t make the grade and improper engine assembly are a recipe for disaster. Unfortunately, this is a recipe that seems to be currently popular in some performance car communities. If you are unfortunate enough to get a taste of this dish, be sure to learn from your mistakes with a proper failure analysis. When you don’t get it right the first time, there is going to be a failure. This happens to everyone, but it is how you react that determines your future success. You will only be a failure in the future if you don’t learn from the mistakes of your past.
