Nearly everyone has gone through or will have to go through the ultimate test of friendship: helping a friend move. The situation worsens if they happen to live in an upstairs apartment and need assistance moving the couch. Although this piece of furniture is mostly symmetrical and balanced in weight, you don’t want to be the unlucky one carrying the lower, heavier end when tilting it up and down stairs. Just as you’d prefer to split the lifting 50/50, your car’s tires ask for a fair and balanced weight distribution. With four tires at your disposal, corner balancing your car enables each tire to work at full capacity, sharing the overall load in your favor for better performance.
Text by Cameron Parsons // Photos by Cameron Parsons and Richard Fong // Illustrations by Paul Laguette
DSPORT Issue #162
Weight Watcher
Before diving into adjusting your vehicle’s suspension settings and hoping for the best, start with changing how you view the car’s relation to the ground below. It does not sit directly on the ground, it floats atop springs and shocks placed at the four outside corners, balancing the car as if it sat on a giant exercise ball. These components control where the weight of the vehicle is distributed, like tilting a couch to move down a set of stairs, and as a result determines how much of the available grip is spread among each of the four tires.
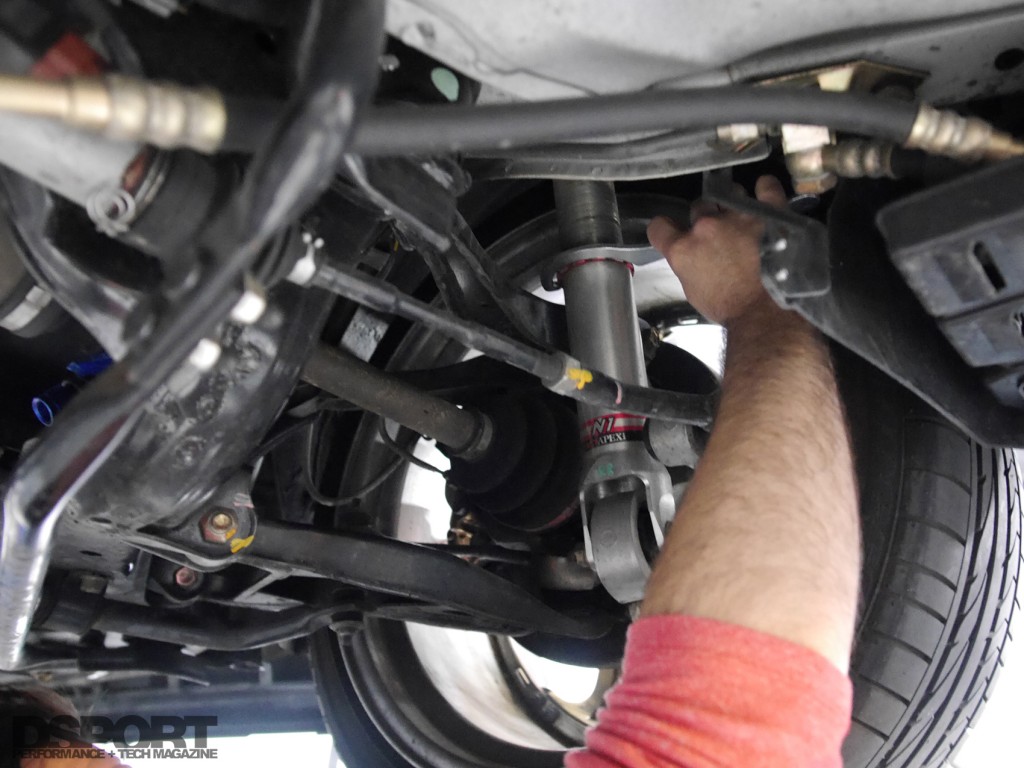 Adjusting the height by only a couple threads will show a noticeable difference, so make small changes at a time.
Four on the Floor
Distributing 100-percent of a car’s grip between four tires means each tire contributes roughly 25-percent toward the car’s overall adhesion to the ground. If any tire gets caught slacking off due to a poor setup or a mechanical error, the total performance of the car goes down with
it. Although suspension aids in driving comfort on the street, it also plays a massive role in increasing a vehicle’s capabilities in accelerating, braking and turning. It manages weight transfer and therefore grip in relation to what the driver asks out of the car. At the same time, the suspension works to keep all four wheels planted to the ground at all times, in order to provide maximum traction for whenever you need it.
Recall the last time you sat in a plain four-legged chair that teetered on only two or three of its legs. These legs extend lower than the others, and are doing all the work of holding up your weight. The remaining one or two legs don’t quite extend to the length of the others, and therefore carry
less of the load. The very same effect occurs in car setup, where any wheel that sits on a shorter shock setting than the others carries less weight and offloads it to the other wheels. This wheel and tire contribute less than its full grip potential to the car, reducing overall traction and off setting the handling characteristics and capabilities between left and right turns.
What Goes Where
No single setup for weight distribution is ideal for all cars in all environments. Oval-track cars sometimes prefer an offset weight that favors performance toward turning left, while drag racers focus on distributing load where it’s needed to launch in a straight line. As for road racing, the combination of left and right turns on track calls for a setup that is even side-to-side. The search for the proper weight distribution requires identifying and adjusting the vehicle’s crossweight for the perfect balance.
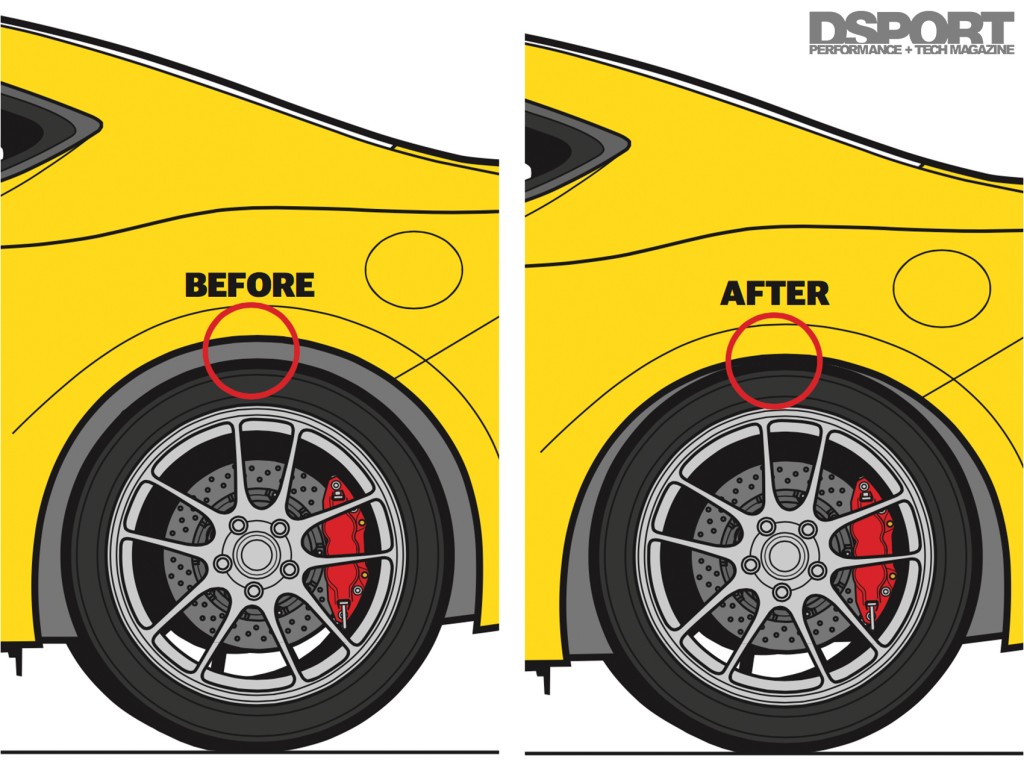 Adjustment Effects: Lowering the left rear reduces the weight on that corner and, to a lesser effect, the diagonally opposite corner (right front). At the same time, the remaining corners increase in weight.
Getting Cross
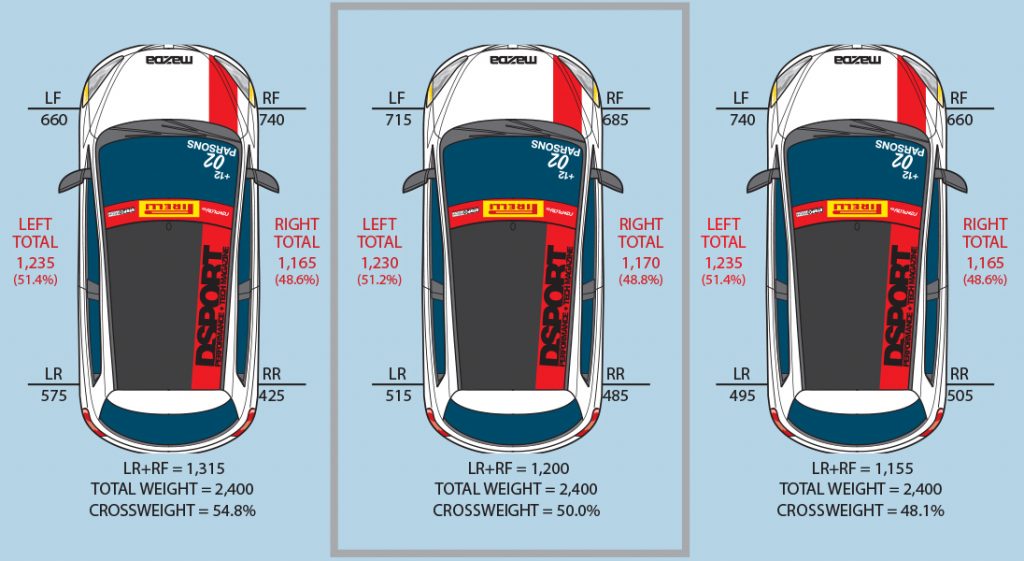
Unless you’re racing in circles, a 50-percent crossweight is almost always the goal. An uneven crossweight is often found in a car that handles well turning in one direction but poorly in the other. In order to determine the crossweight, calculate the sum of the right front and left rear weights, then divide this number by the total weight of the car. Ideally, this produces 0.5, or 50-percent, to show that the right front/left rear sum is equal to the left front/right rear sum. Aiming for perfection might have you working for hours upon hours to getting the weight just right. As long as you find yourself within 0.5-percent of this goal, the setup will likely perform just as well.
Although you should strive for a 50-percent crossweight and 50-percent left-side versus right-side weight distribution, realize that not all cars are capable of this in their design. The same goes for attempting to reach a proper front and rear weight distribution, aiming to keep the weight as centered as possible. This sometimes changes with high horsepower applications, where a slight shift to place more of the weight on the drive wheels may help with traction. However, doing this also removes weight from the other wheels, potentially reducing traction on that end.
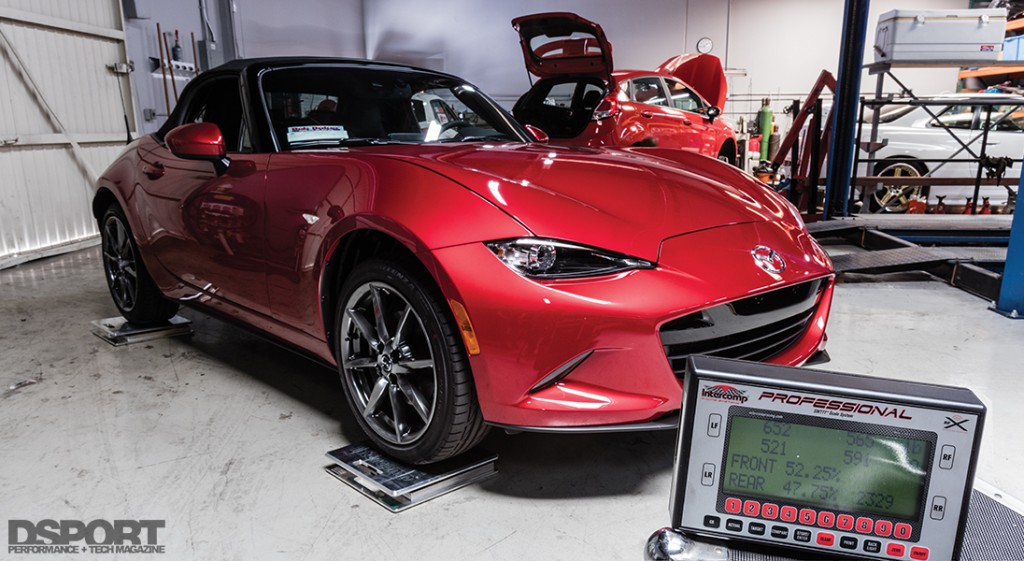 A quality set of scales set up properly will reliably deliver more accurate readings, enabling you to dial in the best setup possible.
The Right Conditions
When you begin taking measurements on a set of scales, realize that you are trying to simulate the car’s static weight distribution. When considering this, you must ask the question, “What are the characteristics of the car while it’s on track?” Top off the fluids, estimate and fill to the expected fuel load, and load some sort of weight in the driver’s seat that matches yours, or sit inside every time you weigh the car. Raise the tire pressures to their anticipated on-track pressures, and position any ballast in the car where you want it before proceeding to suspension changes. Every time you lift and lower the car to make changes, the suspension loads and unloads, and wheel positions sit different from how they would on track. Be sure to roll the car back and forth onto the scales and bounce on the corners to reset these items to replicate their normal state on track.
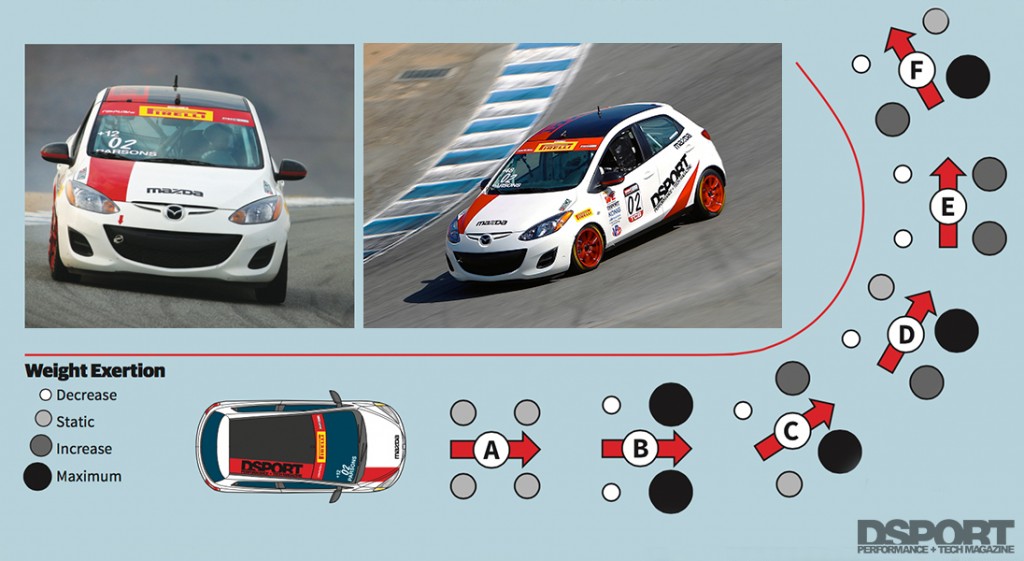
Vehicle weight distribution changes drastically through a corner. Finding the ideal crossweight enables the driver to get the best handling and drivability out of their car.
Weight Transfer in Turns
(A) Weight distribution is static as the car drives a straight line. (B) Braking in a straight line shifts the weight forward, planting the front tires against the road to aid in deceleration. (C & D) Trail-braking transitions weight from the front tires under braking to the outside tires for turning, lightly blending the two. This improves car rotation, slightly drifting the rear end to set up for a better launch out of the corner. (E) When transitioning from braking to accelerating, the outside tires handle most of the weight and needed grip. (F) Similar to trail-braking, accelerating out of the corner blends a small amount of turning, as weight transfers from the outside tires to the rear. The straighter the car is, the more traction is available for acceleration.
Rise and Fall
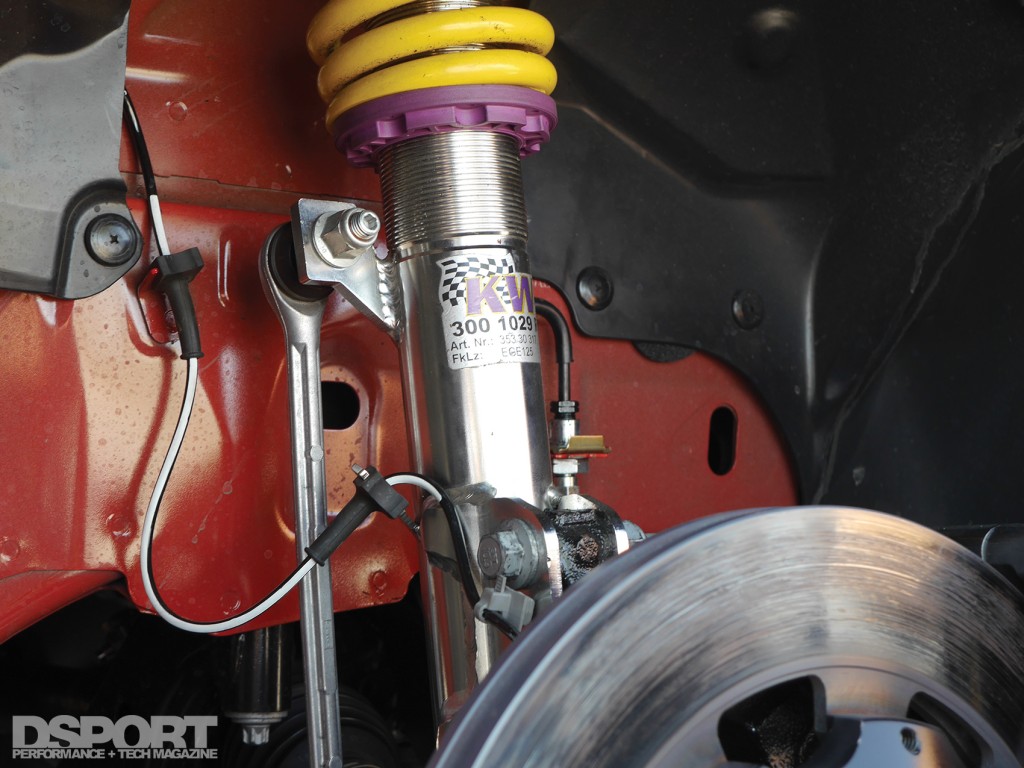
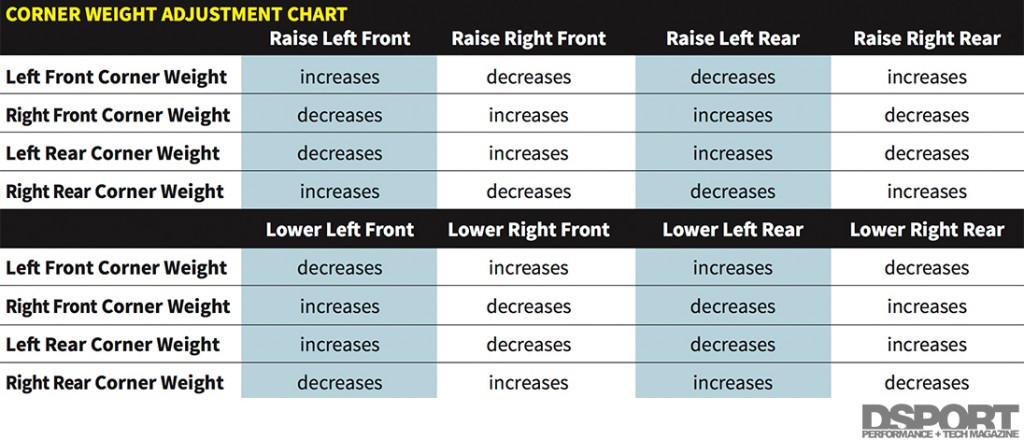
Before starting, adjust the scale pad heights properly so that they provide a perfectly flat platform. You will also need shocks with adjustable spring perches in order to make changes to weight distribution. Adjustments to corner weights is done backwards from what many people might expect. If you lower a corner of the car, you might expect that corner to get heavier because of the car body leaning more on that wheel, but this is not the case. Looking at it in terms of the suspension’s load on the wheel may make it easier to understand. If you lower the right front corner of the car, you are raising the right front wheel on the suspension (like shortening the leg of a chair), reducing the weight it exerts onto the ground. Reducing the weight on the front right corner will also reduce the weight on the left rear, and adds more weight to the two remaining corners. Raising the corner will accomplish the inverse.
Dialing in Crossweight
When the LR+RF weight is more than half of the total weight (left diagram), a vehicle will tend to do better on left turns and worse on right turns. When the LR+RF weight is less than half (right diagram), the vehicle will do better in right turns compared to left turns. The purpose of corner balancing a vehicle is to get the crossweights equal (center diagram) for equal handling in both left and right turns. Notice that the total weight on the left or right doesn’t change with corner height adjustments, only the crossweight. The same is true for the total weight on the front or rear of a car. Only by moving weight can those balances change.
Take it Slow
Keep in mind that making a change to just one corner will affect the other three, so make small, incremental changes. The first time going through this process will prove a time- consuming process, so take notes on how much each adjustment in the corners modify the weight distribution of this specific car. Having this for reference can save a lot of time for future setup or when making changes on the fly at the track.
While the effects of proper or improper crossweights may not make themselves apparent on the street, it won’t take long to reveal a bad setup on the racetrack. The inconsistent handling and unpredictability between left and right turns makes for a headache of a driving experience and a dangerous environment for yourself and others. Making a full effort to achieve proper weight distribution takes time as it is tedious work, but doing it right can potentially help your car drive through corners like it’s riding on rails.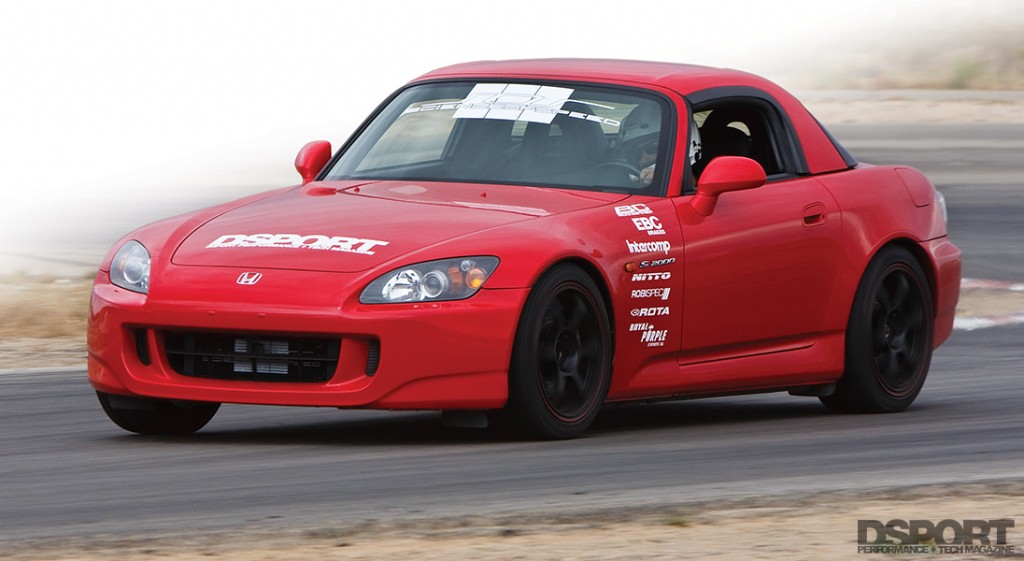
Roadsters like the Honda S2000, Mazda MX-5 and Scion FR-S/Subaru BRZ excel in handling performance, largely due to a near-perfect weight distribution.
Now Read Our Suspension 101 & Suspension 201 Guides


