
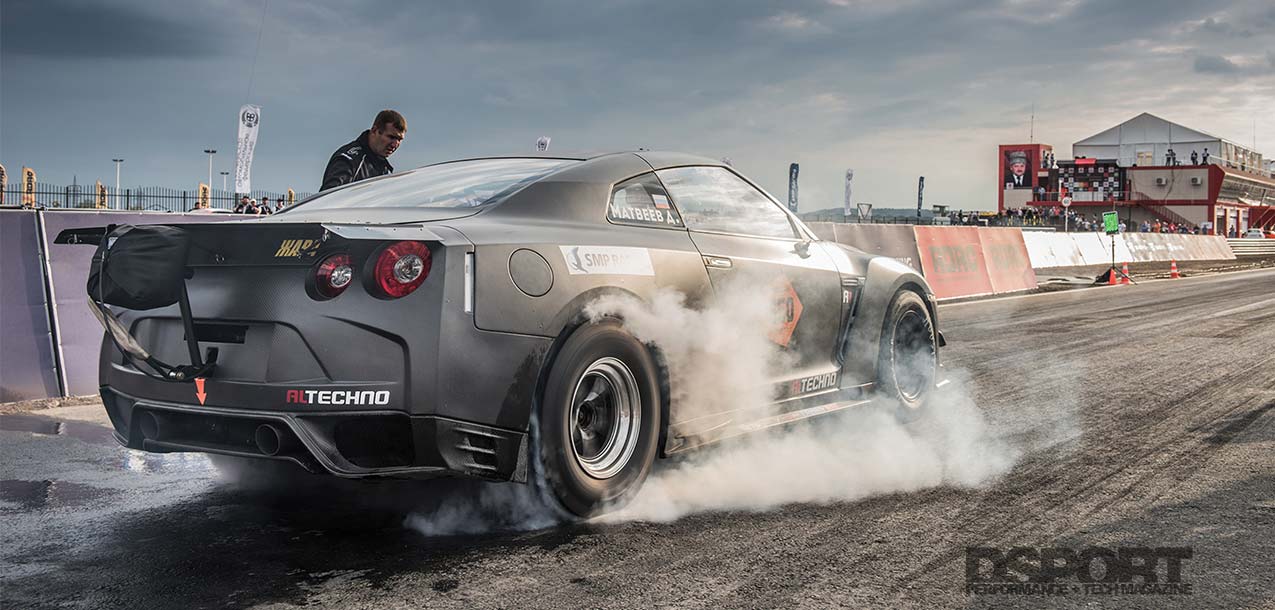
The Nissan R35 GT-R had to go through a wind tunnel during testing to ensure there is nearly no resistance as it drives through the wind. The very same car when built for 8-second runs on the drag strip would have to create a lot of resistance in order to slow down in time and meet NHRA requirements. While you need an aerodynamic car to reach extremely quick status, eventually, you will need to undo all of that to stop in time after the finish line. That’s when drag racing parachutes come in play. Here, we will talk about how these parachutes work, the different types and regulations, and what you need to know to mount one on your drag car properly.
Text by Bassem Girgis // Photos from DSPORT Archive
DSPORT Issue #225

Mounting the parachute is the most important part. Ensuring it’s centered from left to right and in-line with the crankshaft allows it to work properly and not throw the car out of control.
The Science
Just like you feel resistance when walking through a pool filled with water, a similar effect can be felt through the air. If you do a belly flop in a pool, you will get much more resistance than if you jump in the same pool in a sharply pointed shape. The same theory is true when driving a boxy bus as opposed to an aerodynamic R35 GT-R through the wind. The aerodynamic characteristics of a car reduces drag. A parachute is designed to create drag due to its size and shape in the air. The larger the parachute, the greater the drag. So, the goal is to reduce drag until the finish line, then create drag to slow down the vehicle using a parachute.
The Requirements
 Whether you love the idea or hate it, if you’re increasing your drag car’s performance, there will come a time when you will need a parachute. NHRA and IHRA require any race car that goes over 150mph in the quarter-mile to have and use a parachute. If your car hits the 200mph mark in the quarter-mile, then you are required to run dual-chutes.
The Designs
There are two main designs to drag racing parachutes: the cross form design and the Stroud design. The cross form design is effective in quicker cars, like top fuel and funny cars that go over the 200mph mark. The Stroud design came later after finding out that the cross form design wasn’t effective in cars that don’t surpass the 200mph mark. This design deployed too roughly and would end up dragging the car up causing it to lose control. The cross form design tends to open the canopy before the shroud lines are tight. This generates a hard hit on the car when the shroud lines are finally fully extended. The hard impact could potentially lift the rear of the vehicle or cause loss of control. In the Stroud design, the shroud lines’ slack is taken out before the canopy opens, which causes it to open up softer. The soft deployment doesn’t throw off the rear of the vehicle as much, making it safer and even easier to pack.

The parachute pack should be angled at 45-degrees upwards. This allows it to catch the air upon release and deploy properly using the incoming air flow.

Mount the bracket in the center from left to right. As for the height, a good rule of thumb is to mount it straight to the crankshaft center line.
Parachute Mounting
Mounting a parachute should always be done by a professional chassis builder. When you’re driving at 200mph, the parachute is designed to increase safety and help you slow down, not risk your life. The general rule is to mount it to the chassis at the crankshaft centerline. Having the parachute perfectly centered from left to right, as well as vertically centered in the rear, would provide the safest operation. Having the parachute mounted wrong could cause the rear of the vehicle to lift off, or get thrown to one of the sides if it’s not in the center. The parachute pack should be at 45-degrees from the horizontal line, this allows it to get in contact with the air coming through. It has to go back behind the spoiler. If it’s under the spoiler, it may not come in contact with enough air to deploy properly, or possibly even get entangled with the spoiler. If you’re running a wheelie bar, you need a net on it to ensure it won’t get entangled in it.

Testing
Text by: Bridget Macmillan
The reason I decided to research and experiment on parachute mounting is due to an accident I saw at Bonneville Speedweek. I was working in the timing tower when I saw a Triumph GT6 deploy its parachute and raise the rear wheels off the ground. The nose quickly dug into the ground and the car flipped over onto its top. It seemed pretty clear to me that the parachute was the cause of this accident, but others weren’t as sure.
My father had, what I believed to be, a much less extreme form of the same issue. Under parachute deployment, his Acura RSX would become very twitchy, contributing to at least one spin. Two factors helped fix his problem: first, he started accelerating through parachute deployment, and a few seconds after it hit. This helped with control of the vehicle. Secondly, he raised the mounting point of the parachute up.
These two incidents formed my initial theory behind parachute deployment. Basic physics knowledge will tell you that forces act through the center of gravity of a vehicle. And intuitively, I would tell that the center of gravity on these vehicles was much higher than the pull points. I decided to test this theory. I designed and had a friend fabricate a variable chute mount point device, which allowed me to test mounting heights ranging from 8in to 36in off the ground. I also installed ride height sensors on the front and rear suspension so I could gather data about weight transfer as the car drove. There was also an accelerometer in the car measuring G force.

To perform the test, different chute mount point device was fabricated. This allowed for testing mounting heights varying from 8-inch to 36-inch off the ground. Height sensors were installed on the front and rear suspension to test the weight transfer for each height.
Five different mount heights were tested, each five times for consistency. In addition to proving that the ideal mounting height is in line with the center of gravity, I discovered something about parachute deployment techniques. Accelerating while pulling the parachute seemed to help prevent the rear end lifting as much due to the “jerk” of the parachute hitting. This is opposed to lifting off the throttle before deployment. I believe that this is because acceleration causes downforce, which in this front wheeled vehicle, pulls the rear of the car closer to the ground. By accelerating during deployment, you use some of this downforce to counteract the lifting due to the parachute.
After this experiment, I worked on multiple vehicles to help with their parachute deployment. For example, Javier Loarca, a drag racer, was having issues with instability under deployment. His parachute was mounted in a typical location, at the bottom of the rear fender. After measuring the Civic’s center of gravity, and consequentially raising the pull point, he told me that pulling the parachute was the best part of his run.
Parachute Mounting
Text By: Bridget Macmillan
 The goal of parachute deployment is to rapidly and safely decelerate a vehicle. However, as a parachute hits, it often causes a significant weight transfer, most often from the rear to the front of the car. This lack of downforce on either set of wheels can cause the car to feel unstable, and even lift off the ground in extreme cases. The subsequent lack of traction also makes the vehicle more susceptible to veering off course and spinning.
The reason this happens is because any force acting on a vehicle will do so through the vehicle’s center of gravity. When one’s parachute is mounted such that it pulls below or above the center of gravity, it causes some of the force to be applied vertically instead of horizontally (as is ideal for vehicle deceleration). This vertical component of the force essentially rotates the vehicle, causing the weight to transfer and the ride height to shift in the front and rear wheels. Pulling the parachute under high speeds results in a lot of force being applied through the pull point on the car. For this reason, parachute mounting is usually dictated by structural soundness, and the tow line pull point is often situated at the bottom of the chassis. Because it is often mounted so low, it is most common for the rear of cars to destabilize under deployment.

When the parachute deploys, sudden weight transfer occurs from the rear to the front. This causes the rear of the vehicle to get unstable, possibly lifting the rear at higher speeds. To fix this issue, the mount point of the parachute toe line should be situated so the chute pulls through the center of gravity. You have to locate the center of gravity then form a straight line from it, and the angle that the chute makes with the ground needs to be discovered.
Therefore, to fix this instability issue under parachute deployment, the mount point of the parachute toe line should be situated such that the parachute pulls through the center of gravity. In a side view of the vehicle, the center of the parachute blossom, the pull point on the vehicle, and the center of gravity should ideally form a straight line. To achieve this, two variables about the vehicle need to be determined. First, the center of gravity must be located, specifically the height and its position between the front and rear wheels. Secondly, the angle that the parachute makes with the ground must be discovered. Then the pull point should be mounted such that the angle between the pull point and the center of gravity matches that of the angle of the parachute under deployment. By mounting the parachute tow line pull point this way, the car should undergo minimal rotational force, reducing lift under parachute deployment.
Parachute Maintenance
Just like anything on your car, it’s important to use your chute frequently. Keeping the parachute packed all season without using it could start causing deterioration. When stored, always unpack the parachute and keep it in a dry area. Washing your parachute often will also extend its life and ensure it works properly when you need it. Use laundry detergent and Castrol Super Clean (50/50 ratio) and hang up in the air to dry. Avoid using the dryer and avoid keeping it in the sun for a long period of time. Properly maintaining your parachute will allow it to live much longer and more importantly work properly on the track.

The parachute needs to stick out farther and higher than the spoiler. This allows it to get in contact with the air and not have the air flow over it so it can deploy properly once released.
The Bottom Line
When it comes to drag chutes, it all comes down to the design and the mounting location. Fortunately, parachute companies will walk you through the design that best fits your specific car. The only thing left to do is mounting it correctly. Improperly mounted chutes will defeat the purpose, and instead of serving as a safety component for you, it may end up being the cause of an accident on the track. Ask questions and seek the pros when mounting such device. Be sure to know your car’s center of gravity and mount the parachute with all of the correct angles. With everything mounted correctly, your parachute should get enough air flow to deploy properly with no restrictions and slow your car down in a straight line. If your parachute doesn’t do exactly that, then reach out to a professional for help – trial by error may not be the best practice here.
