
BUDGET BRAKE KIT
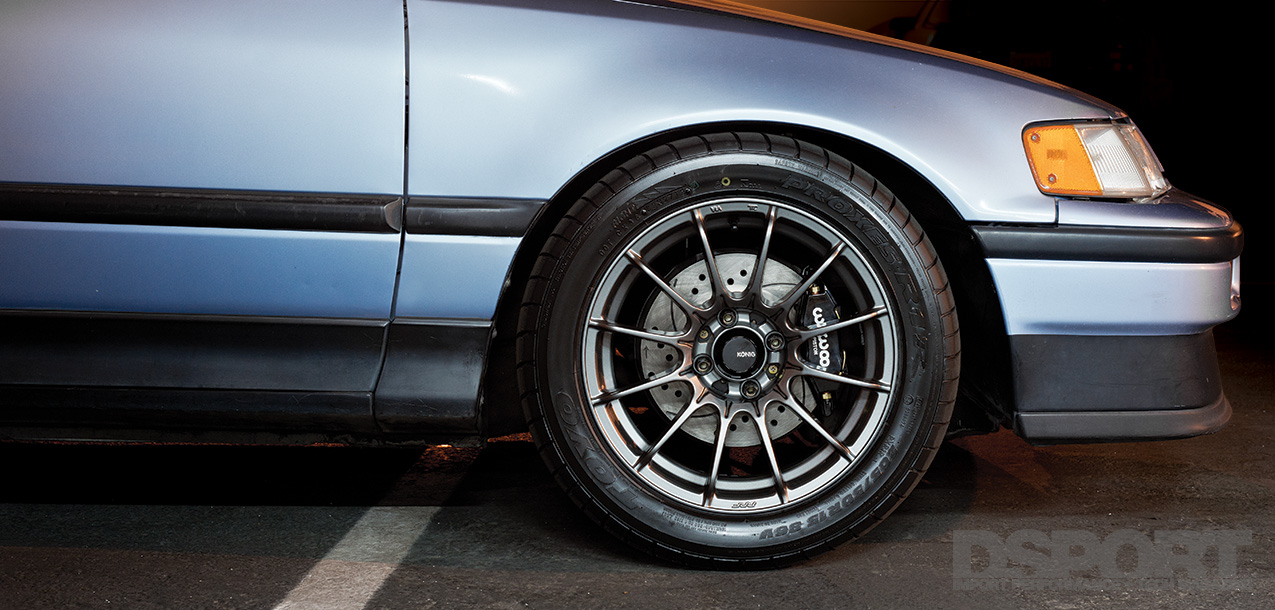
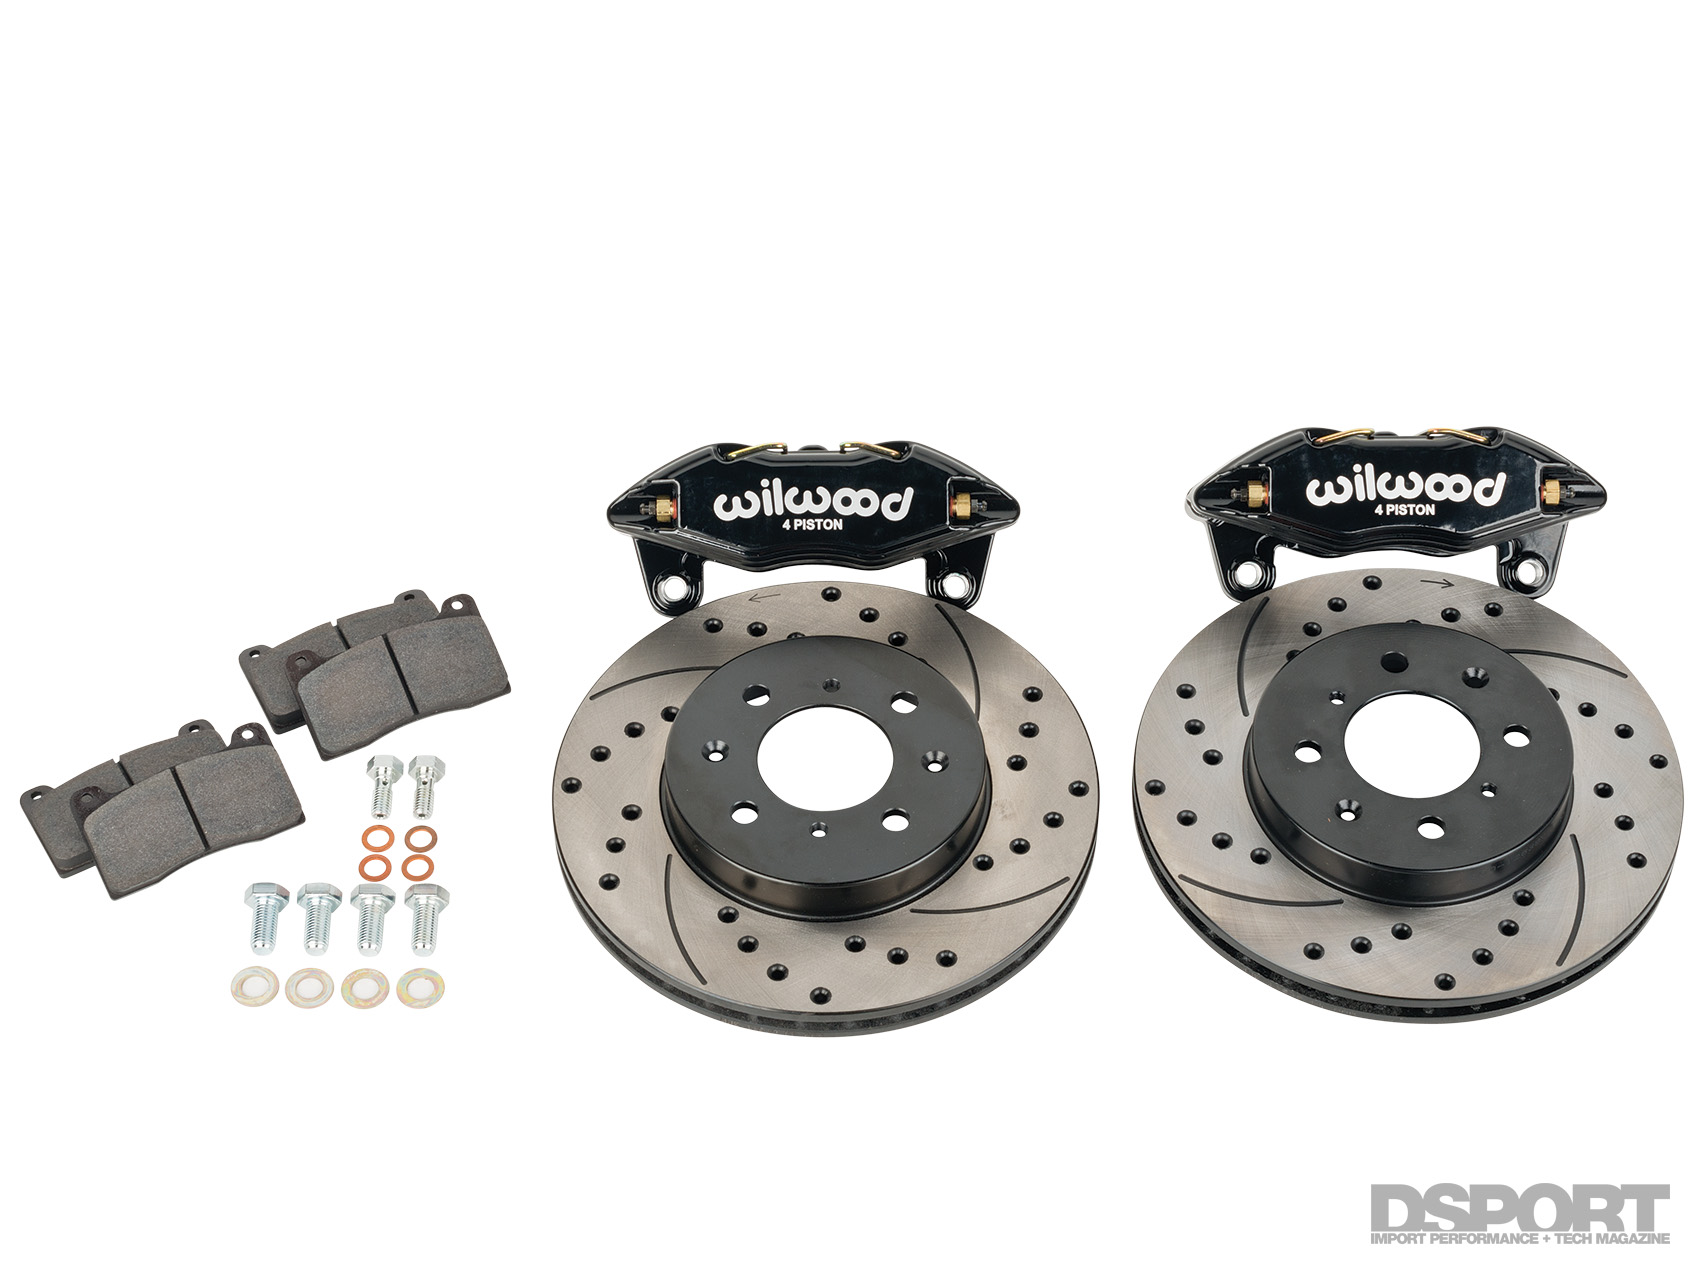 As we bolted on the knuckles, rear trailing arms and brakes, we also noticed that the front caliper pistons had seized up, damaging the rotors beyond repair. During our search for a set of replacement calipers, pads and rotors, we came across a solution from Wilwood for the popular 10.3-inch Honda/Acura brake setup. Utilizing the same size rotor as the factory unit, Wilwood engineered its DynaPro Honda/Acura (DPHA) caliper to bolt directly onto the knuckle (without a bracket) and it also utilizes the factory brake lines. Moreover, this setup fits under most 15-inch wheels with adequate backspacing.
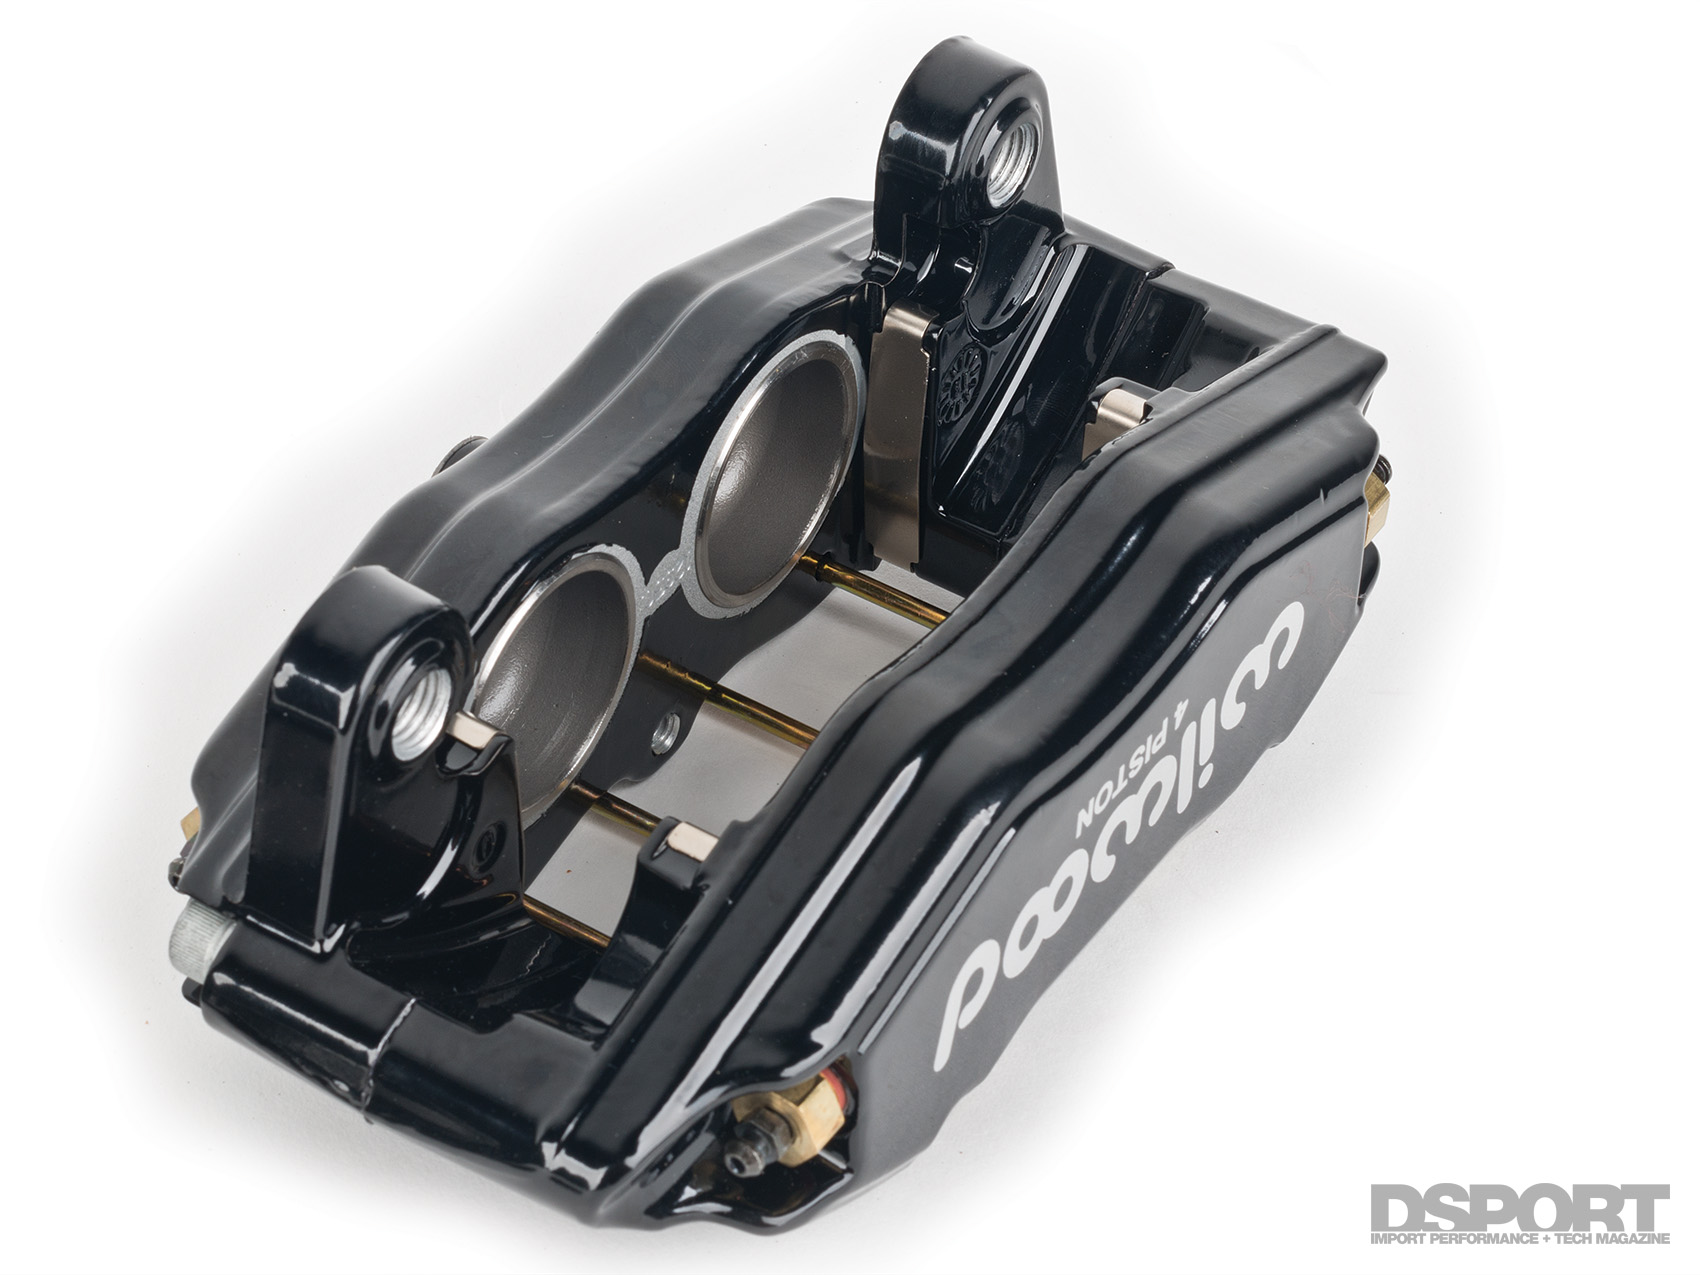 This brake kit won’t bolt up to the original CRX HF knuckles, but since we swapped to the Integra knuckles with beefier brakes, we had no problem using the DPHA upgrade. Coming from the factory single-piston setup, the Wilwood DPHA caliper features a total piston area of 4.1 square inches, a 20- percent increase in piston area over the factory 3.4-inch single piston caliper. In addition, these calipers feature an easily removable pad retainer for quick pad changes at the track. At under $500 dollars for just the calipers with pads and shy of $600 with cross-drilled/slotted rotors included, we couldn’t find a better bargain big brake setup.
SHOES AND SOLES
 After installing the upgraded front calipers, we knew that our CRX desperately needed a wheel and tire upgrade. Our HF model came equipped with a set of small and narrow 13×4.5-inch steel wheels and 175/70R13 tires. These most definitely don’t clear any sort of brake upgrade.
To continue with the theme of budget and performance, we sought a wheel and tire combo that cleared the calipers and fenders, increased overall grip and maintained a close-to-factory overall diameter. While a traditional cast alloy wheel may be a step up from a steel wheel, the high weight and low strength made it an unappealing option. Instead, we decided to go with a flow-formed wheel. We chose a flow-formed wheel for two reasons, cost and weight. Flow forming involves applying pressure to the inside of the wheel while it spins after the casting process. This process effectively stretches and compresses the aluminum, increasing the overall tensile strength of the wheel.
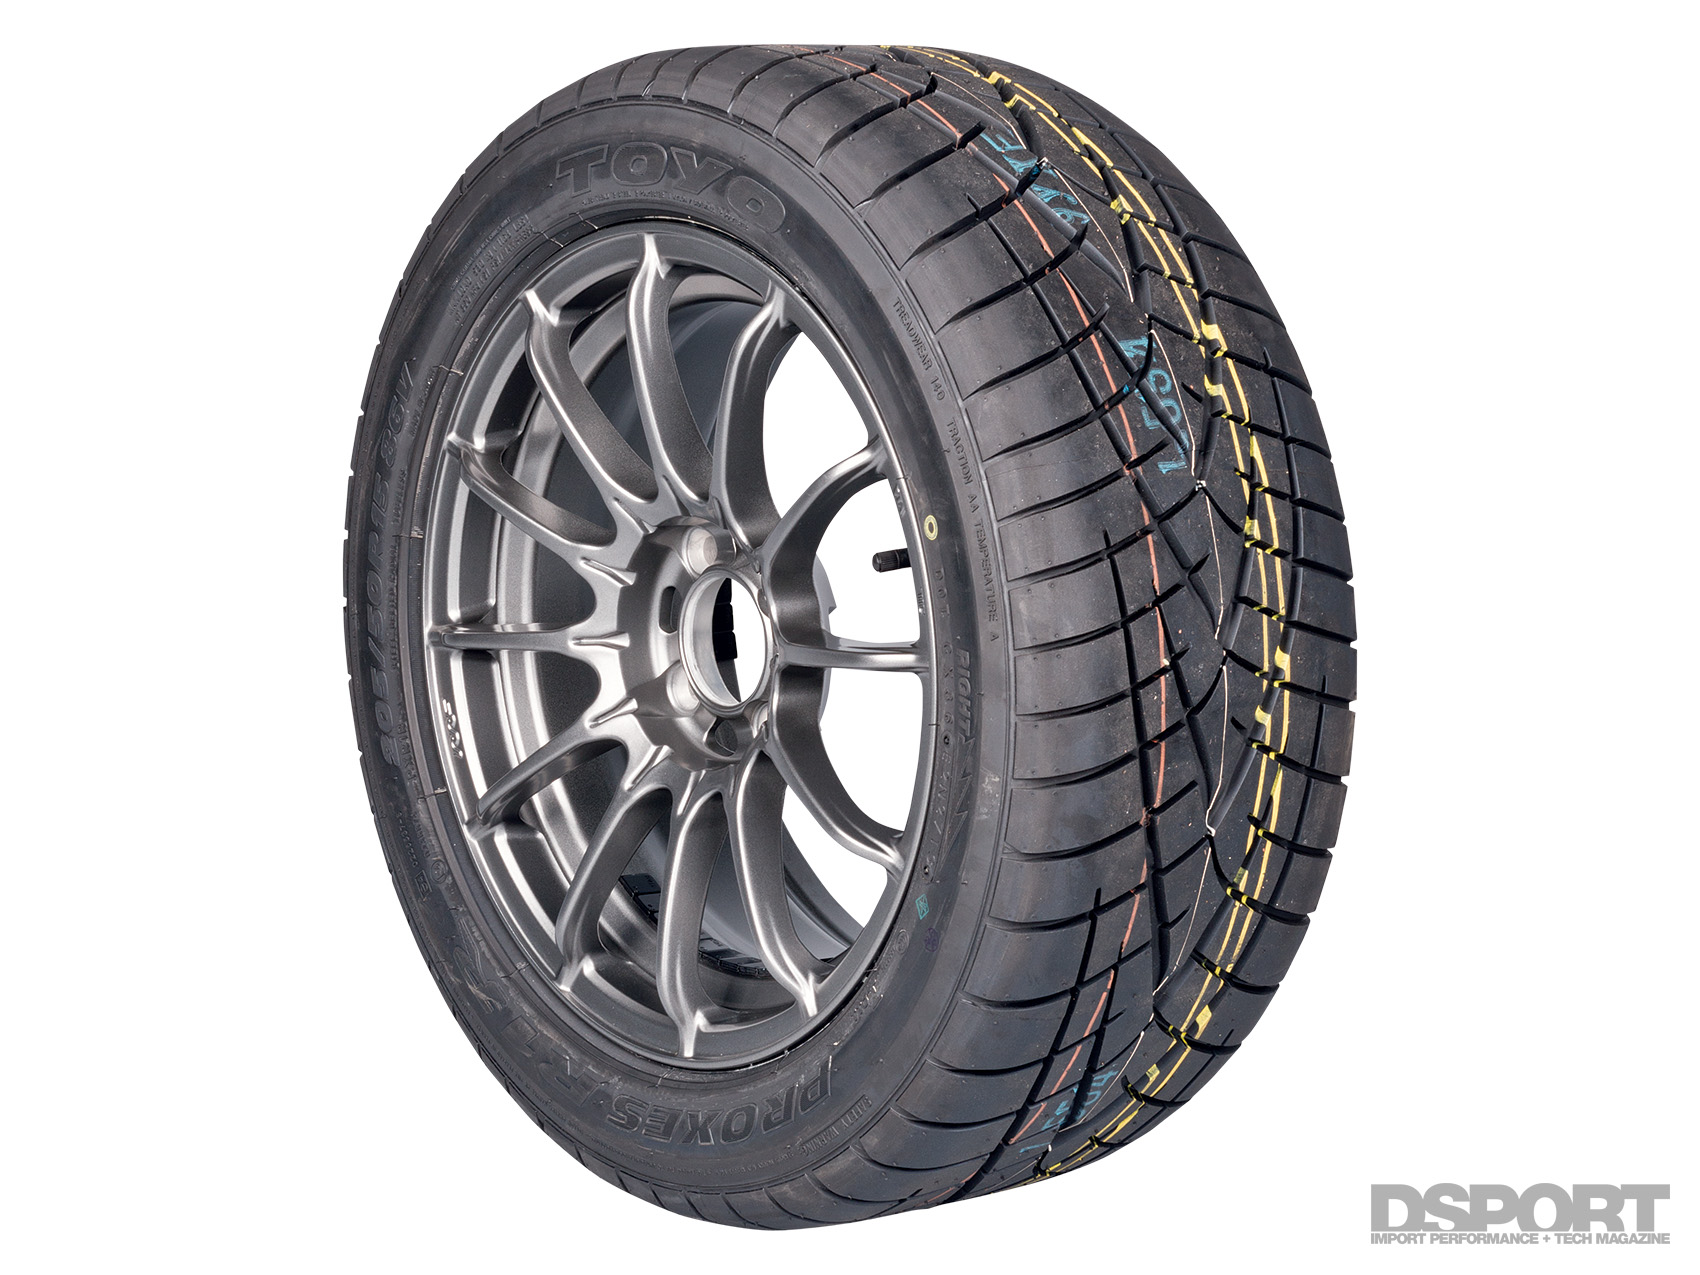
With some of the strength and weight benefits of a forged wheel at nearly the price of a cast wheel, Konig’s Dial-In wheel fit our needs perfectly. Its 15×7-inch size meant we could mount up a beefy 205/50R15 Toyo R1R tire. This tire features a unidirectional arrowhead tread design developed for a combination of wet and dry performance. Compared to the factory 175/70R13 tires, the contact patch increased by 17.1%. The new overall diameter changes by less than 3-percent, keeping our speedometer readings accurate.
TOOL TECH: SNAP-ON 10MM 6-POINT CROWFOOT FLARE NUT WRENCH
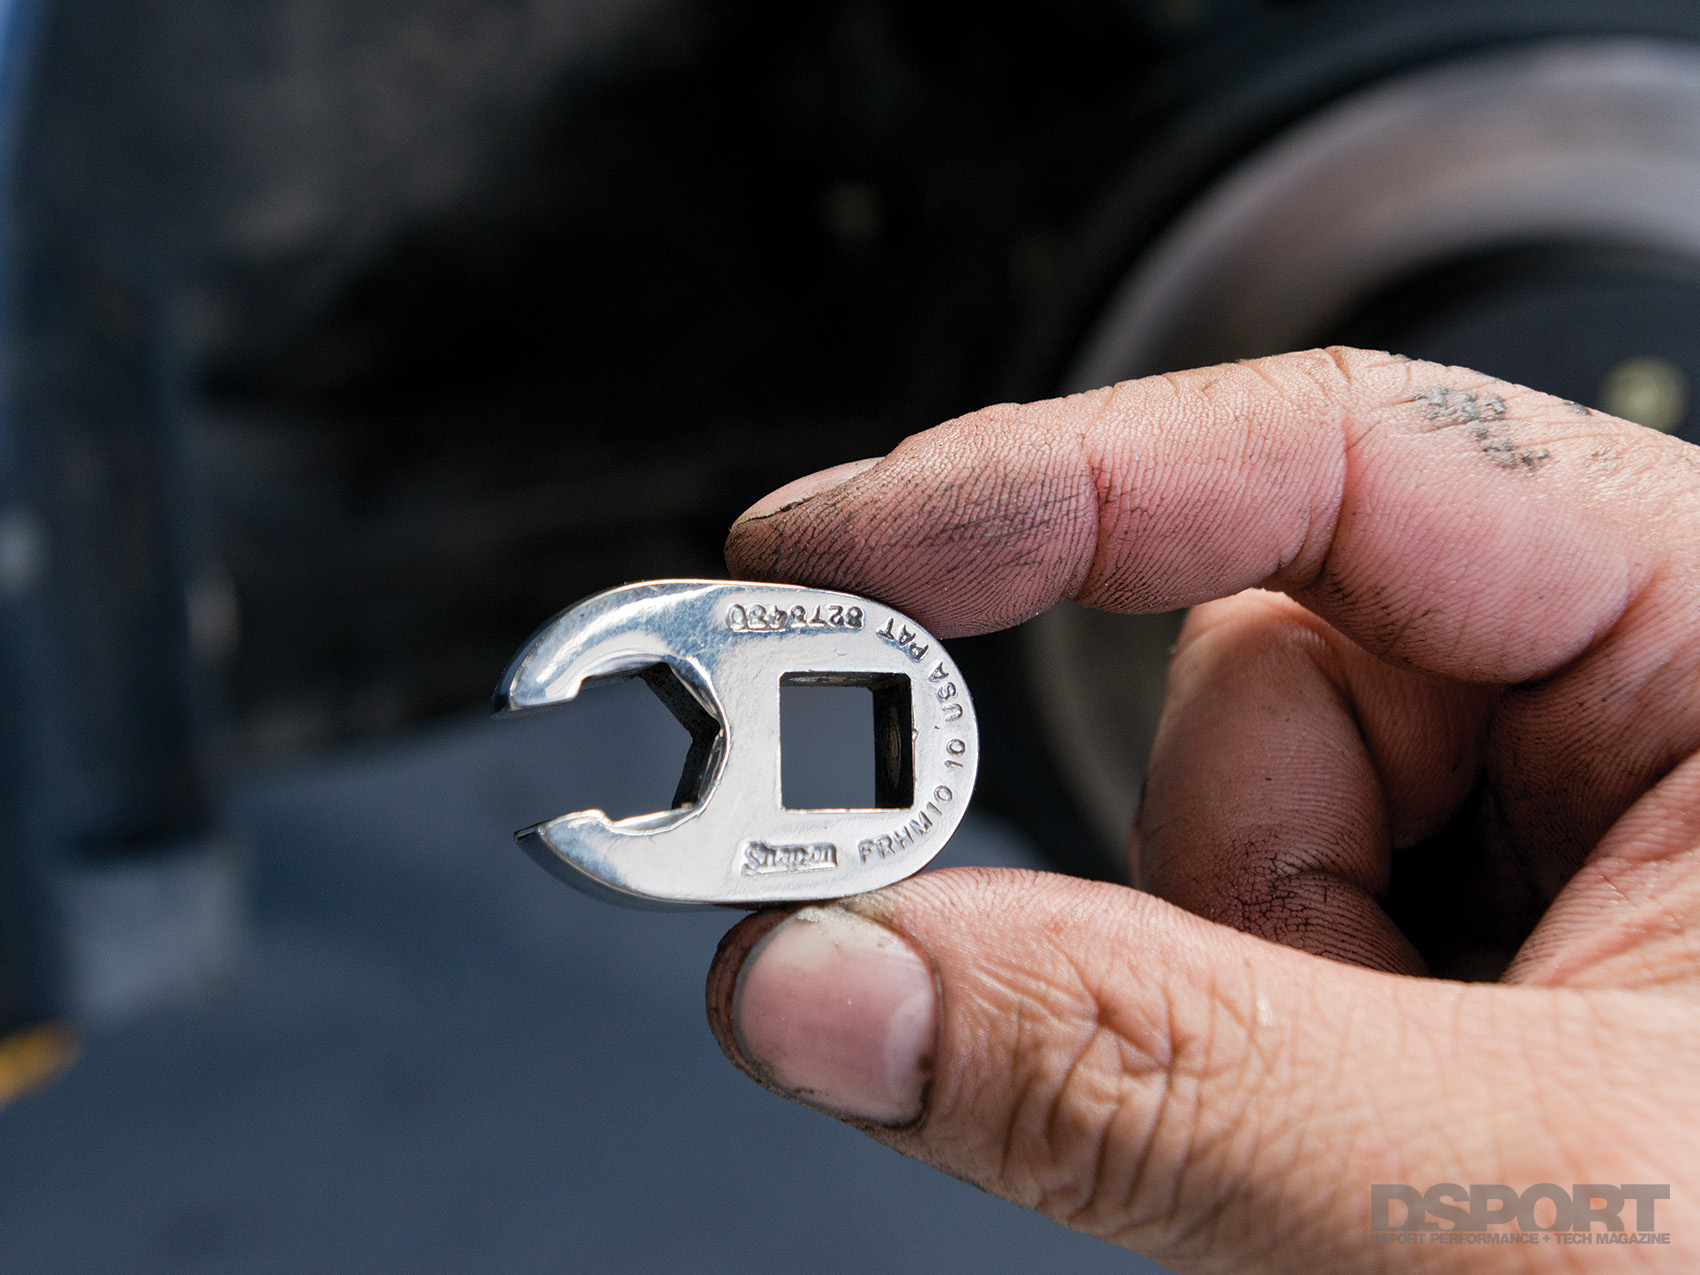 Ever had trouble twisting open those seized brake line flare nuts when swapping to stainless steel lines, a new master cylinder or slave cylinder? Even some specialty flare nut wrenches can round off corroded and seized brake lines. Once the fitting becomes rounded off, you’ll likely have to resort to a Vise-Grip to bust the fitting open. Fortunately, there’s a better solution. The Snap-on 10mm 6-Point Crowfoot Flare Nut Wrench (p/n FRHM10, MSRP is $18.60) keeps soft-metal fittings (like brake line flare nuts) from deforming or rounding off with its precision flare-nut end. Instead of destroying a 10mm flare nut with a “10mm” flare nut or box-end wrench that wiggles loosely around the fitting, the Snap-on crowfoot flare nut wrenches fit snugly around fittings. Attached to a short extension and flex-head ratchet, this tool can keep your wrench time down and flare nuts in one piece.
DON’T BELIEVE THE INTERNET
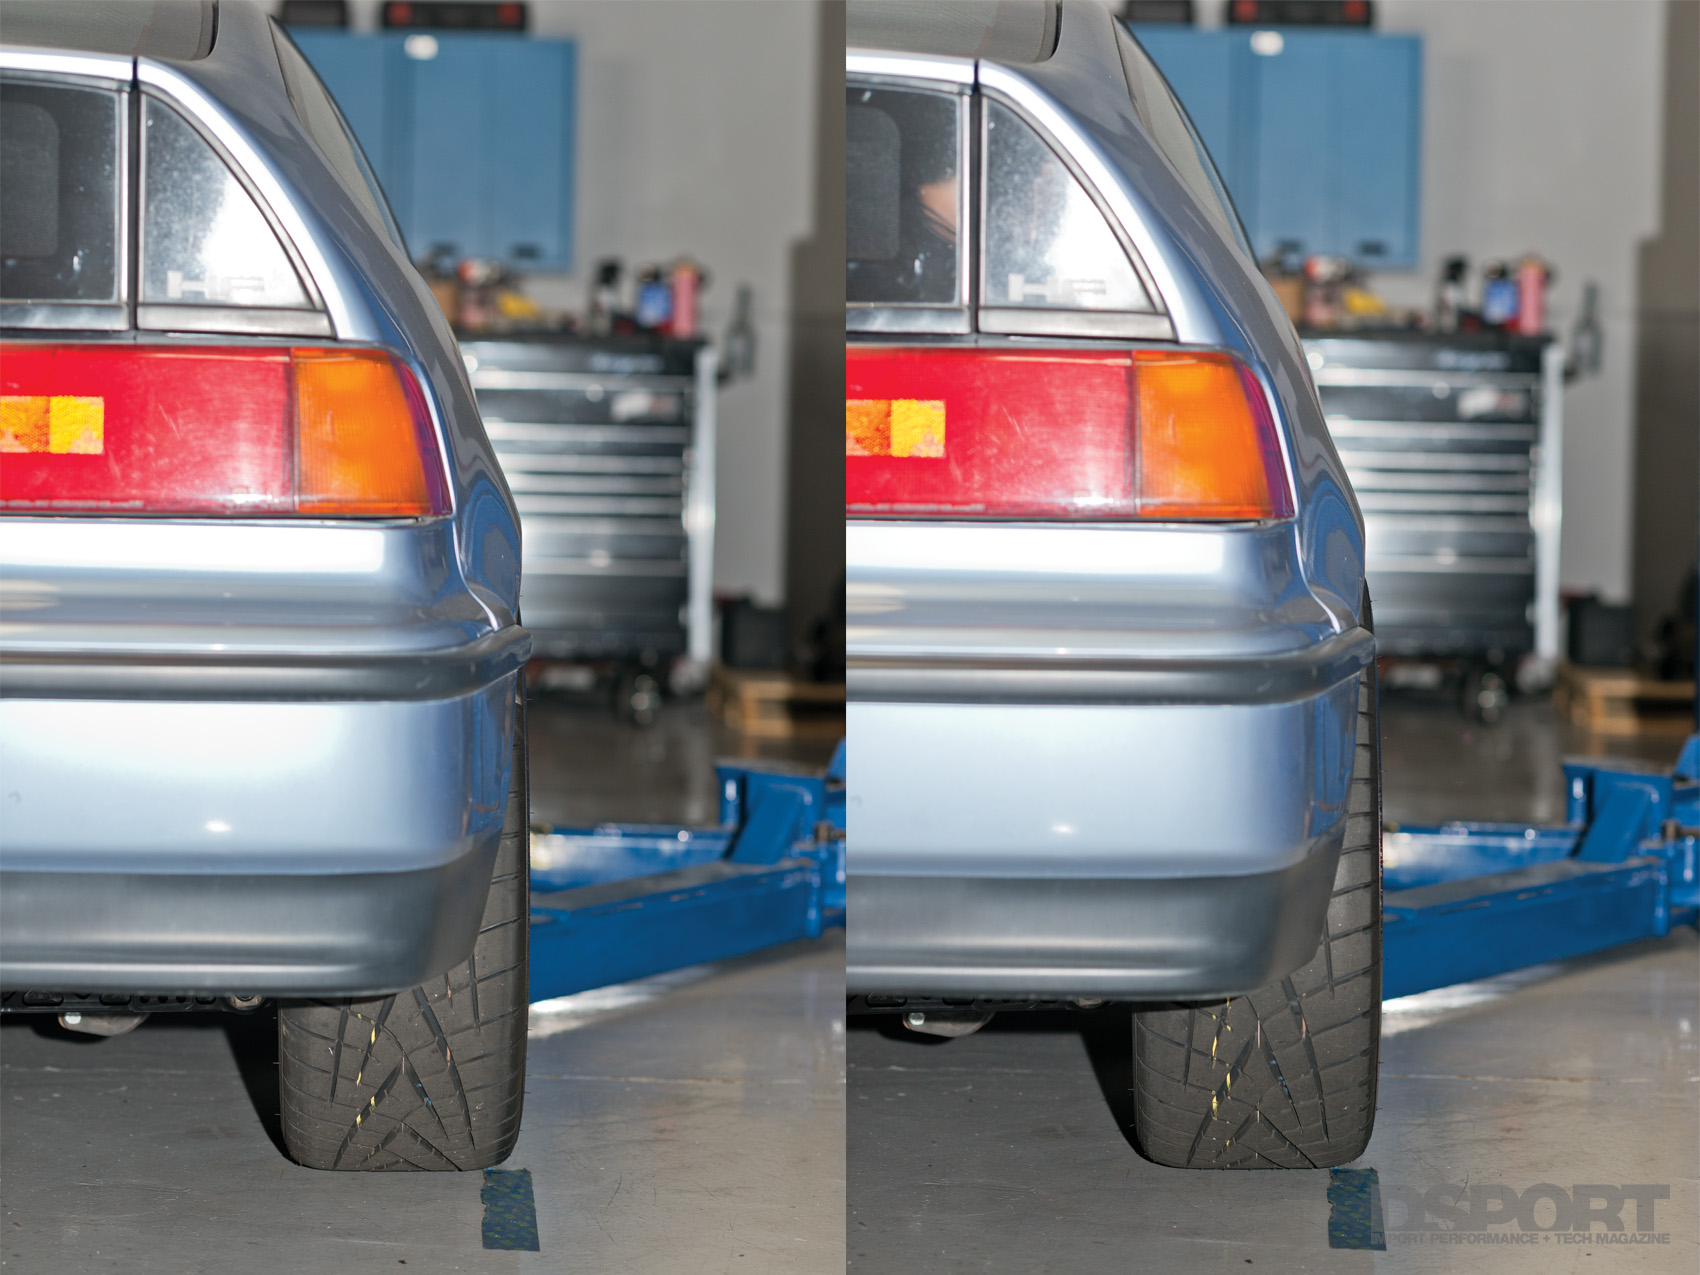 After we got the tires and wheels mounted, we quickly noticed that the rear wheels sat a good 5mm outside of the fender. Although the “stance” crowd may suggest pulling the fenders, running a stretched tire and/or lots of negative camber, we decided to uncover the real reason behind the increased rear track width of our CRX. The Internet might tell you that any rear trailing arm will bolt up between an EF-, EG-, DA-, and DC-chassis. However, the truth is simple: they are not the same. While any of these rear trailing arms may “bolt-on” to other chassis, the track width varies between each and every one of them. Whether or not you use the factory toe, camber or lower control arms, the overall increase in track width can cause wheel and tire fitment problems. We found a set of 91 CRX Si rear trailing arms to fix our mistake. Do yourself a favor and purchase the chassis-specific rear disc setup from the same chassis that you’re looking to put it on. Otherwise you’ll end up tearing everything apart again and spending more money to make things right.
THE NEXT EPISODE
With upgraded brakes, suspension links, wheels and tires, we’ll shift the focus of Project CRX to the engine. Although we love the 45-plus miles per gallon of the current single-cam, it delivers nothing in terms of performance. Ultimately, we’re shooting to build a street machine that can hit the road course on the weekends. A 300whp turbocharged B16 in a sub-2,000 lbs. car? Sounds like the ultimate recipe for fun.